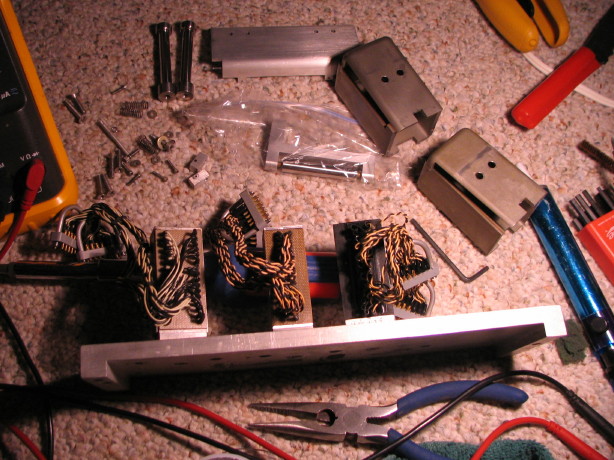
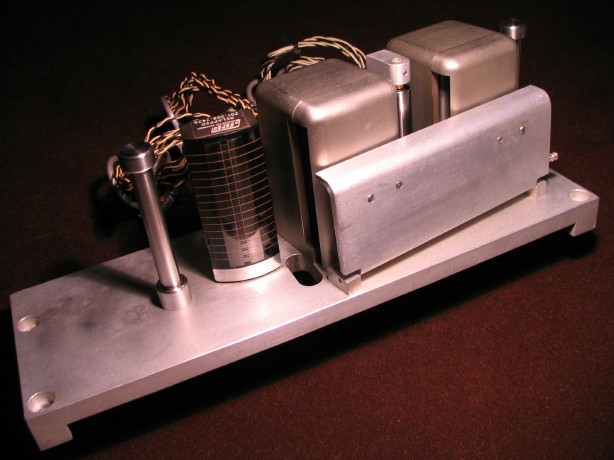
The rest of the blocks are now done as far as the coarse setup goes. There were also some detail bits to finish yet...
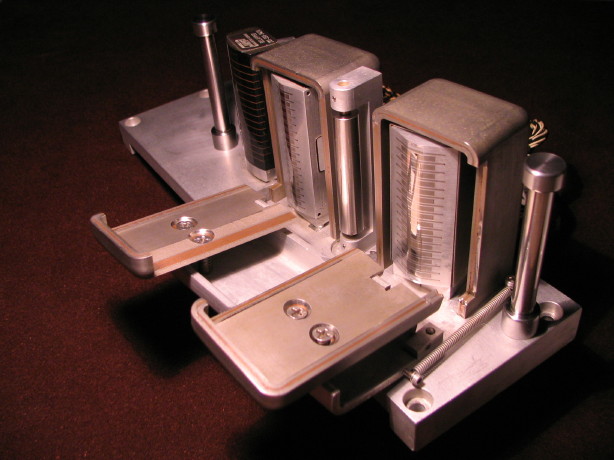
In the headblock with the heads from the 440C-8 (detailed in post #428) I actually had to put the original MM-1000 erase head back on...the erase headstacks are actually slightly different in the thickness of the base...who knew. But when I put my strip of tape in to start adjusting the head heights the erase head from the 440C-8 was just slightly too tall. The incoming guide on that headblock is a stock fixed guide (i.e. I haven't messed with it) so I figured the culprit had to be the erase head, and sure enough when I put the stock head back on it was as perfect as need be. That particular stock erase head had two broken wires and one suspect so I got those fixed.
The next issue I was running into across all the blocks was with adjusting the scrape flutter idlers. Those things aren't fixed...each mounts to the block with a socket head cap screw and the hole in the idler base is oversized to allow for adjustment. Not fancy, but effective. Problem is that the washers under the mounting screws were limiting how far back the idlers could be and in some cases, even when backed all the way off, an idler roller would still be protruding too far into the tape path. I found in my collection of hardware enough matching washers (zinc plated nonetheless) to address the problem. Proper ID and smaller OD than the washers that were on the mounting screws. This took care of the issue on all counts with the exception of the idler in between the erase and record heads on the block that came with the MM-1000 (it is the middle block in the last pic 7 posts back...the "triple threat" pic). Funny thing, the hole in the idler base was just too small to be able to back the thing off enough, so I oversized the hole...

Some of you may be freaking out now. The other option would be to drill another mounting hole in the headblock but that won't work as we are talking just fractional amounts here...the new hole would be far too close to the original hole. I oversized the hole in the idler by 3/64". Just right now. Why go to all this trouble? The idlers are just supposed to "kiss" the tape. If they protrude too far into the tape path it could cause unwanted wear on the jewel bearings. Those things aren't supposed to be a guiding surface deflecting the tape into their constraints, but rather a flutter killer. All they need to do is touch the tape to kill (or considerably dampen) the flutter...and this is why it is
so important that those idlers have those jewel bearings. A properly cleaned, lubricated and adjusted idler is a thing of beauty. I can hold an idler in my hand and give the roller a swipe with a finger from the other hand and I
literally have to hold the thing close to my eye and look hard to try and tell if it is spinning or still...that is how smooth they are...and forget hearing them spin...completely silent as far as my hearing goes (maybe that's not saying much). Understand that any rolling guide or idler has pros and cons. Often we think of a machine with rolling surfaces as more "professional". The rolling surface takes away the scrape flutter that would be induced by the tape rubbing over the static surface, but in trade it induces
mechanical flutter or artifacts from the bearings in the rolling device. Overall the rolling surfaces provide a tape path that is more gentle on the
tape, but, again, you might be
better off with regard to flutter spec with more static surfaces anyway depending on the quality of the rolling surface bearings. My point: don't just assume a transport with a bunch of rolling thingies is "better". Anyway, that's why I'm saying the jewel bearings are so important...when the tape hits the flutter idler it stops the flutter present at that point like when you stop a guitar string on a fret, but if the bearings were "noisy" they would transmit that "noise" into the tape beyond the idler. The jewel bearings provide for the flutter idler to do its job with the least compromise.
So the way I'm setting the blocks up is to:
- Reference everything off the erase head as far as zenith and height goes. I can sight across the face of the erase head to the incoming guide and make sure that they are straight with each other with regard to zenith (i.e. front to back tilt). If they aren't then something major needs to be addressed since they are both have fixed zenith (i.e. bent guide?).
- Once I determine that those are both okay then I can set my piece of tape in the path from incoming to outgoing guides and make sure that the erase head height is correct. I'm not worried yet about the record and play heads. Also at this point the flutter idlers are backed all the way off.
- Next I start adjusting the screws to rough in the right height for the record and play heads, again, using the piece of tape...drop the tape into the path between the incoming and outgoing guides, check, take it out, screw-screw-screw, put the tape in check, etc. As I'm doing this I'm also sighting down the path and referencing the zenith of these heads with the incoming guide or the erase head, whichever is an easier reference to the eye.
- Once the heights are close and the zenith is close then I start adjusting the azimuth (I mave done some of this in the step above as well if it was really off). This is all by sight mind you and at no point do I assume it is correct as it should be. The eye is good, but for some of these adjustments, obviously, running test signal is the chief way to get it right on.
- Once the azimuth appears correct then it is a process of going around all the adjustments and checking again...a tweak here effects a setting slightly there, tweak that then re-tweak the first and so on. I also have to make sure there is enough tension on the adjustment screws throughout the process. There are 4 screws...two of the screws pull the headstack into the other two...a push-pull tension but there needs to be even tension at all 4...I evaluate that just by touch...the torque tension on the allen wrench I use to make the adjustments. If one screw is loose then I look to see if there is an adjustment to make that would put more tension at that point and kill two birds with one stone. If there isn't an adjustment that needs to be made then I have to make two or more adjustments to provide that tension without upsetting the applecart. Tweak-tweak-tweak. And ALSO as I go I am referencing the heads with each other and ultimately back to the fixed surfaces like the guides or the erase head and if something doesn't line up then it may be taking several steps back to rectify that.
- The last step is to set the wrap angle. Again, this is a coarse adjustment because reproducing tone is the only real practical way to address that, but before setting that adjustment the flutter idler(s) need(s) to be installed. Again, just "kissing" the tape...not mashing, but just a peck. The idler should track to the tape but barely deflect the tape. So here again I can sight across the two heads flanking the idler and then slide the idler in place so it is just blocking my view between the apices of the two heads. NOW I can check the wrap because that slight deflection can be enough to disturb what may have appeared as a good wrap angle. If it needs to be adjusted the only allowance for adjustment is in the slop in the head mounting screws as they pass through the head can (loosen the inside two screws an equal amount, shift the head in the proper direction, and re-tighten the two middle screws the same number of turns), OR in the mounting of the head can to the block itself (same thing, loosen, shift, tighten). One thing to mention here, on the 1" block with the 440C-8 heads: I didn't originally have flutter idlers for this...I used spares. One of them has the proper 3/8" diameter roller. The other is 15/32" and is spec'ed for the the MM-1100 1" block or also in the optional secondary idler potion on the 440-8 (in between the erase and record heads). I originally thought it fit and it looked like it did, but it is too big. It protrudes much too far into the tape path even when backed all the way off...oversizing the hole wouldn't work. Fortunately I found somebody that likely has the proper 3/8" idler and could use my 15/32" idler, so we'll see in a bit here but we should be able to work a trade.
- Finally, after all the above I take one more look around everything and if it looks good I'm done, until I put it on the machine of course.
I'm considering going back and re-checking the head heights now that everything else is in close adjustment. The procedure (modified from the manual since I removed the tension pring that goes under one of the scres in stock trim) would be to raise the head up until the tape is just touching the outside guard band of the last track. Each adjusting screw has the same thread pitch so by turning each screw the same amount, I should, in theory, be maintaining the other adjustments. Then I lower the head until the tape is just touching the outside gaurd band for the
first track, counting the number of rotations the screws were turned. Divide that number of turns in half and raise the head that many screw turns and it should be set smack in the middle of the tape.
I think I will do that.
Yes my eyes get tired while doing all this. I take breaks.
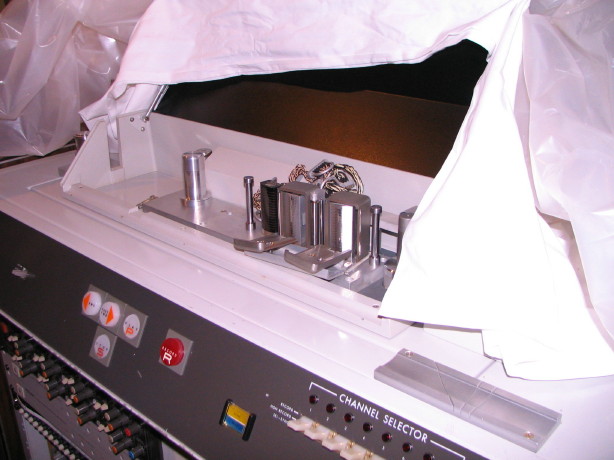
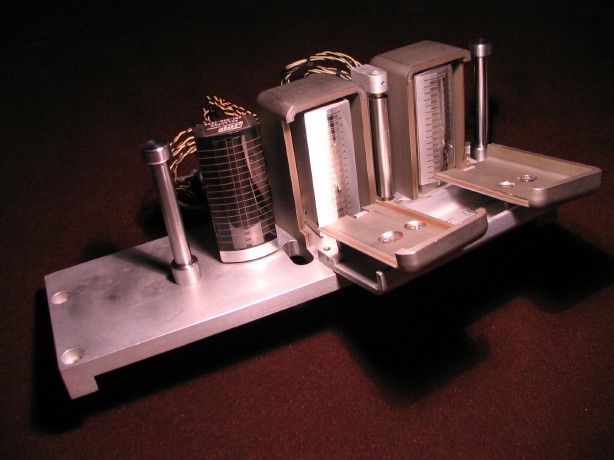
The 2" block was loads easier for two reasons:
- All adjustments are fixed except for wrap angle
- JRF has setup this block already
I could see evidence of #2...some thin shimming material in a couple spots under the record and play heads. When I did my sighting tests everything looked dead-on. That is not only a testament to JRF (not that they need any testimonials), but feels affirming with regard to my methodology as well (i.e. I'm seeing the same results on the 2" block as I am striving for on the 1" blocks). IOW, since the block was setup by JRF I would
expect it to be in good shape...plus there is the evidence in that the wear pattern on the heads is dead-center with not a spot of keystoning. So I ain't messing with that one, uh-uh. Hoping the fine-set azimuth is still good since the only way to adjust that is with the aforementioned shims. Wrap angle looks good too with the flutter idler installed.
PHEW!
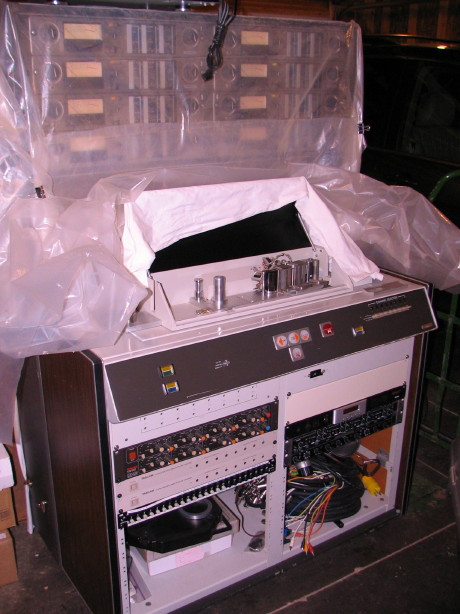
MAN I wish the machine was inside...we're hitting some freezing temps here this week and the garage, being unheated, is just not a pleasant place to be for soldering up an I/O panel, but I'm to the point where that's all that's left before doing fine adjustments on the headblock and setting up other components as needed in the tape path, and then conducting my first Ampex electronic alignment. That stage will also tell me if I've addressed the issue I was having with slight varying of the tape speed by tensioning the capstan belt (and switching to 499), as well as the intermitten PLAY issue (by recapping the relay box). I'm sure something else will rear its head...it always does but as I go through the machine those issues become less and less until the machine is truly back in the reliable operating condition I believe it can achieve.


")
")


 :rolleyes:")

