sweetbeats
Reel deep thoughts...
So to summarize at this point...
I'm continuing to:
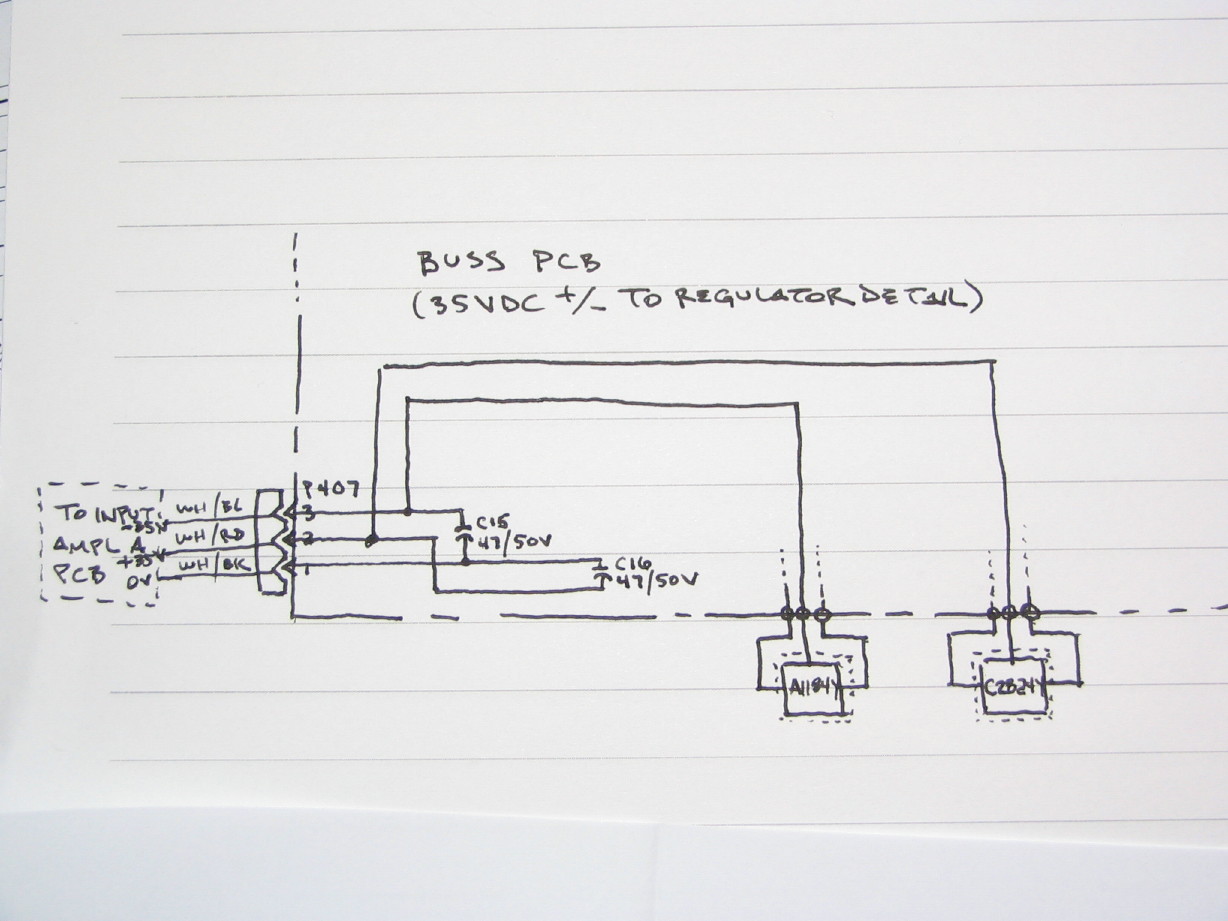
Where I really need to focus my attention at this point is on trying to get a handle on what the 35V rails power.
My spare PS-520 power supply is now in evm1024's possession...we worked a deal and fortunately I get to keep all my children... He's taking a look to see why the 6VDC rail is not functioning and why one of the 0VDC rails is not pulling down to 0 volts reliably. Then from there it is a matter of seeing if there is a reasonable way to create a set of 35 volt rails, but of course it helps to know something about how much current draw there is, so I'm going to try and gather some of that information.
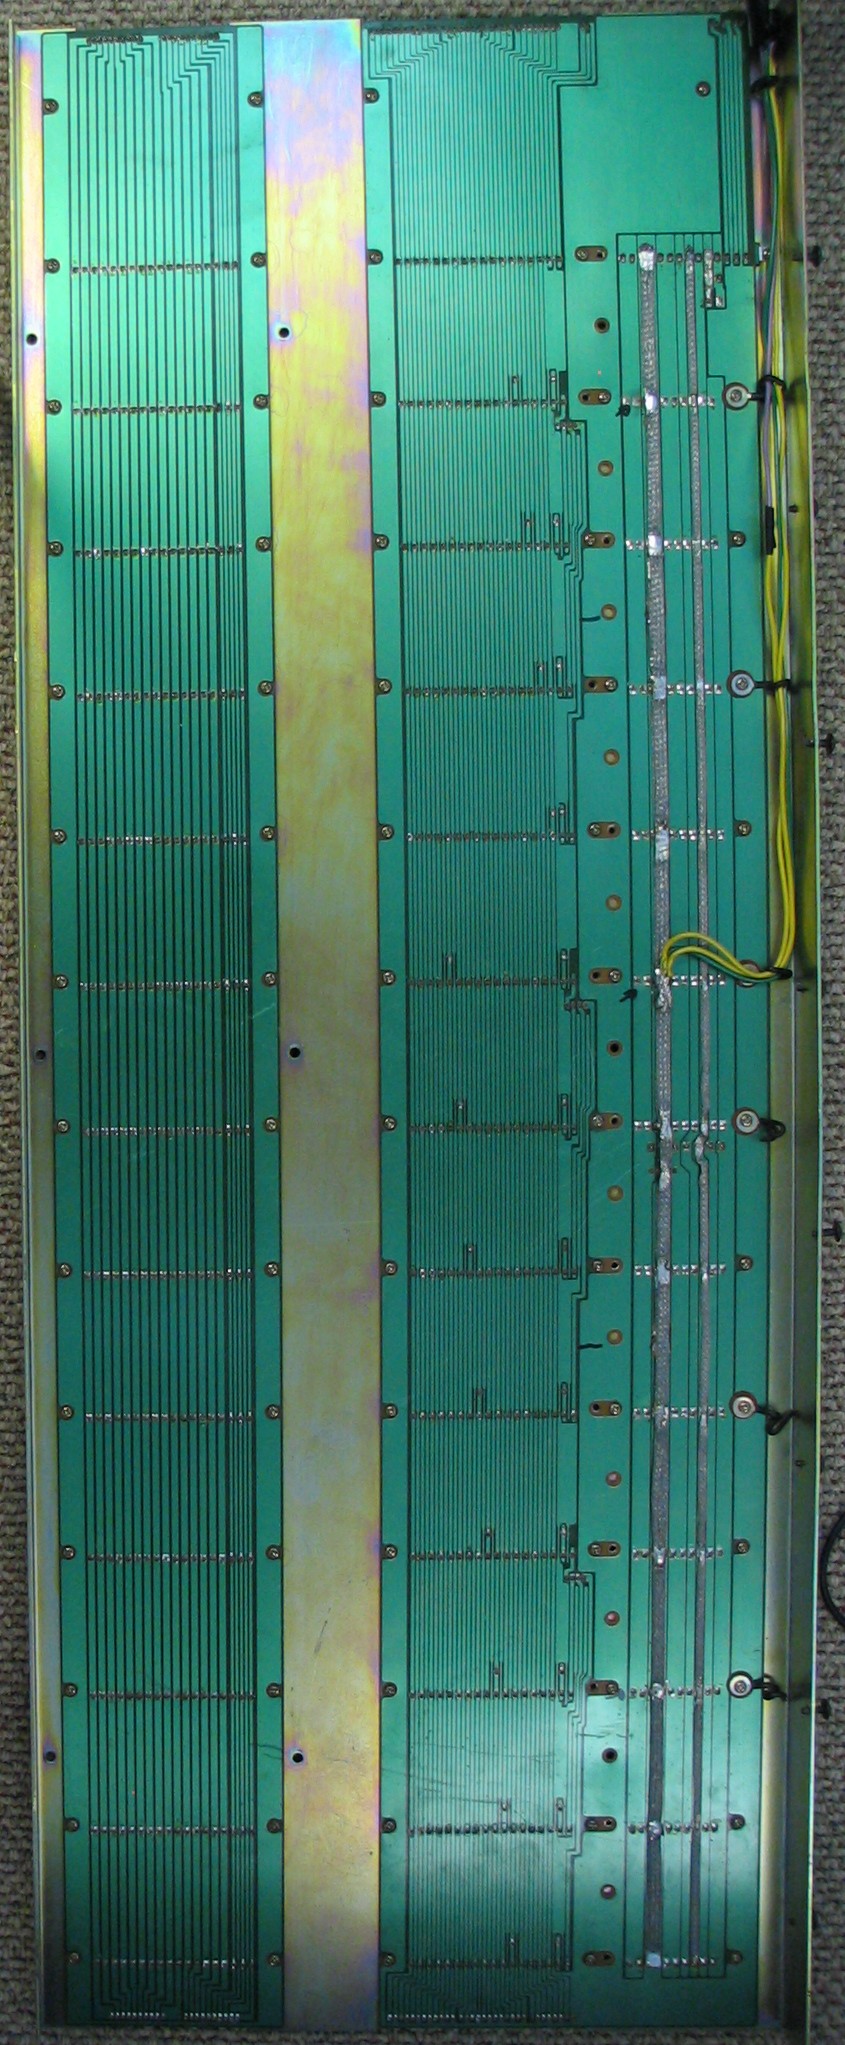
Also, I stopped by my favorite local electronics shop...the kind of place that has a boneyard in the back with lots of wierd surplus stuff...wierd music playing the background, loads of obscure parts and tools, and really cool down-to-earth people that get excited when you bring something wierd in and put it on the counter...well, I brought in the mother PCB assembly. I was excited to get a "Wow!" I was hoping to find the connector that mates with the power supply connector. No such luck, but we determined that it is indeed a Molex connector, at least thats what the pins are inside. There was a temporary debate as to whether it is Molex or Amp, but it looks like Molex pins. I did find an identical connector set in a 6-pin configuration on a transformer in their boneyard though, so whatever it is it is most certainly a line geared toward power supply components...time to start digging. I did end up buying a set of 12 pins in case I decide to build an adapter to mate the Molex connector on the M-___ board with the Hirose ends on my M-520 power umbilical...that may be what I end up doing, as long as I can find a way to mount the Hirose connector to the M-___ frame without drilling any holes or otherwise permanently modifying it...I want to try and keep it as original as possible for posterity, or at least make changes easily revertable...though I guess I did paint it, but I think that's different. Rust spots and chipping paint make for a housing that is not clean for the sake of surrounding components, or the internals of the mixer itself.
blahblah....bl-bl-bl-bl-blah.
I'm continuing to:
- Clean things up (PCB's, jacks, dress panels, knob and switch caps)
- Refurb the frame (removing rust, painting components, reinforcing the attachment points of the side panels and front cross member)
- Map the channel PCB's interconnections
Where I really need to focus my attention at this point is on trying to get a handle on what the 35V rails power.
My spare PS-520 power supply is now in evm1024's possession...we worked a deal and fortunately I get to keep all my children...
He's taking a look to see why the 6VDC rail is not functioning and why one of the 0VDC rails is not pulling down to 0 volts reliably. Then from there it is a matter of seeing if there is a reasonable way to create a set of 35 volt rails, but of course it helps to know something about how much current draw there is, so I'm going to try and gather some of that information.Also, I stopped by my favorite local electronics shop...the kind of place that has a boneyard in the back with lots of wierd surplus stuff...wierd music playing the background, loads of obscure parts and tools, and really cool down-to-earth people that get excited when you bring something wierd in and put it on the counter...well, I brought in the mother PCB assembly. I was excited to get a "Wow!" I was hoping to find the connector that mates with the power supply connector. No such luck, but we determined that it is indeed a Molex connector, at least thats what the pins are inside. There was a temporary debate as to whether it is Molex or Amp, but it looks like Molex pins. I did find an identical connector set in a 6-pin configuration on a transformer in their boneyard though, so whatever it is it is most certainly a line geared toward power supply components...time to start digging. I did end up buying a set of 12 pins in case I decide to build an adapter to mate the Molex connector on the M-___ board with the Hirose ends on my M-520 power umbilical...that may be what I end up doing, as long as I can find a way to mount the Hirose connector to the M-___ frame without drilling any holes or otherwise permanently modifying it...I want to try and keep it as original as possible for posterity, or at least make changes easily revertable...though I guess I did paint it, but I think that's different. Rust spots and chipping paint make for a housing that is not clean for the sake of surrounding components, or the internals of the mixer itself.
blahblah....bl-bl-bl-bl-blah.


")

")