DIY thread.....

  • Thread starter Thread starter thane1200
  • Start date Start date
Mini E- for first reflections / PVC speaker stands

Here's a new DIY..based off the famous PVC speaker stand.

"Mini E" traps named after Ethan. :)

Recipe Each:
1/2 703 $
1/2 Auralex foam front piece $10 (optional)
1qty 8ft 1x3 $3.50
1qty 2x2 1/4 plywood $2.36
plus screws and nails.

Basically a 2x2 box with a solid 1/4" plywood back and Auralex foam on the front...altho you could just use cloth and save $10.

DIY PVC speaker stand ~ $30 pair.....
 

Attachments

  • Mini E DIY.webp
    Mini E DIY.webp
    20.7 KB · Views: 377
Thats a cool idea man...making them portible and all. I saw some company that had these round ones....they were on stands but huge cylinders... I just re-formatted my pc...and didnt save a copy of my favorites...so i dont have the link. :D O well... I'll have to try that. Are they effective? This would please my parents alot more than putting things IN the walls!! LOL :D
 
thanks, it was a bit of un-planned fun while i was "optimizing" my monitor placement. i had a window and a wall (1st side reflections...see realtraps)
and stands..hmm? :rolleyes:

yes its good stuff...the 703 is well "approved"...the auralex is too..i had it laying around. better than nothing...is my understanding.

you could make one different for your application, thats the DIY way! :)

as far as do they work? i've never gotten a clear signal on any of this SPL stuff. nothing is technically perfect...but its something...it offers reference values. but there's so many variables, someone can legititimetly question everything. :confused:

in the end, your left with your ears and what you hear it to be.

the nice thing about portable of course is you can move it around.
 
thane1200 said:
Here's an EZ idea: standard wall "block-off" plates (the type used to cover up an electrical box opening) can be drilled and fitted with XLR, 1/4", MIDI, or whatever jacks to made small, simple, and cheap wall plates.

Not an ingeious idea I know; but why the hell pay money for these pre-made ?


You can buy a tool ($39 for the male, and $43 for the Female)that punches out a perfect hole for an XLR.

You drill a small hole in the metal, then hooks this thing up to it via a bolt, and as you tighten the bolt down, it cust out a perfectly shaped hole for an XLR jack.
It's called a Greenlee XLR Chasis Punch.

The sell them at Markertek.com


http://www.markertek.com/Product.as...ubcat=&prodClass=PUNCHDIES&mfg=&search=0&off=


Tim
 
Last edited:
What? $40 tool to make holes? Are you people insane?

No offense intended... but use a bi-metal hole saw in a drill press. They come in difference sizes and drill through aluminum, wood, steel, fiberglass, plastic, and handyboard.

and they are about $6.
 
i am about to build a set of PVC stands and i am thinking about one of the DIY kits for a new pair of monitors out of parts express! i also have to contend with the fact that i might be moving soon :(
 
Tim Brown said:
You can buy a tool ($39 for the male, and $43 for the Female)that punches out a perfect hole for an XLR.

You drill a small hole in the metal, then hooks this thing up to it via a bolt, and as you tighten the bolt down, it cust out a perfectly shaped hole for an XLR jack.
It's called a Greenlee XLR Chasis Punch.

The sell them at Markertek.com


http://www.markertek.com/Product.as...ubcat=&prodClass=PUNCHDIES&mfg=&search=0&off=


Tim
That's pretty much the exact same tool GM uses to punch out slots on the control-arms of trucks to allow for camber adjustment.

PS: It's good to see the DIY thread is still alive. :D
 
frederic said:
What? $40 tool to make holes? Are you people insane?

No offense intended... but use a bi-metal hole saw in a drill press. They come in difference sizes and drill through aluminum, wood, steel, fiberglass, plastic, and handyboard.

and they are about $6.

To be a fair comparison, you have to include the cost of the drill press, and the person using the Greenlee has to include the cost of a couple of $15 socket wrench sets. Guess which one people are more likely to have lying around the house? :D
 
NOthing usefull to say but I absoultly love this thread! Keep up all the good information and I will be broke from spending money on DIY stuff in no time! The only DIY I have as far as main studio stuff is I went to a parts store/warehouse near my house (Mendelsons liquidation center) and bought an old army surplus mic capsel thing, attached a cable to it, (I used a cheap plastic cased radioshack cable that was shorted at one end) and now I have this horrible crappy lofi mic that sounds like your talking through a telephone. Its absolutly great though. Its decently sensitive so I set it up as a room mic for drums and stuff and mix alittle lofi in at times, Im just itching to use it on vocals!
 
I DIY'd this desk and the monitor stands

Here is a few DIY things that I have done. Desk and monitor stands.
 

Attachments

  • Picture 005small2.webp
    Picture 005small2.webp
    29.5 KB · Views: 150
  • Picture 006small.webp
    Picture 006small.webp
    35.2 KB · Views: 128
Fieva said:
Hey frederic, do you have any pics of the flip-floor vocal booth (maybe even with dimensions). I'd love to see how you did that.

The original flip-floor construction... bad pics I know... I used a cell phone as a digital camera, since that was my only option at the time. No flash :(

studio-0001.jpg

studio-0002.jpg

studio-0005.jpg

studio-0006.jpg

studio-0007.jpg

studio-0008.jpg

studio-0164.jpg

studio-0165.jpg

studio-0167.jpg

studio-0170.jpg

studio-0178.jpg


The stairwell light under the flip floor:
IM000736.JPG


Putting down wood over the plywood:
IM000733.JPG


Finished floor:
IM000734.JPG


Flipped up and locked:
IM000735.JPG


I really can't offer dimensions, because I built it adhoc. Pile of 2x4's, plywood, hinges etc, and just slapped it together without any measuring.

Cut to fit :D But the pictures should give you the basics as to what I did. The stairwell below isn't finished, never got around to that. I have the carpet for the stairs, I have the overhead light for the stairwell, and the new oak tongue and groove paneling ready, I cut those out a few months ago, they're just in a pile in the attic at the moment.
 
Guitar Rack

This is my first attempt at the DIY thing.
It's not so pretty, but its functional...... :)
 

Attachments

  • GR empty.webp
    GR empty.webp
    4.5 KB · Views: 155
  • GR loaded.webp
    GR loaded.webp
    12.2 KB · Views: 148
Here is my best bit of DIY ever: my studio mascots in their home, the twin towers of fish. I took two Marineland Hex 7 tanks and joined them with a 6" length of acyrlic tube. I have a really crappy camera, but you can see Gill, the big ass angelfish, in the picture.

Much better than a cheesy lava lamp :cool:

Oh yeah, the mascot part: my studio is name "Naiant" which is a French word that means "swimming" that is using in heraldry. It so happens there is a fish in my coat-of-arms, and I live at the beach, and I have fish in the studio so it's all come together :)
 
anybody remember that diy talkback box thread. Id like some more info on that. Nothing I try works......
 
frederic said:
Modded studio monitors (Awia home theater speakers with Vifa drivers)
Homemade Steel Console Table and video monitor shelf.
Homemade producer's desk with integrated racks
Homemade wordclock expansion (one in, 16 out)
Homemade under-console wooden tri-bay rack
Homemade audio monitor selector (with sub bypass)
Homemade flip-floor vocal booth
Heck, homemade studio
Semi-Homemade SCSI hard disk recorder hot-swap unit
Homemade Mic Arm Corner/Wall mount
Homemade 1.97TB Media Storage Server (Linux based)
Homemade Akai DR8--> DR16 mod
Homemade Toslink buffer (1 in, 16 out)
Homemade 4 voice analog bass module (midi in only)
Modded Ampeg guitar amp and cabinet
Homemade portable guitar amp (practice cube)
Homemade Opto-isolated stereo compressor (tubes)
Homemade 16 stereo input outboard summing mixer (knob free)
Various PAIA kits:
Vocoder, ring modulator, phase shifter, fatman mono analog synth

And probably 20 other things I can't think of...

Only studio stuff, right? LMAO

hey man can you tell me how you built the flip floor vocal booth, I would be most appricative
Keith
 
tellntim said:
hey man can you tell me how you built the flip floor vocal booth, I would be most appricative
Keith


Pictures above Keith.

I built it "free form" meaning all I had was a simple, not to scale, sketch. In fact most of the lines on the drawing weren't even straight.

Essentially, I bolted down a 2x8 or 2x10 "sill" at the top of the stairs, on the side. I then bolted six hinges, across that, with half the hinge hanging off over the open stairwell. I then bolted a 2x6 across the width of the first bolt holes, then added six 2x6's across the width of the stairs, about 1/2" short of the other side of the stairwell.

I then flipped that up, and bolted that together with 1/2" lag bolts, in slightly undersized holes I drilled.

Then I cut and attached a piece of 3/4" plywood on the bottom, and zapped that on with deck screws. Then I added the stringers between, also using deck screws. Stuffed with insulation, chaulked across the tops of the 2x6's in all directions, and deck-screwed down another cut to fit piece of plywood. Then laid the floor over that. To suspend the floor level, I put a floor jack on one of the stairs, sitting on two cinder blocks so I had room to actually jack it, and put a 2x4 long ways from the jack to the bottom of the floor assembly I just made. I put a level on top, and jacked until it was a "hair" over level, tilting up. Then I attached the 2x10 across the other side of the stairwell, for the floor to rest on, and attached that to the studs of the wall using 1/2" lagbolts. Two per stud, across the whole thing.

Removed jack, 2x4 and cinderblocks, and laid down the birch floor on top of it.

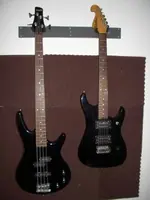
At one point after constructing the floor, and the surround walls for the vocal booth, I had all my gear stacked in there rightly. Rack gear, amps, mixers, audio and video monitors, etc. Floor to ceiling, front to back, and the rest went into the attic.

I easily, had 1500lbs sitting on that floor for about six months, no problem, didn't even squeek.

I've added a few things since then... underneath is now a boxed in stairwell light so if the floor is down I can still walk into the downstairs entrance and not kill myself. I can flip the floor up from underneath, though my back doesnt' like doing that too much. So I also installed an air spring, much like what hatchback cars have, though much larger. It's not enough to lift the floor off the 2x10, but it's enough that it makes the floor less heavy to flip up from underneath. Every little bit helps.

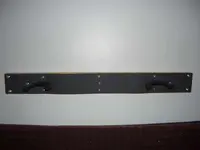
I then added the deadbolt as you can see in the pictures, so if it's up it stays up and there is no risk of "clocking" anyone in the head. And, a felt strip across the 2x10 so if it does fall because someone operating it isn't familiar with it, it doesn't make a huge bang when it lands.

There's the text description... and the pictures are higher up.

Do not the stairwell wasn't even close to square, which is why I didn't bother doing a diagram or anything. The flip floor part is actually slightly trapazoid shaped, because the stairwell isn't straight either. But if flips, it's strong, and works for me.

I still haven't made the "stair blocker" part yet, which I need to do before someone slides down the stairs trying to step into the booth. I made the sides last summer, but haven't finished it. Essentially its like two upside down stairs with a flat top, which after I flip the floor down, just drop into the space between the flip floor and the top of the stairs, so it's all filled in nicely. One of those things I never get around to.

I could have made the booth a little wider, as to cover the stairs completely, however then that cuts into the "swing" room at the top of the stairs. Since the booth doesn't quite cover the entire stairwell, with the floor up I was still able to hump up my half-stack sized amp, my 88-key digital piano, and various other long things and still swing around that corner. I didn't want it too tight.
 
Back
Top