You are using an out of date browser. It may not display this or other websites correctly.
You should upgrade or use an alternative browser.
You should upgrade or use an alternative browser.
Ampex MM-1000 Story...
- Thread starter sweetbeats
- Start date
sweetbeats
Reel deep thoughts...
Several updates...
Indeed, and this reinforces my notion sometime back to put a motor on the thing and some sort of drive mechanism and use it for commuting...then I could take it to Jiffy Lube for the oil changes...just drive right up. No...maybe I should stick to doing the maintenance on this one myself.

I added the 200 centistoke fluid to the reel idler flywheel. Without doing any objective testing I'm very confident that what was in the flywheel was 200 cs fluid. Added about 4oz of the 8oz I purchased...enough to completely submerge that large center bearing. A gentleman on the Ampex List suggested I add that much as it quiets the bearing and he was right...pure silence. I've carefully cleaned all traces of fluid off the cover, seal and housing, carefully put those pieces into place and torqued all the screws. I'm going to wait several hours to see if the seal settles and torque the screws again before I turn the thing over.
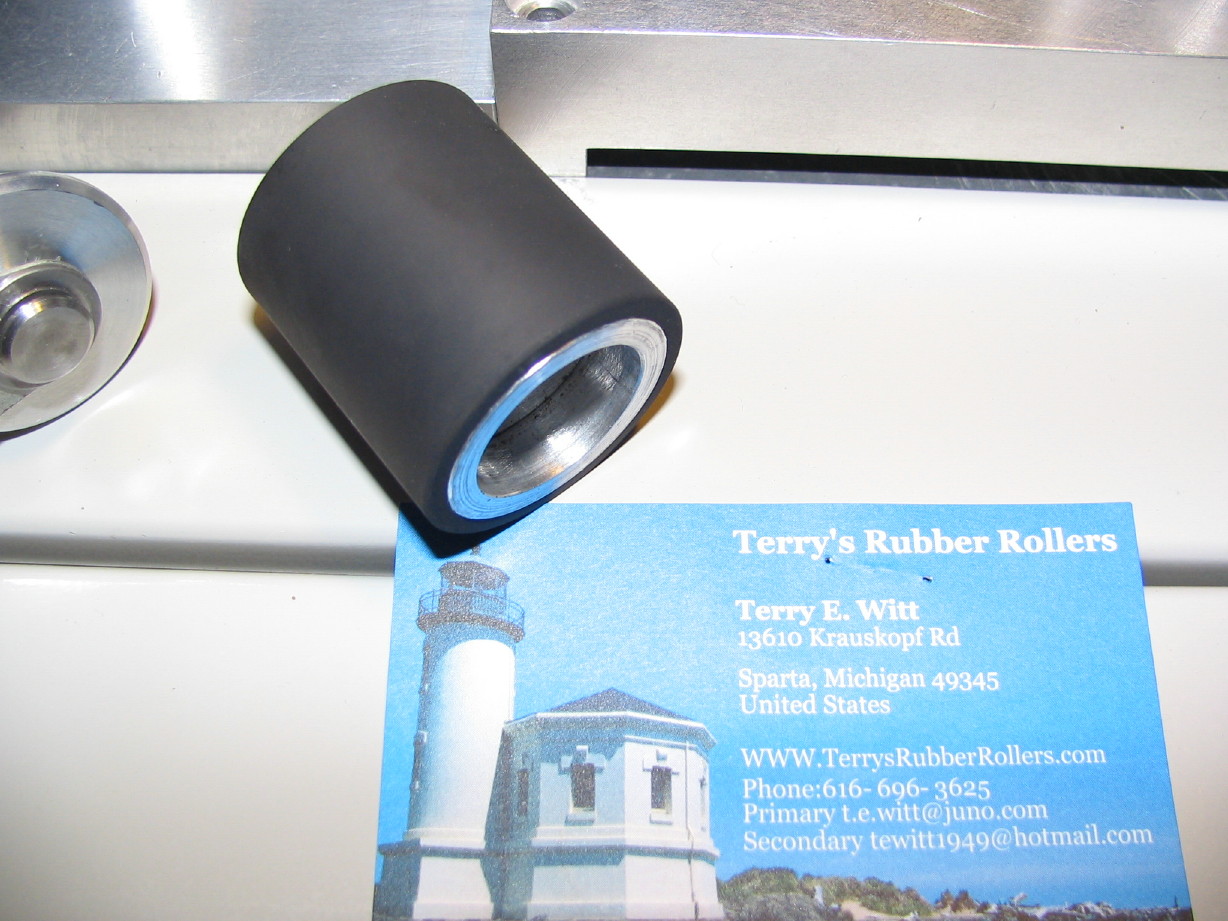
My pinch roller is on its way back from Terry Witt of Terry's Rubber Rollers. No worries there about whether or not its coming back in A+ condition. Another plug for Terry.")
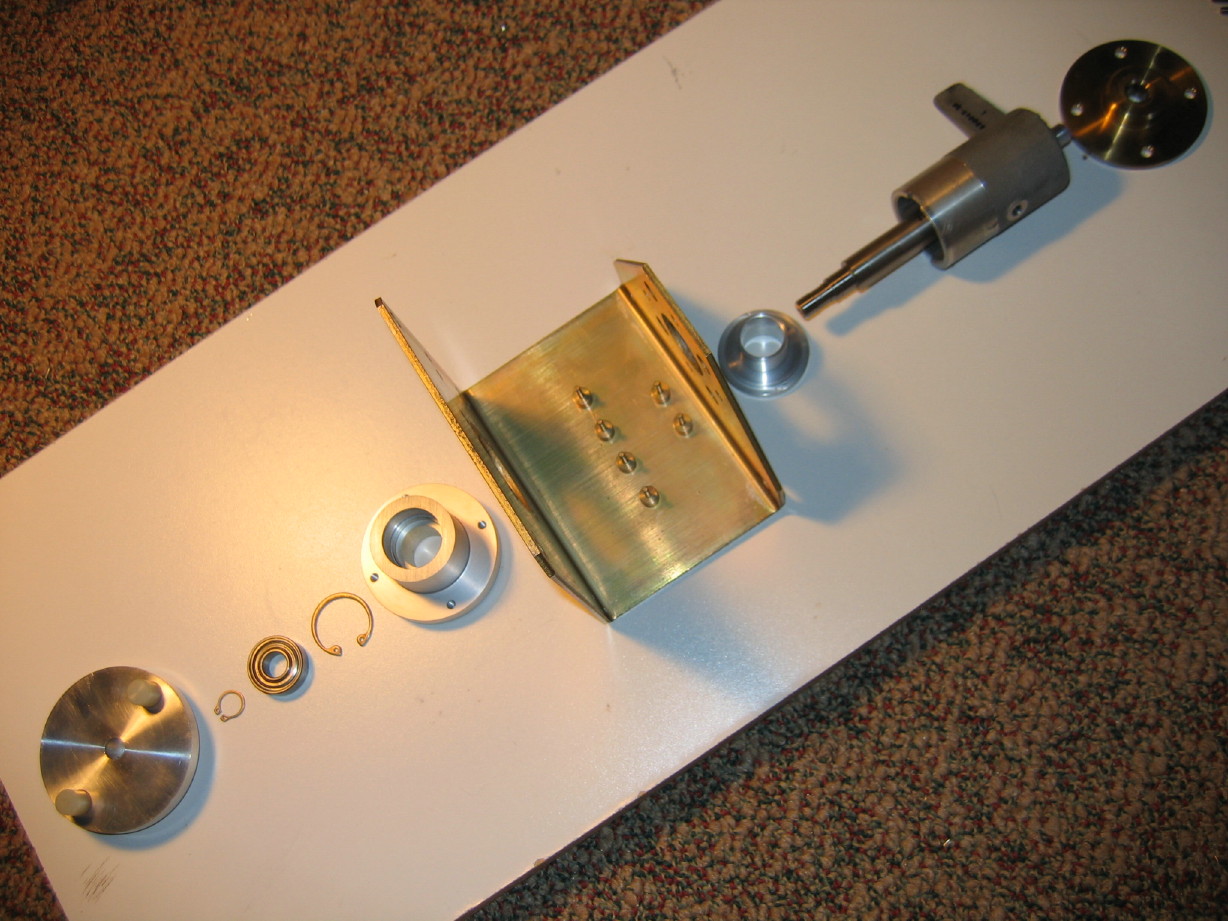
Once that comes back I'll confirm the bearing type and get some new ones ordered along with a new top bearing for the motion sensor actuator assembly. And by the way here is an "exploded view" of that assembly after having disassembled it:
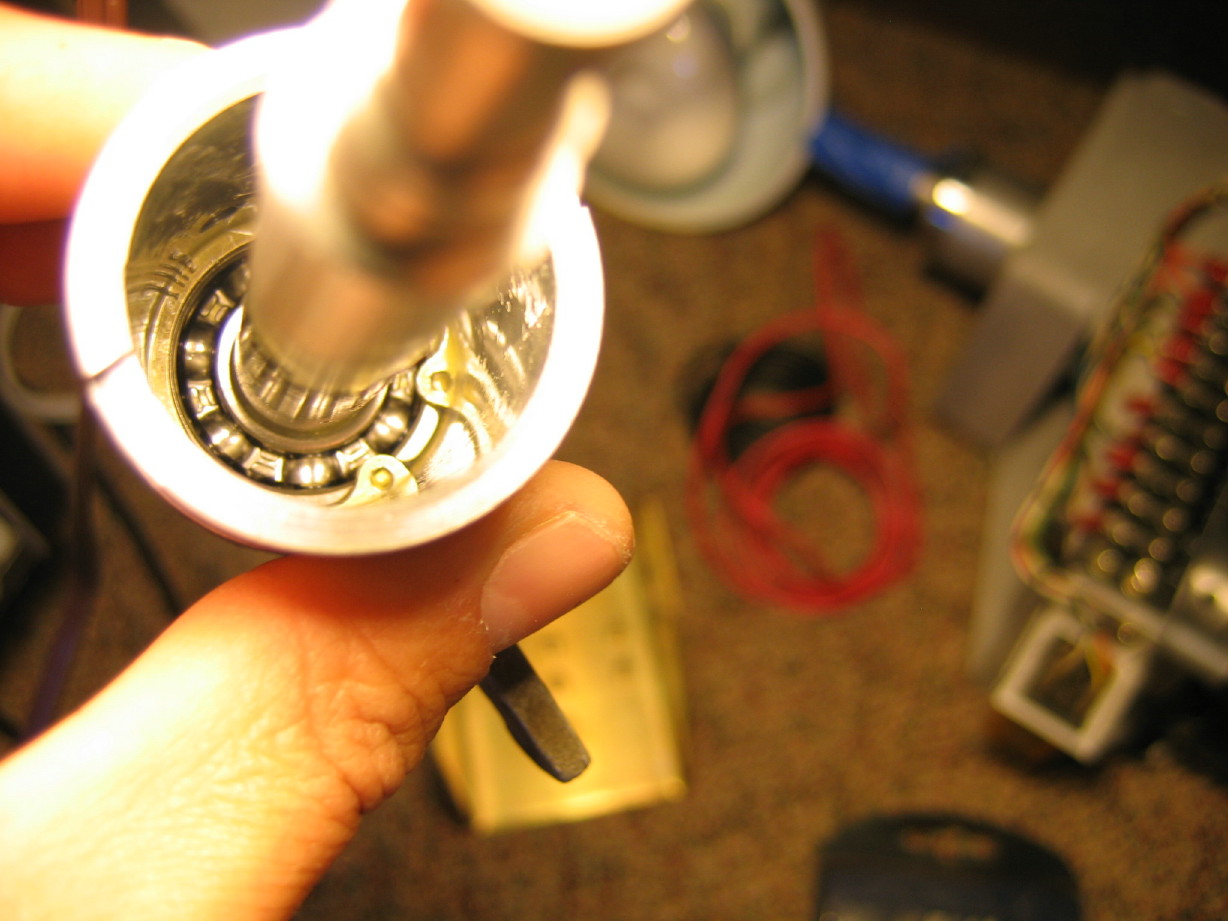
And here's the tail bearing deep down inside the actuator housing...the one I ain't gonna mess with trying to remove...the one I STILL need to go get some mineral spirits to clean out:
Let's see...maybe that's it at the moment...
Any tape machine that requires an oil change is a beast in and of itself. Good luck with this!
Indeed, and this reinforces my notion sometime back to put a motor on the thing and some sort of drive mechanism and use it for commuting...then I could take it to Jiffy Lube for the oil changes...just drive right up. No...maybe I should stick to doing the maintenance on this one myself.
I added the 200 centistoke fluid to the reel idler flywheel. Without doing any objective testing I'm very confident that what was in the flywheel was 200 cs fluid. Added about 4oz of the 8oz I purchased...enough to completely submerge that large center bearing. A gentleman on the Ampex List suggested I add that much as it quiets the bearing and he was right...pure silence. I've carefully cleaned all traces of fluid off the cover, seal and housing, carefully put those pieces into place and torqued all the screws. I'm going to wait several hours to see if the seal settles and torque the screws again before I turn the thing over.
My pinch roller is on its way back from Terry Witt of Terry's Rubber Rollers. No worries there about whether or not its coming back in A+ condition. Another plug for Terry.
Once that comes back I'll confirm the bearing type and get some new ones ordered along with a new top bearing for the motion sensor actuator assembly. And by the way here is an "exploded view" of that assembly after having disassembled it:
And here's the tail bearing deep down inside the actuator housing...the one I ain't gonna mess with trying to remove...the one I STILL need to go get some mineral spirits to clean out:
Let's see...maybe that's it at the moment...
sweetbeats
Reel deep thoughts...
No, Daniel...I really think they didn't.
There are lots of examples of good engineering all around, y'know? I just really like the vintage Ampex flavor and it is very high quality stuff.
I retorqued the flywheel cover screws three times today just to make sure and just flipped it over for the low-impact leak test (i.e. let 'er sit overnight and see if'n she makes a mess).
One thing's for sure...I'm confident there wasn't nearly enough fluid in there before...it feels *totally* different now if I hold it in my hand and rotate this way and that...this was worth teasing out...
sweetbeats
Reel deep thoughts...
The flywheel has been sitting right-side-up (i.e. with the cover on the bottom) for over half a day so far and no leaky yet...I'm so excited to have this resolved as far as feeling confident that it now has the right amount of the right type of fluid in it...you have no idea how much that has been gnawing at me. It feels so cool to hold it in my hand with my arm hanging down and rotate my arm back and forth and there's almost like a wierd sensation as it get's "heavier" to rotate (increasing intertial energy needed to maintain the rotational acceleration)...the same kind of sensation when you hold a gyroscopic device and try and manipulate its position and it fights you...its the same kind of feeling...like there's something alive inside of it... ...springy-like and that's what its supposed to do. The viscous damped flywheel idea isn't really just to make it easier for the transport to start up as I've learned...maybe I said this already, but I read Jay McKinight's paper on these things and now understand that the relationship between the inner flywheel and the outer flywheel with the fluid in between creates a spring-like damping...like a shock absorber in a way, so tiny changes in tape speed and flutter vibrations are dampened by the "spring" connectod to the "mass" (the inner flywheel). So cool. It creates a feedback response mechanism which acts differently on the tape than a scrape flutter filter. The MM-1000 doesn't really have a "tension-arm" per se, like you'd find on most modern transports. You see things that look like tension arms on the MM-1000 and they are even called tension arms but their damping effect is really limited (I'm talking about the arms that have the dashpots attached) and one of their main functions really is as a "brake arm" since there is a switch on each that, when manually moved to the end of its travel hits a switch that releases the brakes for threading or editing...the reel idler flywheel is really the "tension arm", the damping device in the tape path...and now mine's gonna work right.
 ")
Gotta go get some mineral spirits today to clean up the motion sensor actuator...it was too much a success putting the fluid in the flywheel to ignore putting the 10,000 centistoke fluid in the actuator...
Hm...I remember I wasn't going to go this deep with this machine...not at first...I was going to just get everything working and play with it and then over time go through it to a deeper level. No escaping who I am I guess...boy...once I heard audio through this thing and was just totally confirmed that this machine is IT for me, and realizing that bearings were bad (and making whale-song) and then not being able to ignore the gnawing that the relatively hard-to-get-to flywheel probably wasn't setup right...well, its just really hard not to do it right for me.
So stay with me...at some point this thing will be alllll back together proper and I'll get it calibrated and blast it with some drums and put up links to audio files so you can hear what she sounds like.
...springy-like and that's what its supposed to do. The viscous damped flywheel idea isn't really just to make it easier for the transport to start up as I've learned...maybe I said this already, but I read Jay McKinight's paper on these things and now understand that the relationship between the inner flywheel and the outer flywheel with the fluid in between creates a spring-like damping...like a shock absorber in a way, so tiny changes in tape speed and flutter vibrations are dampened by the "spring" connectod to the "mass" (the inner flywheel). So cool. It creates a feedback response mechanism which acts differently on the tape than a scrape flutter filter. The MM-1000 doesn't really have a "tension-arm" per se, like you'd find on most modern transports. You see things that look like tension arms on the MM-1000 and they are even called tension arms but their damping effect is really limited (I'm talking about the arms that have the dashpots attached) and one of their main functions really is as a "brake arm" since there is a switch on each that, when manually moved to the end of its travel hits a switch that releases the brakes for threading or editing...the reel idler flywheel is really the "tension arm", the damping device in the tape path...and now mine's gonna work right. Gotta go get some mineral spirits today to clean up the motion sensor actuator...it was too much a success putting the fluid in the flywheel to ignore putting the 10,000 centistoke fluid in the actuator...
Hm...I remember I wasn't going to go this deep with this machine...not at first...I was going to just get everything working and play with it and then over time go through it to a deeper level. No escaping who I am I guess...boy...once I heard audio through this thing and was just totally confirmed that this machine is IT for me, and realizing that bearings were bad (and making whale-song) and then not being able to ignore the gnawing that the relatively hard-to-get-to flywheel probably wasn't setup right...well, its just really hard not to do it right for me.
So stay with me...at some point this thing will be alllll back together proper and I'll get it calibrated and blast it with some drums and put up links to audio files so you can hear what she sounds like.
You know, the design of something as mundane as a motion sensor switch reminds me of the over-engineering that went into my Maglite flashlight.
I had some leaky batteries in the thing. Battery got stuck. I ended up fully disassembling the thing from the bulb down, which was a helluva lot easier said then done. about 25 pieces in the flashlight. flashlight. 25 parts. it was crazy.
I had some leaky batteries in the thing. Battery got stuck. I ended up fully disassembling the thing from the bulb down, which was a helluva lot easier said then done. about 25 pieces in the flashlight. flashlight. 25 parts. it was crazy.
sweetbeats
Reel deep thoughts...
Movin' along...
Well, Muck, over-engineered or not it is back together and works incredibly well...I'm impressed with how effective this mechanical device operates.
Motion sensor assembly repaired and reassembled
For those that just want to watch a movie about it go here:
YouTube
Otherwise, or additionally, read on...
Here's the new nose bearing I had on-hand:
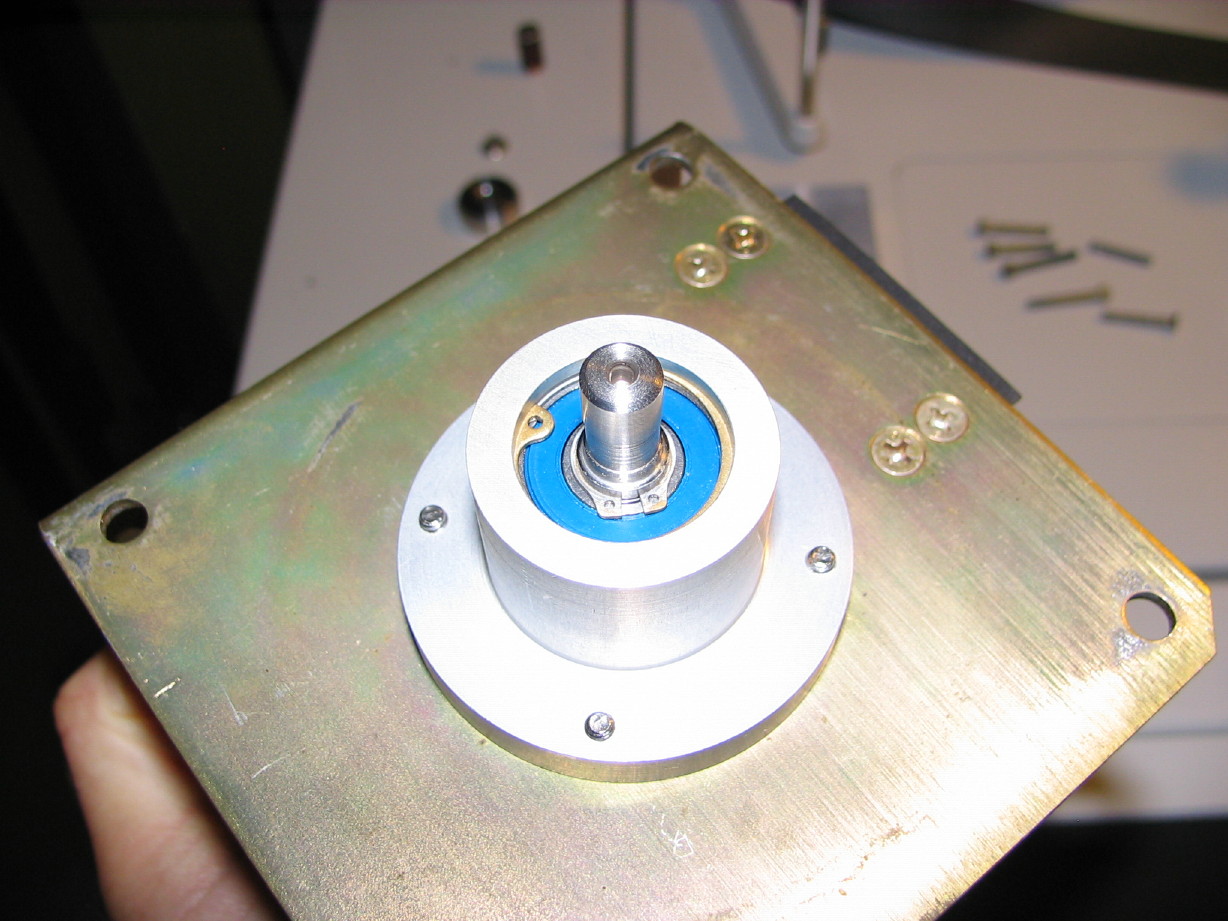
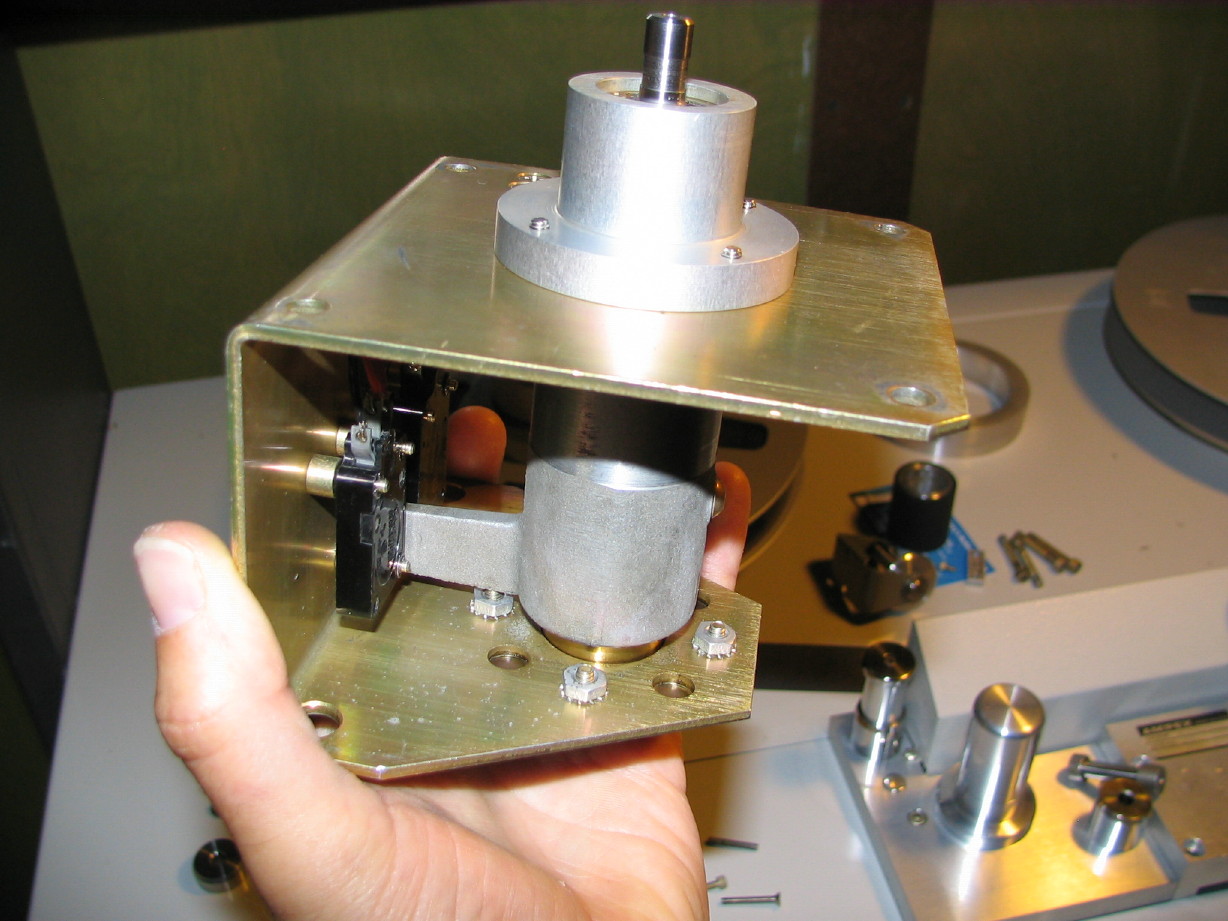
And the reassembled unit overall:
It...works...like...a...charm.
The 10,000 cs fluid in the actuator was the ticket!
Rolling guide upgrades
Got the parts back from my machinist friend.
Again, if you just want to watch a movie about what I'm doing with these custom machined parts go here:
YouTube
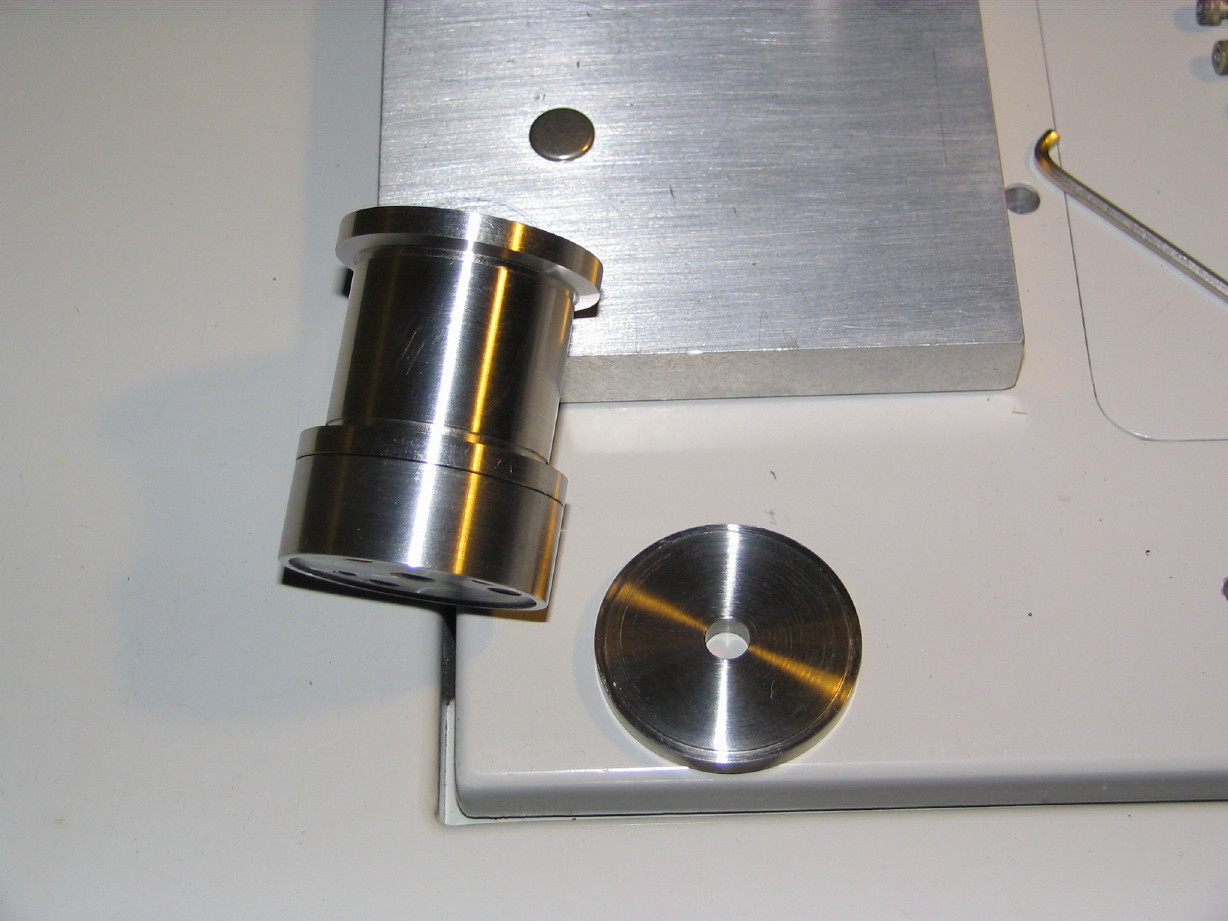
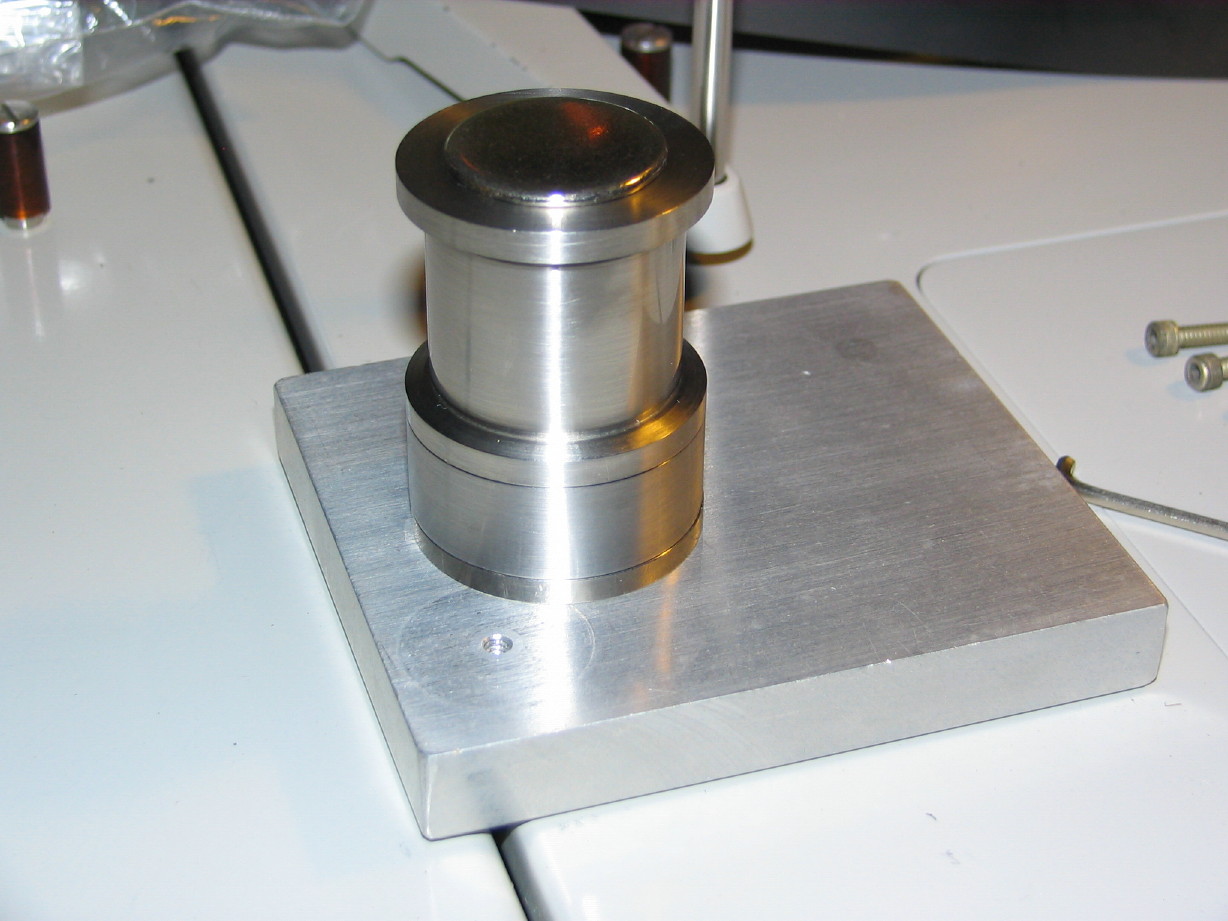
Otherwise, or in addition, here's what's happening...there are two rolling guides in between the supply reel and the erase head and one static guide. The static guide is RIGHT before the erase head and its just generally accepted that its kind of a shame that it has to be there because that's after the reel idler roller with the viscous damped flywheel and it'd be nice to maintain, as much as possible, the benefit of that damping and not go backwards with a static guide downstream. So I have this really nice "rotary tape guide" off of the 440-8 project I used to own and subsequently parted out. Its beefy, heavy, rolls like silk. I thought THAT would be nice right before the erase head but there are some limitations as its too tall, and because of the way its made I really don't want to modify it. So I'm putting that in place of the first rolling guide which comes right before the tape enters the head cover. Its too short to go there so I had my friend make a shoulder washer to build it up. Here's the guide and the new washer separate and then a shot of the two mated together:
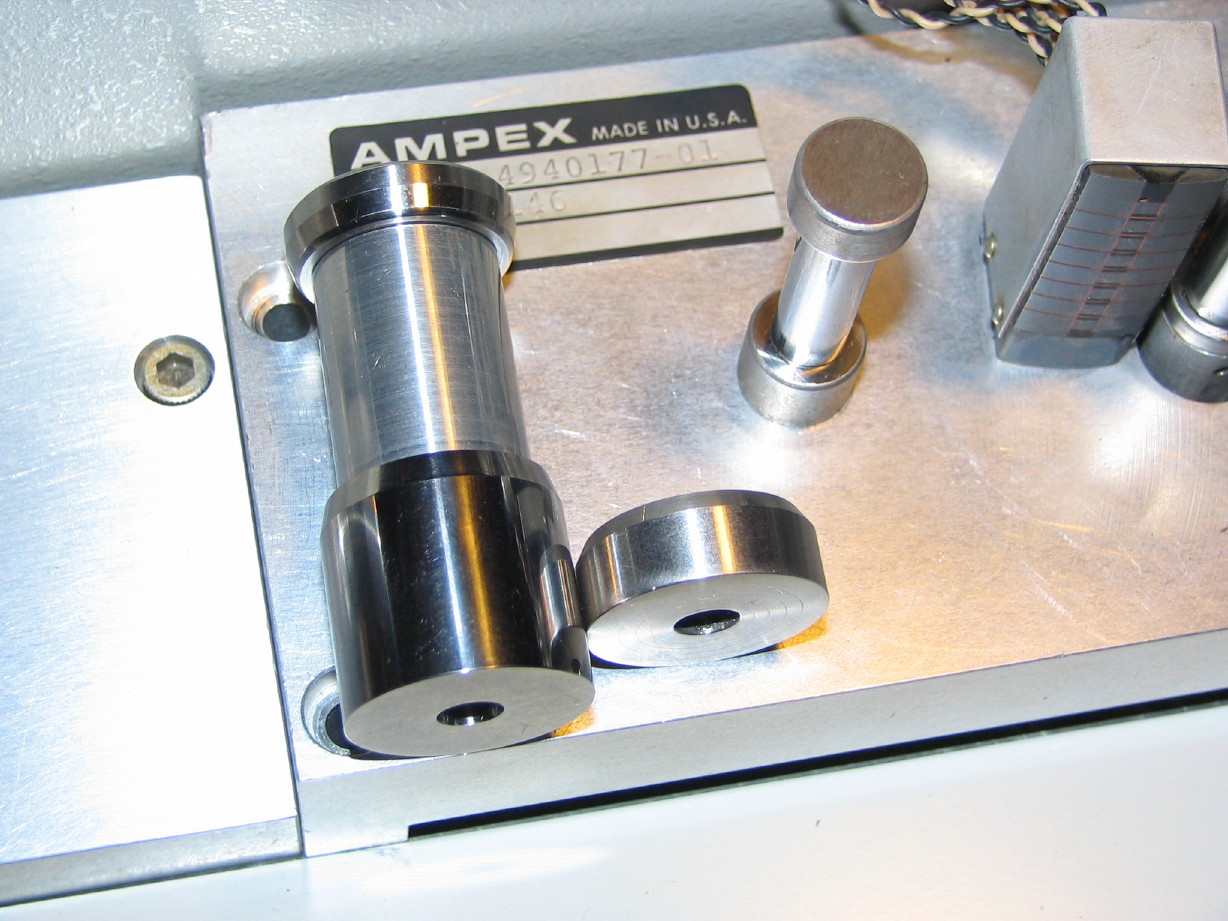
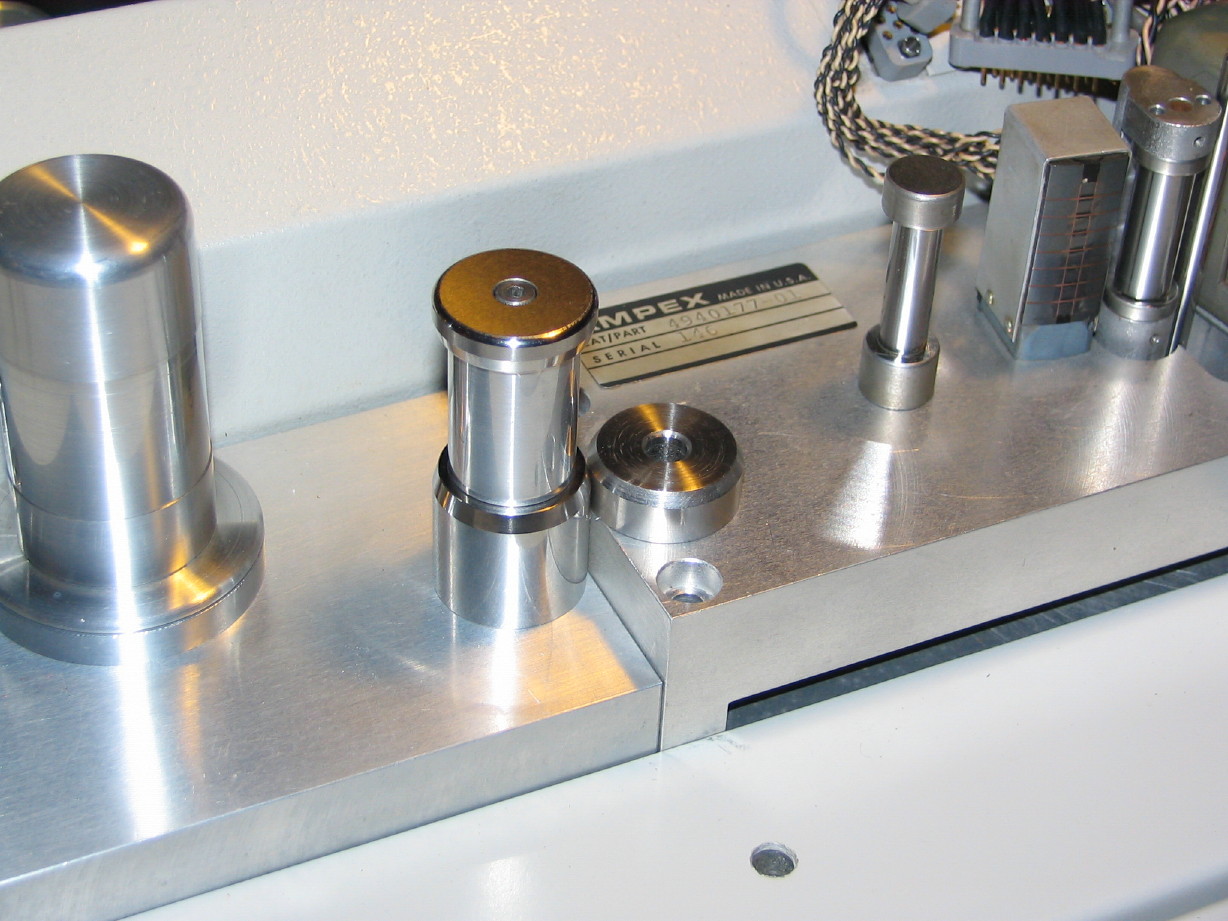
THEN...I can take the rolling guide that was where the 440-8 rotary tape guide is going and put THAT in place of the static guide right before the erase head. Problem there is that the guide is too TALL. But unlike the rotary tape guide the standard rolling guide can be easily modified because the guide assembly sits on a spacer. So I had my friend make a shorter spacer. Yup. Here's a couple shots of the full stock guide with the stock spacer and then to the right of it the new part:
Other updates
Got the pinch roller back and here's another plug for Terry Witt of Terry's Rubber Rollers:
Also the new bearings are on the way for the pinch roller. I spent a little more money on these bearings because the tape drive's effect on performance can be significant since it is a ripe source for mechanical "noise". I got ABEC-7 cartridges with stainless races. Here's the thing...the pinch roller doesn't spin very fast right? A higher ABEC rating means a bearing with a tighter tolerance which makes for a smoother bearing at speed and increased speed tolerance. A higher ABEC rating doesn't necessarily guarantee smoother operation at slow speeds! Plus there are some variances depending on where the bearing was manufactured. Knowing I was going to get import bearings I chose to get ones with ceramic balls which wear better and are smoother. I also chose to get sealed cartridges rather than shielded. Seals can produce mechanical "noise" (I'm splitting hairs here folks) and create drag but I opted for them anyway. I think the capstan motor can handle the drag and because of the application I thought sealed was important. They were $13 each + $5 to ship, BUT there's a special this month and I got a free digital readout 0.001" scale dial caliper for free. Do I need one? Uh...no, and I like my analog dial unit better than the digital ones anyway, but hey...it makes me feel better getting something for "free" with my relatively expensive bearings. And the bearings will last and last and last.
The last batch of spare parts are on their way thanks to a very helpful friend. With this shipment comes a spare 8 track remote carcass from which I can make one really nice remote (like I may have mentioned in the past its incomplete but has the guts I need and the dress panel is in really nice shape...mine is kind of trashed, so this is a good match), the special rackmount panel for racking the two additional 39V supplies for the 8 additional electronics for 16 track conversion as well as a stationary 2" tape guide for in between the footage roller and the takeup brake arm...oh and a spare motion sensor switch. I literally will have everything for the 2" conversion except for the 3 wiring sub-harnesses...and it *is* possible to run the machine without them...the three harnesses simply extend several controls located on the electronics modules to centralized locations...the bias trap and sync gain controls are on screw pots on the back of the modules but those are redirected to the "sync boxes" that handle 8 tracks each on the MM-1000 so you can get to them and adjust them from the front of the machine, and the other harness relocates track arming and source switching controls to the right of the control panel from the face of each electronics module...SO...if I wanted to start using the machine in 2" trim I can do it with what I have, it would just mean the incovenience of manning those controls at the modules for 8 of the channels. I can deal with that for a time but eventually I will *have* to have it setup proper...I mean, I have the second sync box and the control panel dress panel with the cutouts for the second row of 8 mode control switches as well as the second set of mode control switches themselves...I've got to use them RIGHT??? Heheh. Just wish the mil spec connectors weren't so hard to find and expensive or I'd just set my mind to having to make the harnesses but that's the way it is...but they are pricey...the big 27 pin amphenol connector for the mode control assembly is ugly expensive...just the female side with no pins is about $127 for one if purchased new. I'll have to come up with something else if it comes to that, but I've done a global search for scrap MM-1000 cabling and I have several helping me and no dice in the many months I've been searching.
So I think that's it for now...
Au contrare my friend...I can't WAIT to use it...
Well, Muck, over-engineered or not it is back together and works incredibly well...I'm impressed with how effective this mechanical device operates.
Motion sensor assembly repaired and reassembled
For those that just want to watch a movie about it go here:
YouTube
Otherwise, or additionally, read on...
Here's the new nose bearing I had on-hand:
And the reassembled unit overall:
It...works...like...a...charm.
The 10,000 cs fluid in the actuator was the ticket!
Rolling guide upgrades
Got the parts back from my machinist friend.
Again, if you just want to watch a movie about what I'm doing with these custom machined parts go here:
YouTube
Otherwise, or in addition, here's what's happening...there are two rolling guides in between the supply reel and the erase head and one static guide. The static guide is RIGHT before the erase head and its just generally accepted that its kind of a shame that it has to be there because that's after the reel idler roller with the viscous damped flywheel and it'd be nice to maintain, as much as possible, the benefit of that damping and not go backwards with a static guide downstream. So I have this really nice "rotary tape guide" off of the 440-8 project I used to own and subsequently parted out. Its beefy, heavy, rolls like silk. I thought THAT would be nice right before the erase head but there are some limitations as its too tall, and because of the way its made I really don't want to modify it. So I'm putting that in place of the first rolling guide which comes right before the tape enters the head cover. Its too short to go there so I had my friend make a shoulder washer to build it up. Here's the guide and the new washer separate and then a shot of the two mated together:
THEN...I can take the rolling guide that was where the 440-8 rotary tape guide is going and put THAT in place of the static guide right before the erase head. Problem there is that the guide is too TALL. But unlike the rotary tape guide the standard rolling guide can be easily modified because the guide assembly sits on a spacer. So I had my friend make a shorter spacer. Yup. Here's a couple shots of the full stock guide with the stock spacer and then to the right of it the new part:
Other updates
Got the pinch roller back and here's another plug for Terry Witt of Terry's Rubber Rollers:
Also the new bearings are on the way for the pinch roller. I spent a little more money on these bearings because the tape drive's effect on performance can be significant since it is a ripe source for mechanical "noise". I got ABEC-7 cartridges with stainless races. Here's the thing...the pinch roller doesn't spin very fast right? A higher ABEC rating means a bearing with a tighter tolerance which makes for a smoother bearing at speed and increased speed tolerance. A higher ABEC rating doesn't necessarily guarantee smoother operation at slow speeds! Plus there are some variances depending on where the bearing was manufactured. Knowing I was going to get import bearings I chose to get ones with ceramic balls which wear better and are smoother. I also chose to get sealed cartridges rather than shielded. Seals can produce mechanical "noise" (I'm splitting hairs here folks) and create drag but I opted for them anyway. I think the capstan motor can handle the drag
and because of the application I thought sealed was important. They were $13 each + $5 to ship, BUT there's a special this month and I got a free digital readout 0.001" scale dial caliper for free. Do I need one? Uh...no, and I like my analog dial unit better than the digital ones anyway, but hey...it makes me feel better getting something for "free" with my relatively expensive bearings. And the bearings will last and last and last.The last batch of spare parts are on their way thanks to a very helpful friend. With this shipment comes a spare 8 track remote carcass from which I can make one really nice remote (like I may have mentioned in the past its incomplete but has the guts I need and the dress panel is in really nice shape...mine is kind of trashed, so this is a good match), the special rackmount panel for racking the two additional 39V supplies for the 8 additional electronics for 16 track conversion as well as a stationary 2" tape guide for in between the footage roller and the takeup brake arm...oh and a spare motion sensor switch. I literally will have everything for the 2" conversion except for the 3 wiring sub-harnesses...and it *is* possible to run the machine without them...the three harnesses simply extend several controls located on the electronics modules to centralized locations...the bias trap and sync gain controls are on screw pots on the back of the modules but those are redirected to the "sync boxes" that handle 8 tracks each on the MM-1000 so you can get to them and adjust them from the front of the machine, and the other harness relocates track arming and source switching controls to the right of the control panel from the face of each electronics module...SO...if I wanted to start using the machine in 2" trim I can do it with what I have, it would just mean the incovenience of manning those controls at the modules for 8 of the channels. I can deal with that for a time but eventually I will *have* to have it setup proper...I mean, I have the second sync box and the control panel dress panel with the cutouts for the second row of 8 mode control switches as well as the second set of mode control switches themselves...I've got to use them RIGHT??? Heheh. Just wish the mil spec connectors weren't so hard to find and expensive or I'd just set my mind to having to make the harnesses but that's the way it is...but they are pricey...the big 27 pin amphenol connector for the mode control assembly is ugly expensive...just the female side with no pins is about $127 for one if purchased new. I'll have to come up with something else if it comes to that, but I've done a global search for scrap MM-1000 cabling and I have several helping me and no dice in the many months I've been searching.
So I think that's it for now...
Cory, be careful, 'cause you may not want to use this thing once it's in "museum condition".
Au contrare my friend...I can't WAIT to use it...
Last edited:
Got the parts back from my machinist friend.
so I had my friend make a shoulder washer to build it up.
So I had my friend make a shorter spacer.
a very helpful friend.
Corey, this friend of yours. Is a masterful machinist.
I get the impression that you are contracting a Gimli-type fellow in your workshop or in your barn?
http://www.rankopedia.com/CandidatePix/29339.gif
sweetbeats
Reel deep thoughts...
Corey, this friend of yours. Is a masterful machinist.
I get the impression that you are contracting a Gimli-type fellow in your workshop or in your barn?
http://www.rankopedia.com/CandidatePix/29339.gif
OH HAHAHAHA!!!
That's hiLARIOUS!
Hm...I can see how it sounds that way, but no, I got to know him because he's married to one of my managers. He's been doing machining for decades and he jsut has a real good touch and knows how to setup the projects intuitively and I think the MOST valuable aspect of a machinist's knowledge is knowing how much cutting you can do and what kinds of bits to use with different materials...of course he's a CNC operator but clearly knows how to make up custom one-off parts. I get him the dims and out spits the part it seems.
I used to work in an in-house machine shop in the factory I worked in so I got to know sheet forming, turning and milling as well as heat-treating, die making , surface grinding and welding. It was small because it was just for repairs as well as design and development of production line machines but we didn't have any CNC equipment and really nothing that did well with stainless. I HATED working with stainless but my friend can rattle off all sorts of reasons why he likes working with it and its because (IMO) he knows how to work with it.At any rate, I'm glad to know him!
And, Daniel, yeah. The pinch roller looks nice. That's the second roller I've had Terry rebuild for me. The other was the BR-20T pinch roller and in both cases the outcome has been superb, and his turnaround is very quick. I know he may get backed up at times depending on business but both times the rebuilt roller was back in a week including transit...very professional. I trust my rollers with Terry.
dodgeaspen
New member
I really enjoyed the video's. Now I get a better fell for what your doing. Things are looking amazing. You'll be posting tunes in no time at all.
sweetbeats
Reel deep thoughts...
More progress...
Got the motion sensor assembly back in and it works great. Still have problems with the transport not wanting to go into play sometimes but I'm pretty sure its a bad cap issue so I'll get to that soon. Otherwise the transport behavior with respect to the motion sensor is much better than before...nice and crisp with the lifter retraction and the machine coming to a stop (what I mean is that the lamp in the STOP button doesn't light until the motion sensor tells the transport that the tape has stopped...used to be dodgey and often delayed...works wonderfully now)...
Got the capstan assembly cleaned up and adjusted the tension of the belt...went well and it turns out the belt was pretty loose so that certainly wouldn't be helping my tape speed variations...anyway, here's a little video about adjusting the tension of the belt:
YouTube
Also got the reel idler flywheel reinstalled...I hadn't done that yet because I kept finding patches of oil on it...I had wiped it a couple times with a dry cloth, and even wiped it down with alcohol but give it half a day or whatever and there the patches would be...I switched to wiping it down with mineral spirits and after a couple times the patches no longer reappeared. I think all is good, and that the Dow Corning 200 fluid may not soak into a cloth as readily as other fluids and instead just smear on the surface from which you are trying to clean it. At any rate, with the new bearings in the reel idler roller and the flywheel properly filled the assembly feels and sounds like a precision instrument...
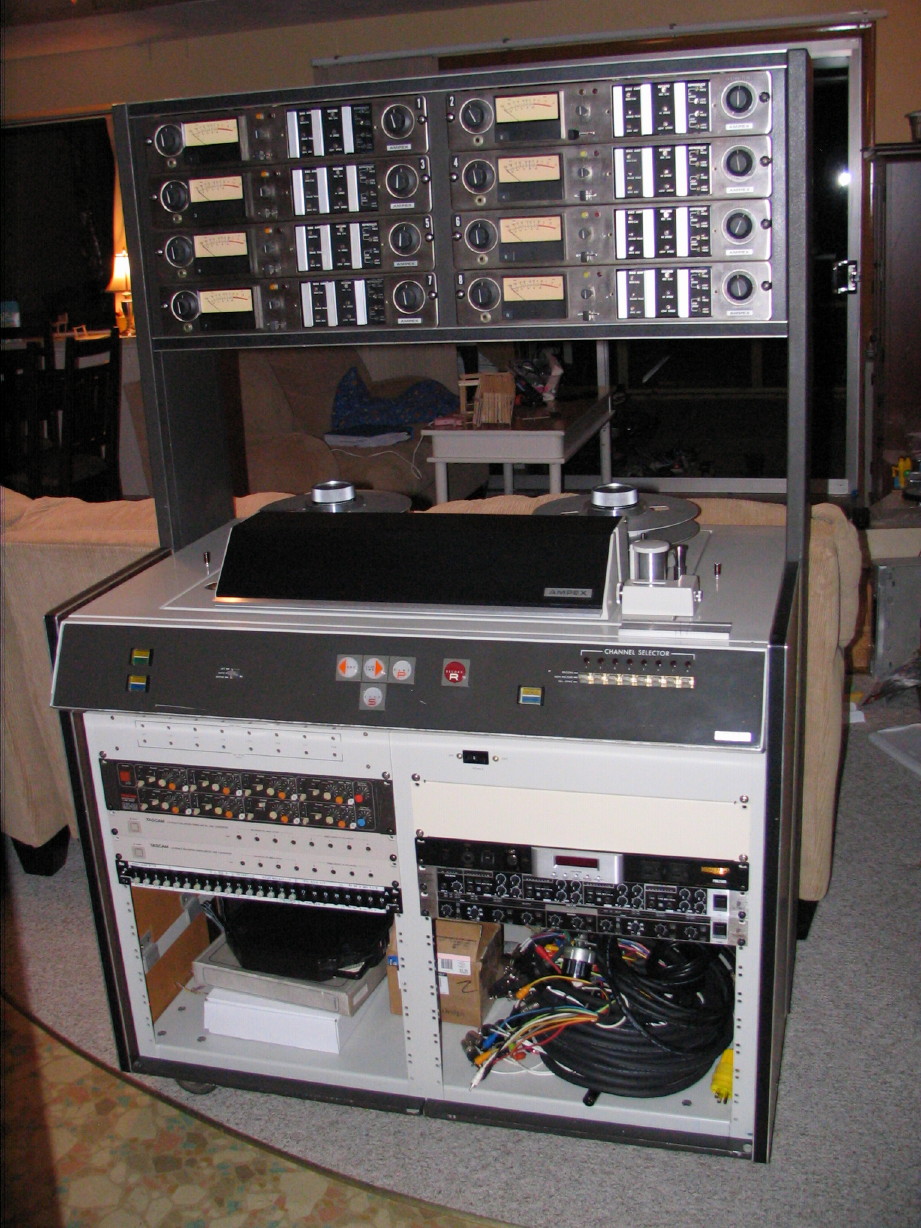
Still working on the guide mods...Have to track down a 1/4"-28TPI x 1" flat head screw to mount the rotary guide...I'll have to go to the big city to get that...I exhausted all sources in my small town. Still need to measure out where to bore the hole for the new rolling guide by the erase head. Things are bonkers here with construction...I was doing demolition all weekend and packing stuff up for temp storage and moving stuff, so attention to these projects is patchy at best. But I did finally get some rack gear mounted up in the MM-1000's lower console for temporary preamping and monitoring ability...what's in there is the Tascam MX-80 for mic pre's and 8 x 2 monitor mixing, two Tascam LA-40mkII's for -10dBv to +4dBu bumping as well as going the other way, a headphone amp, crossover, power conditioner and patchbay. Here's what it looks like right now, temporarily in the house, and for perspective on the size, that's a high-back loveseat behind it...
Got the motion sensor assembly back in and it works great. Still have problems with the transport not wanting to go into play sometimes but I'm pretty sure its a bad cap issue so I'll get to that soon. Otherwise the transport behavior with respect to the motion sensor is much better than before...nice and crisp with the lifter retraction and the machine coming to a stop (what I mean is that the lamp in the STOP button doesn't light until the motion sensor tells the transport that the tape has stopped...used to be dodgey and often delayed...works wonderfully now)...
Got the capstan assembly cleaned up and adjusted the tension of the belt...went well and it turns out the belt was pretty loose so that certainly wouldn't be helping my tape speed variations...anyway, here's a little video about adjusting the tension of the belt:
YouTube
Also got the reel idler flywheel reinstalled...I hadn't done that yet because I kept finding patches of oil on it...I had wiped it a couple times with a dry cloth, and even wiped it down with alcohol but give it half a day or whatever and there the patches would be...I switched to wiping it down with mineral spirits and after a couple times the patches no longer reappeared. I think all is good, and that the Dow Corning 200 fluid may not soak into a cloth as readily as other fluids and instead just smear on the surface from which you are trying to clean it. At any rate, with the new bearings in the reel idler roller and the flywheel properly filled the assembly feels and sounds like a precision instrument...
Still working on the guide mods...Have to track down a 1/4"-28TPI x 1" flat head screw to mount the rotary guide...I'll have to go to the big city to get that...I exhausted all sources in my small town. Still need to measure out where to bore the hole for the new rolling guide by the erase head. Things are bonkers here with construction...I was doing demolition all weekend and packing stuff up for temp storage and moving stuff, so attention to these projects is patchy at best. But I did finally get some rack gear mounted up in the MM-1000's lower console for temporary preamping and monitoring ability...what's in there is the Tascam MX-80 for mic pre's and 8 x 2 monitor mixing, two Tascam LA-40mkII's for -10dBv to +4dBu bumping as well as going the other way, a headphone amp, crossover, power conditioner and patchbay. Here's what it looks like right now, temporarily in the house, and for perspective on the size, that's a high-back loveseat behind it...
Last edited:
sweetbeats
Reel deep thoughts...
Got the bearings for the pinch roller today...no time to put them in right now though...
sweetbeats
Reel deep thoughts...
Got some parts...
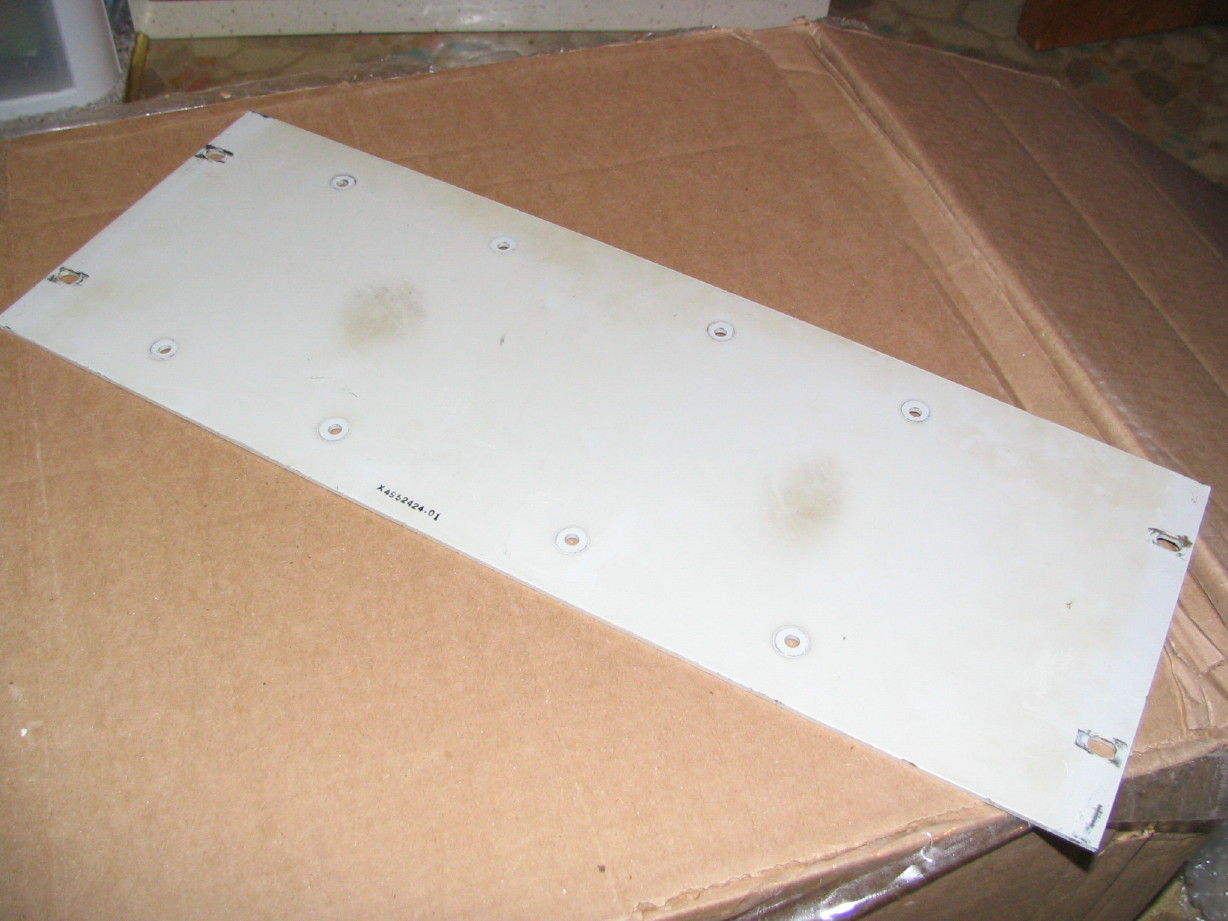
Rack panel for the power supplies for channels 9~16...its in perfect shape as far as I'm concerned. It'll clean up fine. I'm just glad to have it.
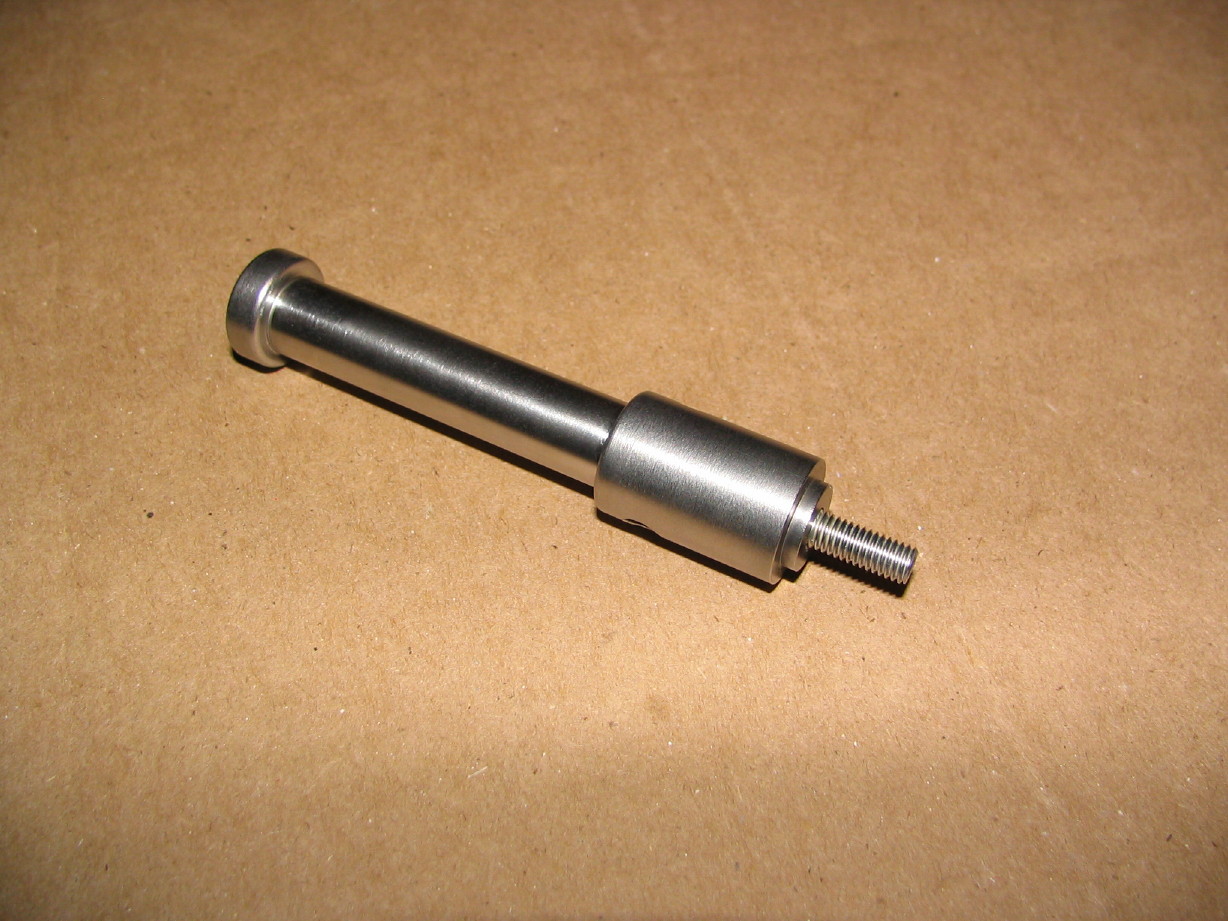
Static 2" guide...this is the one that goes in between the tape footage roller and the takeup brake arm:
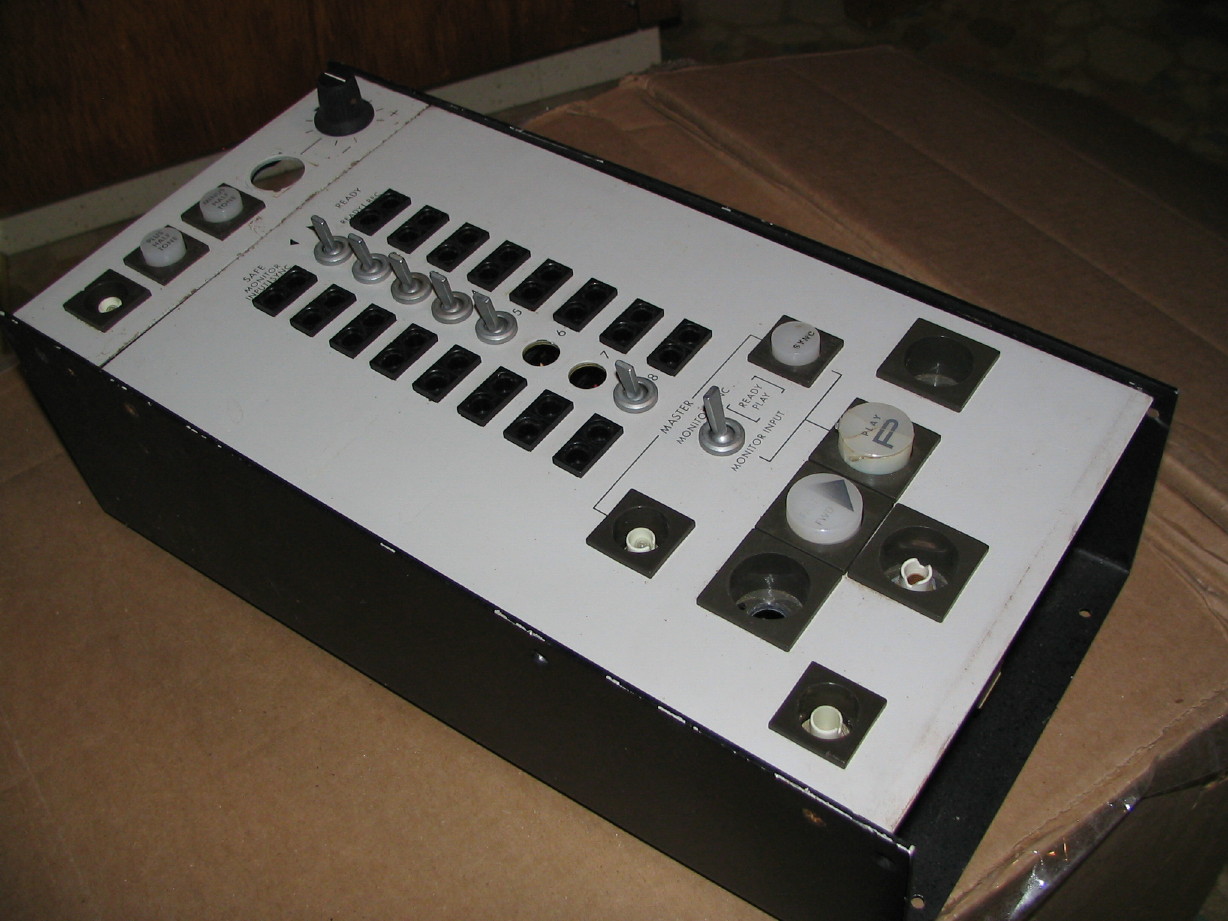
And finally the 8-track remote carcass...The dress panel and body are in better shape than the one I got with the machine. This carcass will provide those as well as some spare switches and the guts aren't all corroded like mine. Might could have a working remote!!! After I repair the cable...and figure out how to retrofit the bigger winchester connector onto the consol chassis...and uh...ned to make some walnut trim panels for it...mmm...laterrrrr:
Rack panel for the power supplies for channels 9~16...its in perfect shape as far as I'm concerned. It'll clean up fine. I'm just glad to have it.
Static 2" guide...this is the one that goes in between the tape footage roller and the takeup brake arm:
And finally the 8-track remote carcass...The dress panel and body are in better shape than the one I got with the machine. This carcass will provide those as well as some spare switches and the guts aren't all corroded like mine. Might could have a working remote!!!
After I repair the cable...and figure out how to retrofit the bigger winchester connector onto the consol chassis...and uh...ned to make some walnut trim panels for it...mmm...laterrrrr:
The Ghost of FM
Banned
Cool parts acquisition, Corry!
I gotta wonder though, what on earth was going on in that studio that saw remote transport buttons being sheared off?
Maybe he had some sad talent in there doing 500 takes of a part and the engineer losing his mind and throwing the remote on the floor and stomping on it!
Cheers!
I gotta wonder though, what on earth was going on in that studio that saw remote transport buttons being sheared off?
Maybe he had some sad talent in there doing 500 takes of a part and the engineer losing his mind and throwing the remote on the floor and stomping on it!
Cheers!
sweetbeats
Reel deep thoughts...
Oh, Jeff, those are just the button caps. Somebody took some out to maybe replace worn or cracked ones on a different remote. BUT...it IS a shame what happens to some of this stuff...
sweetbeats
Reel deep thoughts...
I got the layout done on the headblock to bore the hole for the rolling guide right before the erase head...probably do the machining tomorrow...I have to bore a 9/64" hole straight through in the precise location and then counter-bore a 5/16" deep 1/4" hole...and then counter sink the back side of the remaining 9/64" bore...
I wanted to locate the hole for the guide so the tape path didn't change as far as what the tape sees...the stock guide is 5/16" in diameter and the rolling guide is 3/4"...its gonna be good...the new guide will even cover the stock mounting hole.
I wanted to locate the hole for the guide so the tape path didn't change as far as what the tape sees...the stock guide is 5/16" in diameter and the rolling guide is 3/4"...its gonna be good...the new guide will even cover the stock mounting hole.
sweetbeats
Reel deep thoughts...
Dang...sometimes I wish I wasn't so fidgity...
I think I've about exhusted all known reasonable options for locating the extra harnessing needed to convert the MM-1000 to 16 track, and unless a parts MM-1000 shows up at my doorstep it looks like I'll be making the harnesses...I *think* I have some of the cabling and some of the connectors but at best this will be a project (literally) at least 10x the magnitude of sourcing the parts for and building a Tascam M-520 power supply cable. Am I up to it? Sure.
I need 16 Amphenol MS-3106A-10SL-3S connector sets...that's a mil-spec 3-pin screw-on type connector used for the 8 of the inputs and 8 of the outputs on the sync box...its a bi-directional 8 channel unit with the sync relays and bias traps in it, so there are a total of 16 inputs and 16 outputs...the other set of 8 inputs and outputs are on Winchester connectors as are some other circuit connectors. I'll deal with those later. These Amphenol connectors will be relatively easy to find as they are current products, but I donzt want to pay for new so the search will be for surplus stuff at a bargain.
The other difficult connector to find (besides the Winchester units) will be the ITT/Cannon connector from the mode control switches for channels 9~16...its a model NK-27-21C-5/8...27 pin circular female unit. Over 100 bucks new. Gotta find used but not easy.
*sigh*
Enough of that for now...found spec sheets and part number references. That's step one and I've got some eBay listings I'm watching for the Amphenol connectors.
I'll take a break from that and drill some holes in the headblock plate.