Goodbye Studio

  • Thread starter Thread starter technominds
  • Start date Start date
VSpaceBoy said:
Looking good.


That booth looks small. Is there going to be any windows or anything in there? I'd hate to be in there.

Nope, a mounted computer screen with a switch for a webcam. Because of the screen it isnt clostrophobic at all...
 
A bit more painting done..
 

Attachments

  • Borders Painted.webp
    Borders Painted.webp
    30.7 KB · Views: 227
very nice work you got going on there. I am very excited to start mine as well. Just curious if you followed some plans on that desk as I have seena few DIY ones that are of very simliar design. if so, do you mind sharing them? ;)
 
cincy_kid said:
very nice work you got going on there. I am very excited to start mine as well. Just curious if you followed some plans on that desk as I have seena few DIY ones that are of very simliar design. if so, do you mind sharing them? ;)

I designed it myself, if you search my threads you will find it.. if you cant, let me know what equipement you want it to house, and the style you want and I can mock you up a design in 3d
 
wow, awesome, thanks!

I will search and then get back to you ;)
 
As i was making my absorbers, i decided to take some step by step pictures, and post a little tutorial on how to make dead cheap absorbers, with next to 0 DIY skills.

What I used...

Cheap Timber, came 6ft long (average)
Jigsaw (a friend had one lying about, a handsaw would do)
Fabric (make sure you can breathe through it)
Staple Gun (you can pick these up really cheap)
Pack of 10 Rockwool, 4x2
Scissors

I had to work out a way of making these panels with my horrific DIY skills, so basically anyone with half a brain could make these panels...

Lets start off...

Step 1.
Step 1.jpg

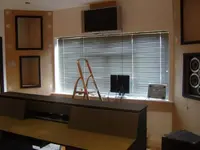
Find a cosy spot and get that timber out!

Step 2.
Step 2.jpg

Measure up to the 2ft, and mark

Step 3.
Step 3.jpg

Cut. Then repeat with another piece.

Step 4.
Step 4.jpg

Check lengths of the pieces match, if not, cut them so they do =]

Step 5.
Step 5.jpg

Place you wood down as shown, with the longer pieces thin side up and the short pieces fat side up. This means even with your dodgy cutting, the pre-cut flat sides will be nailed together.

Step 6.
Step 6.jpg

Nail like so.

Step 7.
Step 7.jpg

All the corners, one wont do.

Step 8.
Step 8.jpg

I had a bit of spair MDF lying about, which will be used as a support to hold the rockwool in place. You can use Tape (staple it down), string, or more timber.

Step 9.
Step 9.jpg

Bring in that rockwool

Step 10.
Step 10.jpg

Oh no! It doesnt fit! Use scissors or a stanley knife to cut it to size.

Step 11.
Step 11.jpg

Lay your material over and cut enough to cover it.

Step 12.
Step 12.jpg

Pick it up and put it against a wall, with the material facing the wall.

Step 13.
Step 13.jpg

Staple the top width of the material to the back of the short timber.

Step 14.
Step 14.jpg

Flip it upside down, pull tightly on the top and staple as you did the bottom.
Then do the same with the lengths. Cut off the excess material.

Step 15.
Step 15.jpg

Tada! You have yourself one lovely looking absorber, now get going making more you crazy little handyman you!

Ive been a busy man myself....

Multiple.jpg


Next week we will learn how to hang them (when ive worked it out).
 
Interesting... I never thought to use Rockwool for absorbtion, at least for sound ;)
 
onehandpass said:
Interesting... I never thought to use Rockwool for absorbtion, at least for sound ;)

Well, as its almost impossible to get rigid riberglass over here it was my only option.. I do believe it is as effective, if not more than fiberglass
 
technominds said:
Well, as its almost impossible to get rigid riberglass over here it was my only option.. I do believe it is as effective, if not more than fiberglass
I wouldn't say more... About the same. Anyway, was it Rocksilk stuff from travis perkins you used? Looks good... I'll post some pics of how I do them too. I've some ideas to get that professional look, hopefully they work. My ideas also leave the edges exposed, ie more absorption :D.
 
pandamonk said:
I wouldn't say more... About the same. Anyway, was it Rocksilk stuff from travis perkins you used? Looks good... I'll post some pics of how I do them too. I've some ideas to get that professional look, hopefully they work. My ideas also leave the edges exposed, ie more absorption :D.

Ah, I only left 2 edged exposed. You have a plan to leave them ALL exposed?! Id like to see how that works! Yea it was the stuff from travis perkins, I had to drive to some place in wembley to pick it up because they didnt stock it in the one down my road.

Its very rigid stuff and only itchy if it gets in your clothes.. otherwise you can just use bare hands with no problem! Il let you know how it sounds when they are hanging =]
 
This is how, hope it works...
 

Attachments

  • absorber.webp
    absorber.webp
    52.7 KB · Views: 185
hehe, great idea Panda. I may try that method when making the rest of mine =D
 
pandamonk said:
This is how, hope it works...

Thats a great idea! but im sure it will be hard to pull off!

Also, the rockwool doesnt have a particularly great edge, I much prefer to have the framing to be solid to that when it hangs it doesnt look to flimsy around the edges
 
technominds said:
Thats a great idea! but im sure it will be hard to pull off!

Also, the rockwool doesnt have a particularly great edge, I much prefer to have the framing to be solid to that when it hangs it doesnt look to flimsy around the edges
Yeah it will be hard, but I think it'll look quite good, unless the edges are really bad. I'll try one and see how it looks, once i get it. Still got loads to do before i get to that stage though.
 
Cant wait to see the finished room. Looking great! Where abouts do you live?
 
pandamonk said:
Yeah it will be hard, but I think it'll look quite good, unless the edges are really bad. I'll try one and see how it looks, once i get it. Still got loads to do before i get to that stage though.
Just bought 125m of fabric :D for the absorbers(£150). Better get cracking on with the studio...
 
pandamonk said:
Just bought 125m of fabric :D for the absorbers(£150). Better get cracking on with the studio...

Whoa, alot of money for fabric!
 
Back
Top