DIY thread.....

  • Thread starter Thread starter thane1200
  • Start date Start date
Hey frederic, if you EVER need hi vacume for soldering, I use compressed air. On the end of my levervalve(at the end of the hose) I have a 1/4" metal "T" threaded fitting. On the T leg, I have a small 1/4" x 3" piece of Teflon tubing stuffed into the end with a compression fitting. This is the "SUCKER". On the right end of the T is an adaptor to a standard male air fitting. On the other end(straight through from the air line) I tied a small cloth bag. Hit the lever for air, and "VOILA"......vacume....strong vacume!! Sucks the shit out of solder :D

fitZ
 

Attachments

  • soldersucker.webp
    soldersucker.webp
    6.9 KB · Views: 563
Last edited:
RICK FITZPATRICK said:
Hey frederic, if you EVER need hi vacume for soldering, I use compressed air. On the end of my levervalve(at the end of the hose) I have a 1/4" metal "T" threaded fitting. On the T leg, I have a small 1/4" x 3" piece of Teflon tubing stuffed into the end with a compression fitting. This is the "SUCKER". On the right end of the T is an adaptor to a standard male air fitting. On the other end(straight through from the air line) I tied a small cloth bag. Hit the lever for air, and "VOILA"......vacume....strong vacume!! Sucks the shit out of solder :D

fitZ


That's actually known as a venturi pump. They sell them through a lot of woodworking catalogs. We do a lot of vacuum clamping around the shop for jigs and the like, and we used a venturi pump before we bought a real vacuum pump. They are unbearably noisy though, or at least that is what we thought.


Light

"Cowards can never be moral."
M.K. Gandhi
 
Hey Rick.....

Hey Rick.......what program are you using for that illustration?
 
thane1200 said:
Hey Rick.......what program are you using for that illustration?

Rick, liking self-torture, uses autocad :) But the drawings are pretty for sure.
 
Hey Rick.......what program are you using for that illustration?

Hello thane, well, as frederic told you, I punish myself with Autocad2002 :p Actually, I am a CAD detailer, so it is really easy for me. However, I took a CAD test for Verizon the other day and they were using a program called Microstation. Never heard of it before the test. They gave me 77 minutes to do 10 things. Write my name in a block, draw 2 lines, one straight, one angled. Move a line. Measure it. Draw a circle. Stretch a rectangle and a few other simple commands. Took me a whopping 3 minutes and I'd never used the program :D I couldn't believe this was thier test, which accounted for 90% of my total test score. The week before was another story altogether. Took a series of apptitude tests :rolleyes: HOLY SHIT.......I failed miserably :confused: :eek:(I think) Some of that stuff I hadn't seen or used in 40 yrs! It sure confirmed my age :o :( :D As far as Autocad is concerned, I love it. Does everything "I" need. And it is intuitive...at least compared to some other programs I've tried.
fitZ
 
Update

Update on the PVC monitor stands that I'm building.....
I got some Maple at HomeDepot for (check this!) 4 square feet for $0.51!
I'm planning on staingint the tops, and painting the base and body matt black. Here are some pics.
 

Attachments

  • PVC stand down.webp
    PVC stand down.webp
    15.7 KB · Views: 444
  • PVC stand face.webp
    PVC stand face.webp
    14.2 KB · Views: 355
  • PVC stand face1.webp
    PVC stand face1.webp
    24.8 KB · Views: 328
  • PVC stand top.webp
    PVC stand top.webp
    22.2 KB · Views: 330
Here's my DIY setup:

DIY monitors (made from the Aria 5R kit)
DIY PVC monitor stands
DIY guitar #1 -- Les Paul knockoff
DIY guitar #2 -- strat knockoff
DIY guitar #3 -- Martin HD-28 knockoff
several other homemade guitars
DIY effects #1 --- distortion pedal (same circuitry as Fulltone '69)
DIY effect #2 --- boost pedal

That's all that jumps to mind, but I'm sure there's some more homemade stuff up there.

Now if I could only learn to play . . . .
 
frederic......I'm curious to see what you use to organize all your cables. I'm trying to decide if I want to build a giant "peg-board" of sorts, to hang my extra cables from. Any thoughts?
 
thane1200 said:
frederic......I'm curious to see what you use to organize all your cables. I'm trying to decide if I want to build a giant "peg-board" of sorts, to hang my extra cables from. Any thoughts?

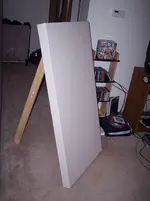
If you mean extra patch cords and mic cables, I've built a closet in the back left corner under the ceiling slant for storage which currently only houses my table saw since I've been too lazy to carry it down into the garage :D.

IM000830.JPG
IM000831.JPG


In this closet on the right side wall will be hooks, similar to coat hooks, which I will be coiling cables and hanging them reasonably sorted. I debating installing something like this:

bins.JPG


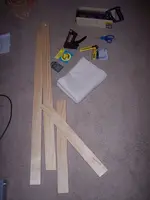
The drawback of bins and cabling is you know what is going to happen - the cables will invariably overflow the smallish bins and end up on the floor, tangled in whatever else I put in the closet. Hooks are really the way to go. Bins and drawers are great for adaptors (1/4" to RCA, xlr to 1/4", etc) and things like that, so I might do a combination. Making bins is easy, essentially its a wooden "grid" mounted on the wall with sections of wood along the front of the cubbies to prevent things from sliding out. I'm going to start off with hooks first.

In my last "pro" studio, as part of the construction we built a "wiring closet" which was a really cool thing, and extremely useful for us as we had tons of spare cabling and parts. What was done is at the narrow end of the machine room, which was kinda trapazoid shaped, say about 9' at the narrow end, 12' at the wide end, and 16' long both sides, we built a wall sized closet, a mere foot deep. The entire wall was covered with two 4'5" wide doors, floor to ceiling, the ceiling being 12-14' high. Huge, huge doors. The doors opened, and from the floor to about waist high, were wooden cubbies much like in kindegarden class :) Above that, on both the back wall and the back side of both doors, were shelving brackets and shelf hooks, with no shelves - the cables were looped over that. Using a pool pole with a coat hanger bent up like a hook wrapped in duct tape, we could get cables from anywhere in that closet. It was great because it took only a foot or so out of the depth of the room, and because it was in the machine room it didn't have to be acoustically treated at all, as the machine room was off to the side and fairly noisey anyway. That's where we put the Otari twins, spare media, etc.

But you have me thinking now... I may use the closet I made in the above pictures for now, but down the road, since I've already made an under-table rack for my recorders and the hot-swap hard drive system for the recorders, I don't need to use the "shower stall space" for recorders, when I redo the bathroom next to my studio. I could easily convert that into a closet and just hang the cables in there. At least I wouldn't have to crawl on the floor to retrieve and return spare cabling. In the picture below, the entry door is all the way to the right, and right next to that is a dark brown slatted door, which is the narrow access door to the shower stall's plumbing. This is where I could put a closet. Would be tight to get into, but hey, why not.

IM000725.JPG


Essentially, I hate drawers and cubbies for cabling. Long term, they end up on the floor or hanging out, and you'll bang yourself on partially open drawers. Hooks all the way. Just have to find a place for the hooks :)
 
My solution for cables is simple: at the home studio, all cables are 10', and I keep them coiled in a file cabinet drawer. The portable rig, all cables are 20'. That way I never have to worry about which cable I'm pulling, and it works fine to keep them in a stack.
 
great solution Ms.

I just hate drawers, because of my own organization issues (or lack thereof). Every drawer in this house, house, shed or garage, ends up filled with unsorted crap.

I got yelled at least week because on of the kitchen drawers had an alternator in it :)
 
I really think this thread should be made official. So *BUM to the P*
 
acoustic panels

I've started building a few rigid fiberglass panels for my studio space. They are 2ftX4ftX3in wrapped in two layers of loose-weave cotton fabric. Doubled up the fabric still passes air freely. These are pictures of the frame and fabric only, I'm going to buy the 703 tomorrow. I plan on using 3in thick fiberglass.
 

Attachments

  • materials.webp
    materials.webp
    52.5 KB · Views: 267
  • brace.webp
    brace.webp
    18.9 KB · Views: 222
  • frame.webp
    frame.webp
    47.6 KB · Views: 225
  • corner.webp
    corner.webp
    19.1 KB · Views: 233
  • full.webp
    full.webp
    52.2 KB · Views: 290
A thread this good deserves a bump. Thanks go to Thane for making me aware of it in a another thread.
 
Purge, you are very welcome. Hopefully more people use it!
 
Weineresque bass traps
Ceiling diffusor
Acoustic treatments
randomized wall diffusors, aka bookcases
racks for holding equipment
table for mixing desk
kajillion cables
ladder for chilling loft
entry porch for studio

still to come:
curtain assembly for windows
speaker stands sand-filled PVC type
reconstituted Motion Sound rotating horn enclosure
motion-sensing "recording in progress" light for spousal deflection
stone patio for smokers and other scum
 
Todzilla said:
motion-sensing "recording in progress" light for spousal deflection

I already have that issue resolved. My home studio has it's own outside entrance from the back/side of the house, but is joined to the 3rd bedroom my wife uses as her office, with a really nasty shaped bathroom in between (you have to duck to walk through, slanted ceiling, bathroom shoved in a place it shouldn't be....) anyway... the door to the bathroom between her office and bathroom itself has an electronic deadbolt. Push one button, the deadbolt slides out of the wall into the door. Push another button, the deadbolt slides out of the door into the wall. It's just like a normal deadbolt, but motorized, and the lock is in the wall instead of the door, and the door gets the striker plate, i.e. mounted backwards. I had to mount it this way so the electrical could be in the wall, rather than running thorugh the door.

This is on top of the normal locks that the door has, which were installed in 1941 and very fiddly.

Push button, lock wife, family, friends, neighbors out of the bathroom, and on my side of the bathroom I have double doors on one doorframe, so I don't hear anyone whining that the bathroom is locked.

My studio is insulated and built well enough that if my double doors are closed, you can't hear the toilet flush, or the sink running. But, you can hear the gurgling of air and water in the sewer pipe that runs partially through my studio floor, so this lock was necessary. The switch that locks this door, also cuts out the electric garage opener, so that noisy device mounted on the ceiling of my studio's floor, doesn't rumble underneath.
 
STICKY!!!
Or better yet a WHOLE forum! There are some really cool ideas in here, I wish I could get a dedicated place for my recording because at the moment I have to spread everything out over the whole house and my housemate doesn't like it that much. But then I could put some of these things into practice around here!

Anyway here's my effort:
Custom PC
Custom mic stand (read take cymbal tilter off of old tama boom stand and gaff tape a mic clip to the boom :D )
Homemade power amp. It's only mono, but that might change on day. Still 200ish watts into 4 ohms isn't too bad for running vocals though for practice etc. Actually a couple of the transisters are blown, so need to replace them.
 

Attachments

  • amp1.webp
    amp1.webp
    5.7 KB · Views: 213
  • amp2.webp
    amp2.webp
    3 KB · Views: 164
Back
Top