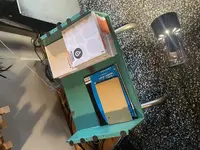
Quick set of questions: how long have you owned this 388?
I’ve owned it for almost two years now
Do you know if any trauma or damage inflicted on the unit prior to or after you took ownership?
The past owner told me that nothing wrong ever happened to it, it was actually supposed to be in good working condition as his add said. but when I turned it it was in poor condition.. got naive. connectors were rusty, a lot of gremlins sounds popping out of nowhere, intermittent problems on channel six, a LOT of bleed between track 6 and 7, the tape machine poorly calibrated, etc.
I had a tech looking into it at the time. He fixed the issue of channel six being intermittent. He also cleaned thoroughly all the pcbs by putting each one of them in an ultrasound bath which was pretty conclusive.
But then we came to the point, me and my tech, that we needed to calibrate the machine and when we went through the procedure to make the mechanical calibrations (setting up the tape tension arms with a tentelometer) we realized we were not even close of being in specs even with the trim pots screwed to their maximum capacity.
he realised that a lot of capacitors needed replacement and invited me to do a full recap of the machine in order to get proper results.
Many things happened while I worked on it. As I said, I am not an engineer and my sheer will to make my machine work without having to pay thousands of dollars and my love for the sound / workflow of tape recording drove me to try to repair it by myself. But I did mistakes, that I tried to correct the best I could.
Something went wrong at some point with the reel servo pcb; it was the first pcb I worked on and I murdered it. Bad traces and everything. . This is when things got nasty for a while. A short circuit happened because the reel servo pcb pcb was loose as I was testing it and touched the metal frame. Smoke came out. I think the machine didnt like it. This is when I started having logic transport problems. I can’t perfectly recall how it was behaving with the ancient pcb but I know at first the motors were just spinning WAY too fast. At some point it just stopped working. When I installed the new one, the transport went back to normal on play function, but as I described in another post the rewind and FF modes were acting all messed up because of a digital chip that was not behaving like it’s supposed to on the control pcb.
So after many months of troubleshooting we finally pinned down which one it was and I ordered it and installed it. I have to say that when I installed the digital chip, some traces lifted and went bad. It’s been a real pain to work on it to recreate the paths because it is a really tinny area with many many traces.. but when I replugged everything, it worked.
I had to buy three NOS tascam 388 pcbs, all bought from audioproz.com. One was a new reel servo pcb. Then I also bought a new power supply pcb because one fragile connector on the original one broke as I tried to plug it in. Same thing happened with one of the bias pcb which I had to replace.
I did a full recap, being extra careful of installing every capacitors with the right values.
Then one last goof happened when I’ve reassembled it all together, I inadvertently switched two connectors in the stereo master pcb and the buss pcbs area. I freaked out when I pushed the rec functions; all vu meters went into red peaks instantly and smoke came out of the machine. But then when I fogured out which connectors I switched and fixed it, the machine worked properly. It may have damaged something else though.
So.. the rest is me calibrating the machine. Getting decent results. Fixing my last problems through your assistance.
I went silent for a while because I did not want to bother anymore with all these issues. I am currently recording my album on it and after all the work I’ve put on it I just wanted a moment of actually using it for whats its supposed to be used for.
But now I can’t keep working like this, the issues just kills my workflow because of these three issues that drives me crazy:
- when the tascam runs for a while, especially when I operate a lot of Play / rewind / play rec / rewind / play rec and so on, the transport will eventually end up having some kind of failure. At first it took maybe one hour but now it takes like 15 minutes. I hit play and it spins for three seconds, then the right tension arm looses tension and it stops. But when I hit play right after, it works. Then as soon as I hit rewind or fast forward and hit play, the same problem happens again. Let me tell you it gets pretty annoying in the process of tracking..
- Second problem is that very weird phenomenon that happens on track 1 and track 7 when I record or playback with the DBX on. If I record a loud source in track 2 and record track one at the same time (let’s say two microphones from a drum kit for exemple) , a HUGE feedback occurs on track one and it just won’t stop. Its like a high pitched frequency. Same thing happens on track 7 if I record through track 8 while track 7 is on playback mode with the DBX mode. None of this happens if the DBX are off. I tried troubleshooting it a little bit, removed the dbx boards and did the same manoeuver with the DBX buttons on but it happens anyways so I know the problem doesnt come from the dbx pcbs.
Third super annoying problem is that when I try collapsing /ping pong tracks as described in the manual the same high pitched frequency happens on each track that are setup in recording mode. Its like the audio disappears and whats left is that super strident high pitched sound that makes everything peaks. And the sound gets recorded to tape. This happens even if DBX are off.
I wonder if I should buy a new stereo master pcb and or a new control pcb or not..
I hope it gives you some insight regarding the background on my tascam. If you got any questions I will do my best to provide.
I’m sorry to lay down other issues on the table; at least the last issues we talked about are fine for now. Track 7 records and also no more weird pressure problem with the vu meters peaking.
If anything happened under your watch, it would be EXTREMELY helpful for you to share…no judgment…if done some regrettable things or sometimes accidents just happen, but I’ve spent hours and hours helping somebody on my own time chasing gremlins only to find the whole time they knew they dropped something heavy onto the control surface or whatever and we could have just started there. I’m not saying that’s what’s happening here, but I want to rule it out because every post you put up has a blossoming set of issues and at some point, and we’re getting close, it will be too much for me to be able to assist.
I understand that and I don’t want to bother or anything. What you can provide I’ll take.
Thank you!