Remodeling The Studio....Again

  • Thread starter Thread starter Track Rat
  • Start date Start date
Track Rat

Track Rat

Just Your Average Sized Member
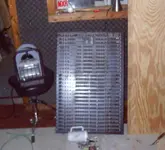
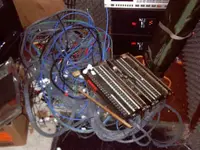
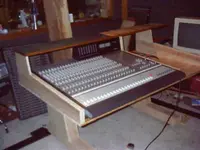
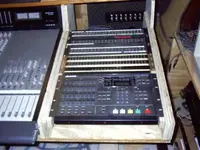
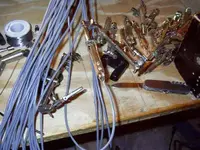
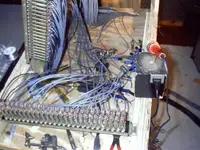
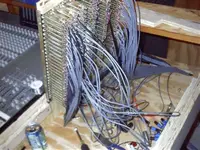
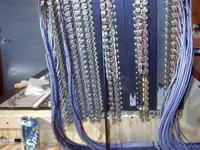
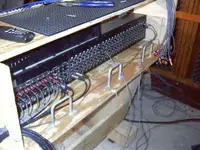
As of late, I've been increasingly dissatisfied with my studio. My control room was 10'x12' and the studio was 16'x12'. The control room is just too small for all the shit I've accumulated over the years so I decided to swap rooms. The thing that made me pull the trigger on this idea was buying a new 24 channel console to replace my 16 channel desk. I bought my new Tascam M3500 from a fellow member here from Louisiana that goes by the moniker Jburn34 (thanks again Jeremy!:D ). I'm retiring the old StudioMaster which has served me well over the years. This is the old set up that I've torn down.
http://www.johnlsayers.com/Studio/Pages/Human.htm
 
This is the old console (which is now for sale:D ).
 

Attachments

  • old studiomaster.webp
    old studiomaster.webp
    15.8 KB · Views: 1,125
The old wiring harness that I worked my ASS off on.
 

Attachments

  • wire harness & p bays.webp
    wire harness & p bays.webp
    18.9 KB · Views: 1,097
This is the new mixer setting in the desk I'm still fabricating for it.
 

Attachments

  • m3500 in table.webp
    m3500 in table.webp
    16.1 KB · Views: 1,112
I set the patch bays and the BRC in last night. I anticipate that the work is going to take at least another three weeks to complete. If anyone gives a shit, I'll update as I get things finished.
 

Attachments

  • brc & p bays set in.webp
    brc & p bays set in.webp
    19.4 KB · Views: 1,092
Track Rat said:
I set the patch bays and the BRC in last night. I anticipate that the work is going to take at least another three weeks to complete. If anyone gives a shit, I'll update as I get things finished.
If anyone's interested? Can I get a big ol' HELL YEAH!?
I want to see everything, even close up photos of solder joints. :D
 
You asked for it.:eek: 
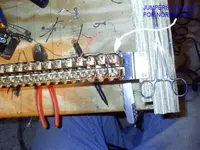
I'm headed downstairs right now to begin soldering.:cool:
 
Oh yeah, almost forgot:

You're comming to Austin to wire my patch bay.... right? :p


Holy She-ite!
InsidePatchbay.jpg
 
HELL YEAH! Looking great Track! Keep the photos coming.

Kevin.
 
Keep em coming!!

That desk looks really sharp. Can't wait to see how it all comes together.

Darryl.....
 
First lesson of the day; ALWAYS check the manual of the devices you're cabling to verify the pin out. The M3500 is pin #3 hot. EVERYTHING else I have is pin #2 hot. This could have been a major bummer had not a little voice in my head said "Hey stupid, check the manual".
 
Looking great Trackrat, and yes, I give a shit :D

We can't have Michael being the only show-off with his massive pretzal.

Wait until i start wiring, I might scare some of you. 22 144-TT patch bays...

eeeeeeeew.

First a motor swap, then wire studio. Yes, thats it.
 
I've wired MANY of those bad boys. Are you wire wrapping or doing a punch block for the rear connections?
Anyways, this is the second installment. This may be too much information but here goes. This is an individual jack frame out of the patch bay in a soldering vice soldered up to a cable. When I get all the frames for one bay soldered, then I reassemble them.
 

Attachments

  • individual frame.webp
    individual frame.webp
    21.3 KB · Views: 952
The only exception to building the bays this way is when I build normalled connetions for the inserts and such. Then I remove the bay from the rack and first solder the normalling connections. Unlike a lot of patchbays on the market where you just flip a PC board to nomal/un-normal, these Switchcraft bays have to have a few jumpers soldered in place.
 

Attachments

  • normalling a bay.webp
    normalling a bay.webp
    20.9 KB · Views: 947
Then I solder in all the insert lines.
 

Attachments

  • inserts soldered.webp
    inserts soldered.webp
    21.6 KB · Views: 954
Remount into the rack.
 

Attachments

  • remounted.webp
    remounted.webp
    23.4 KB · Views: 944
Then comb it out and tie it down with 9 ply wax rope.
 

Attachments

  • tied down.webp
    tied down.webp
    23.7 KB · Views: 883
I just mounted the bridal rings on the back to tie to and now I'll begine the business end.
 

Attachments

  • bridal rings.webp
    bridal rings.webp
    19.5 KB · Views: 879
One of my most important tools.:cool:
 

Attachments

  • essentials.webp
    essentials.webp
    14.6 KB · Views: 851
Man oh man, Track, looks like some ground radar units I used to work on. Yesseree, you'd pass the military tieoff tests! Ha! I went to Nasa soldering school back in the old days. Talk about STRICT procedures...holy shit. Makes studio work a breeze. But your sure doin a fine job there guy. I LOVE it when everything is tidy and tied down. Nice console project too!Hey, is that HOLLOW leg cable troughs I see?

fitZ:)
 
Back
Top