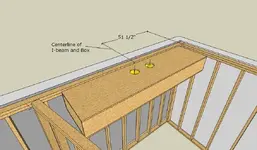
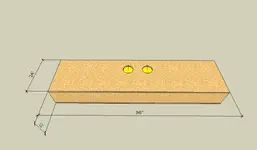
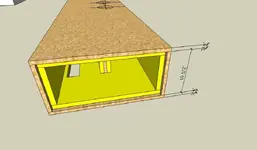
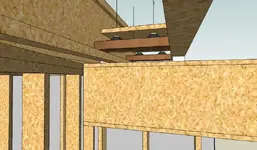
Hello Jim. As I was dimensioning the interior this morning, something dawned on me. Since this box is 12x24x96, it may NOT fit the pathway to the room

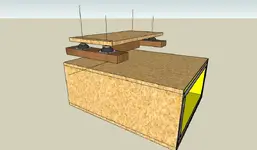
Not only that, but even if you get it in the room, most likely, because of the angled wall, you might have to move the box up against the wall up on edge, and then rotate it downwards to the floor on its bottom. Then you can lift it up. I am designing the hanger hardware for an EASY decoupled hang. From years of experience installing Store Fixtures, I've learned nothing is worse than trying to lift a heavy fixture and fastening it at the same time.
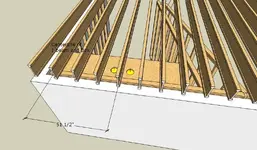
You might have to install some blocking between the joists, and wall studs, but I don't have the design down yet. I'll let you know. Also, IF, you don't think this will fit through the house in one piece, I'll redo it into TWO.
Anyway, heres the plan so far.
")
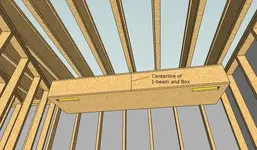
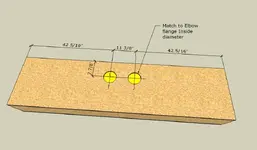
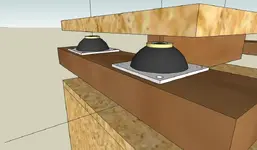
I didn't bother dimensioning the register holes because I don't know what you are using yet. The hole should be 1/4" larger than the hardware, all the way around, and you might have to install it with caulk/seals BEFORE the RC and drywall are installed, simply for lack of access after the drywall is in place. Then the Grill could go on after the drywall. Let me know when you have a register in mind. I'll post a TYPICAL detail of the concept later.
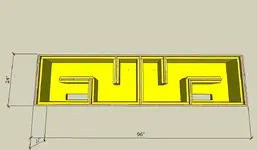
Also, I don't know the nature of your "duct liner" but I did show the insulation as 1" thick everywhere. You'll most likely have to custom fit these pieces as you go. Mainly, I'd assemble everything but the top, then insert the bottom insulation first. Then all the sidewall liners. Then the register. Then the top of the box. Then the hanging hardware. At least, thats the assembly sequence as I see it.
")
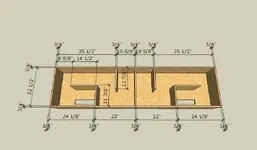
This will require the following pieces of OBS/Ply. The top and bottom will take one full sheet themselves. Then rip strips 10 1/2" wide by 96" long. Cut all the ends/partition and baffle pieces to length from these. It'll probably take two strips.
Top and bottom. (2)@ 3/4"x24"x96"
Ends and partition. (3)@ 3/4"x10 1/2"x22 1/2"
Center Baffles (2)@ 3/4"x10 1/2"x 12 7/8"
Register Baffles (2)@ 3/4"x10 1/2"x 11 7/8"
(2)@ 3/4"x10 1/2"x14 1/2"
As to assembly, for ease of assembly. I'd PRE MARK the outlines of the ends/partition and baffles on the top and bottom piece, and then PRE DRILL and countersink holes at about 8"oc. Then Pre drill the sides for the ends/partition and baffles. Assemble sides to the bottom first. Then Then the ends/Partition, and then the baffles. It would be easy to fasten these if you roll the unit up on one side, so you can fasten through the bottom, and through the one side. Then roll it back on the other side to fasten things to this side.
Hope this helps so far.
fitZ
 Ok, well, it looks like its time to put this together. I can see now you have your work cut out for you.
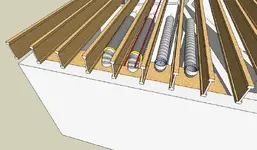
 Great. Ok Jim, that makes things easy now. Now, I need a couple of other pieces of info(I bet your thinking...jeeeezus, what now