TASCAM Wallpaper

  • Thread starter Thread starter The Ghost of FM
  • Start date Start date
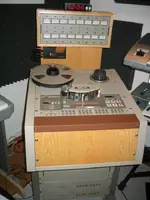
Found a few more golden nuggets hiding down in Sweetbeats archieves....


3Mopendoorwallpapertilted.jpg


Full sized image here;
https://i66.photobucket.com/albums/h250/thefontmeister/3Mopendoorwallpapertilted.jpg


And this one, a bit of a mock up as no cabinet actually exists yet, so I drew one up to fit the gear...


3Mtopdownmedium.jpg


full sized image here;
https://i66.photobucket.com/albums/h250/thefontmeister/3Mtopdownmedium.jpg


Cheers! :)
 
Well Ghost, I guess it must be true that great minds think alike.:D
 
Well if you are going to do that, please replace the missing knob for goodness sakes! :o
 
Well if you are going to do that, please replace the missing knob for goodness sakes! :o

The original photo actually had the bottom right corner cropped right out of the photo, so by the time I got through digitally reconstructing that and doing all the color corrections and scratch removals, I forgot about that knob in the middle. :laughings:

Cheers! :)
 
Sweetbeat's M_ series mixer with a bit of conceptual wood trim on my part...


IMG_3410wallpaper.jpg


1920x1080 wallpaper below;
https://i66.photobucket.com/albums/h250/thefontmeister/IMG_3410wallpaper.jpg

Cheers! :)

Oh...snap.

THAT is amazing.

That gives me some ideas. I'll have to play with some of that. Some of my limitations will be on the thickness of the wood that I have as well as the widths. The wedges at the meter bride sides would be the tough ones for me to do...and I was originally thinking that the frame sides would be narrower like the trashed-up panels that came with the mixer were...M-500 style. Can you do one like that and take the wedge out of the meter bridge side caps? I'd be curious to see what that would look like...and less red/orange in the wood.

Its really exciting to see a mock-up with the panels...that's doesn't look like a mock-up. :)

Here's a pic with the original side panels for quick reference:

https://www.torridheatstudios.com/ftp/share/pictures/Tascam%20M-___/Damaged%20Side%20Panel.JPG

I was also thinking I would put a small chamfer along front and top facing edges of the trim panels to reflect the 45-degree corner treatment with the screened-on borders on the control surface...this mixer as well as a number of the early 80's products had that detail...like the little 45's you see here:

https://www.torridheatstudios.com/ftp/share/pictures/Tascam%20M-___/shoulderpain%20pics/mixing%2520console%2520011.jpg

Well, first off, thanks very much for the kind words on the shot! It represented close to 5 hours of work in Photoshop to do all of the process steps which include building each edge-face of the wood pieces with having not much more then my eye to go on as a judge for correct perspectives, which in no small part is what makes these become highly life like mock ups!

I did do another version with the similar angled shot that you uploaded but had more trouble with that one because the lens in your camera induced some very difficult fisheye-like distortions that were essentially impossible to correct. But, that didn't stop me from trying! :D And on that particular shot, I did do more M500 style trim pieces, though they are a bit thicker, as I found the skinnier ones just looked too ...cheap, for lack of a better term.

Anyway, here's that one...


IMG_3409CS5wallpaper.jpg


full sized 1920x1080 wallpaper below.
https://i66.photobucket.com/albums/h250/thefontmeister/IMG_3409CS5wallpaper.jpg


I think you'll probably agree that the full sized side boards with the additional meter bridge end caps would definitely give the mixer a style and class that it fully deserves, rather then it being just a nuclear mutant cousin of the M500 series mixers. And yeah, I also realize that would involve far more work to achieve as well as present some difficult woodworking challenges to get the angle cuts just right. In that regard to you not having thick enough wood stock, you might get away with gluing two thinner pieces together to get the right sized hunk o wood to work with...I've seen this done before with pretty good success so long as the grains match up reasonably close. Something to think about anyway. ;)

Cheers! :)
 
:eek:


!!!


:eek::eek:

Wwwwwooowwwwwwwww....!

Folks, trust me...it don't look that good in person...
 
I think you'll probably agree that the full sized side boards with the additional meter bridge end caps would definitely give the mixer a style and class that it fully deserves, rather then it being just a nuclear mutant cousin of the M500 series mixers. And yeah, I also realize that would involve far more work to achieve as well as present some difficult woodworking challenges to get the angle cuts just right. In that regard to you not having thick enough wood stock, you might get away with gluing two thinner pieces together to get the right sized hunk o wood to work with...I've seen this done before with pretty good success so long as the grains match up reasonably close. Something to think about anyway. ;)

Cheers! :)

Yeah, Jeff, this is actually really helpful...I don't think I can go the full-bore treatment, but it definitely needs more than what I was originally thinking.
 
^^ Thanks Cory! :)


This next one's a bit of a Frankenstein project as it was put together from different cameras at wildly different resolutions coupled with a good deal of digital cabinet making on my part to create something I like to call the...440-2. :D


Ampex440-2trackwallpaper.jpg


Wallpaper sized file below;
https://i66.photobucket.com/albums/h250/thefontmeister/Ampex440-2trackwallpaper.jpg


My thanks again to Sweetbeats for providing the original images and for the extra effort he went through to get me a nice shot of the channel amp units which I'm working on a separate wallpaper of them in isolation. Stay tuned for that one!

Cheers! :)
 
Back
Top