Tascam 388 Fader/VU/Actual Output differences

  • Thread starter Thread starter frcake
  • Start date Start date
You have to remove the bottom panel, remove the knobs from the channel you want to service, *carefully* remove the BUSS PCB that spans across the bottom of all the mixing section PCBs, unscrew the channel’s fader, unplug any other connections, remove all the pot nuts for the channel on the top panel, and you should be able to remove the PCB from the chassis, or at least get it out enough to service the pots.
Ok cards are out of the machine, super carefully.

There are a couple different passages or holes in the pot body into which you can inject the cleaning agent. And I really recommend DeoxIT F5. It cleans and protects and lubricates carbon element potentiometers without stripping the shaft lubricant.
Ok I sprayed the following locations:
20260628_151339.webp


20260628_151359.webp


Now the problems:
All the potentiometers feel great except for the Even/Odd and the EQ Level pots.

From looking at them, they appear to be a different type of potentiometer than the rest of the console. All the other pots still have a smooth, well-lubricated feel, whereas these feel noticeably different.

I'm currently working on channel 8 and stopped before continuing so I could ask for some advice.

The Even/Odd and EQ Level pots feel as though they've lost their lubrication. You can actually feel the increased friction as you turn them. What's interesting is that they never felt quite the same as the other pots to begin with. Even on the channels I haven't sprayed yet, these particular pots have always felt slightly rougher than the rest.

Teslanol T6, claims to provide the necessary lubrication. I've since ordered DeoxIT F5, but after reading various discussions online, I've come across several reports suggesting that even F5 can wash away the original lubricant inside certain potentiometers.

I've also bought some Caig FaderGrease. Would it make sense to open these pots, apply fresh lubricant, and try to restore their original feel? Or is there a better approach?
 
Last edited:
Do you want smooth feel, or silent, crackle free operation? My experience is that pot cleaning is often the sort of thing people do before selling them, because it rarely lasts. The actual problem is actual wear. you have a carbon disk and a wiper and after years, the surface deteriorates and the extra pressure from the wiper deforms the track under it when it never moves. If you can remove and dismantle, then you can clean properly. Pots are in many ways, like video heads. Solvent, that softens and allows debris to be wiped off works very well, if the solvent is sprayed under pressure, then the loosened debris gets relocated somewhere less critical. You can use a cleaning tape, but all they do is wipe the surface clean but leave most of the rubbish in place, where it rehardens. Despite what people claim, the hand test does it for me, before I squirt it in holes. I put it on the palm of my hand, wait a few minutes and see if it totally vanishes. WD40 always leaves behind a slippery residue. Isopropyl alcohol does not. A few years back I managed to buy on amazon some empty plastic bottles with the long very thin tube - designed, I think, for thin superglue. Guitar folk use them for running down the side of frets. I put IPA into these and then poked the thin tube into the little access holes in difficult to reach pots, then a hefty squeeze and the 'schluch' seemed to do the trick. Brand new fader are not as far as I know, lubricated - the carbon has a very low coefficient of friction - it's naturally slippery. Any form of grease seems a very short term 'cure'. Any lubricant is naturally sticky - the whole point is to create a barrier between surfaces. Exactly the opposite of what you need. I'm involved in a historic lighting equipment collection and we have lighting desks with hundreds and hundreds of faders. Best success is something to remove oxidisation on the metal on metal versions and simple gentle cleaning and solvent on the carbon faders. Clearly, many of donations have been 'cleaned' with products very unsuitable. Some cleaning has actually badly damaged the tracks - some of the cleaning chemicals seem to have soaked into the carbon. One appears to have been lubricated with Vaseline petroleum jelly. I actually tried that. amazingly it worked. Three weeks later (in the winter), the fader would hardly move. No actual damage, but I have seen that suggested as a fix on audio pots and faders far too often.

I worked for a while in TV and videos were lidless, in a rack (Panasonic MII) and we used a substance called colclene - recommended on the can for being suitable for guided missiles. It was alochol with additives and was amazing stuff, but the additives are banned now. Shame! The current product is not the same.
 
Do you want smooth feel, or silent, crackle free operation? My experience is that pot cleaning is often the sort of thing people do before selling them, because it rarely lasts. The actual problem is actual wear. you have a carbon disk and a wiper and after years, the surface deteriorates and the extra pressure from the wiper deforms the track under it when it never moves. If you can remove and dismantle, then you can clean properly.
For sure crackle free operation is what I'm after. I'm kindof scared that with this more "rough" feeling the potentiometer might be damaging inside when it moves left/right.. It's the sort of movement that when you apply a steady rotational force to the pot instead of moving smoothly it will have small stuttery jumps. I'm dumb I shouldn't have sprayed this pot, it was perfectly fine, I got carried away by the claims of lubrication of this product. I will only spray the things that actually crackle which luckily are not affected (at least as much) by the chemical and keep their smoothness for the most part. At least enough to not make a substantial difference..

Sadly I don't think I'm the most qualified person to go close to the tascam with a soldering iron.. maybe I could get it touch with my tech to see whether opening the potentiometer makes sense..


Edit: There are also some good news though! the crackling of the EQ band selector have stopped! I will spray these and try to see how the machine sounds. I'm also waiting for the cal tape tomorrow!
 
Last edited:
What Rob said ^^^^.

And to add to that/reinforce that, you got advice from me to pull the PCB assemblies because you were having problems with intermittent operation from the potentiometers. You said nothing about “feel”. And the pots don’t “lose” their lubrication…it’s grease. After 40+ years it hardens/dries up. And between that type of lubrication and the lubrication some cleaning products may have, we are talking about two completely different circumstances of lubrication. They are both mechanical, but for different reasons and different types of lubrication. The grease that impacts the feel is between the shaft and the potentiometer chassis…the cast aluminum part at the top of the potentiometer through which the shaft passes. That grease is actually there as a dust shield. It also provides some drag so there is some better control on the position of the shaft. Obviously with the decades that drag often becomes undesirable as it increases. But the lubricating properties of, for instance, DeoxIT F5 FaderLube have nothing to do with the feel of the potentiometer, rather it has to do with leaving behind a lubricating film on the element to reduce friction and wear and improve contact between the wiper and the element. This has no impact on the feel of the pot. Yes, I have found that if I put a tiny amount of product, like just enough to wick in a little at the top of the potentiometer chassis where the shaft comes out, and then exercise it a bunch, it can loosen up the hardened/dried out grease and make the shaft easier to turn, but I avoid doing this out of concern that may cause grease laden product to leech down into the works and contaminate the element and/or wiper. You do not want the grease that is up in the chassis to get down onto the element and wiper. So I stopped doing that a long time ago, and just accepted the stiffer feel of some pots as character. And yes different pots have different different assemblies, varying number of elements, varying length of shaft that is in contact with the potentiometer’s chassis, they will feel different than, say, the single element MIC TRIM pot. Don’t expect them all to feel the same. I’d spend less time and energy and focus on trying to get them to feel “right” to you and more on just getting them flushed and exercised…get them functional. And don’t judge whether or not the treatment has been effective until they have had the chance to thoroughly dry out. And remember, your issues may be a compound of the need for treatment AND aged coupling capacitors, AND/OR worn elements and wipers like Rob said ^^^^^. I will say on the latter that’s not generally what I’ve run into on something like a 388, unless it is clearly a very high mileage unit and you’d have issues with the r/p head being worn beyond service life as an indicator of a high mileage unit if that was the case. I see worn elements/wipers more on actual production consoles that have been used for many years in a true professional production environment, either a touring console or console in a busy recording studio. And I see it much more in linear faders vs rotary potentiometers because, at least with this grade of ALPS potentiometers and the more budget linear faders, the wiper construction is similar, but the amount of travel for that same wiper is 6-10x greater in the linear fader, and often faders are getting more actuation than the rotary controls. So the wipers wear out faster in the faders. But, still, with all the different units I’ve worked on, and faders I’ve serviced, it’s rare for the wipers to show appreciable wear even in the linear faders. But it can happen. Mostly the “skritchies” in the potentiometers is because of the need for flushing and because of aged coupling capacitors. My early 1980s Tascam prototype console is a good example…same series potentiometers as your 388, but the entire thing was recapped 10-12 years ago…it’s really quiet, very little skritchies. It doesn’t get much use, so when I power it up there’s always a little bit of exercising needed, but this is normal. I don’t really know how much use it got before I got it, but I know for sure it was FILTHY and neglected when I got it, and even at that, with some cleaning and exercising and the recap it works well. I’ve also found if a device has lived in a humid environment or smokey environment, or been stored in a humid environment, it makes everything 20x harder to get working. So if I’m looking at acquiring something I look for telltale rust on fastener heads and smell for the smoke. If it’s been in a really smelly environment you can even just rub your finger on the surface and see the tar. These things wreak havoc with potentiometers, switches and plugin contacts. I run away if that’s the case, or if a client comes to me wanting XYZ done and the unit is reconditioned these ways I try to set realistic expectations around the potential rehab-ability of the unit.

Caig Fader Grease for rotary potentiometers: one word…NO. Read the application notes. That product is for application on targeted mechanical bearing points, typically in linear faders, and it is designed for conductive plastic faders because typically those are a higher-grade assembly that can be opened up and serviced…designed to be serviced. And, again, it’s a product designed for targeted application. It comes in a syringe for a reason. It is NOT for packing into small rotary potentiometers to improve the “feel”. If you did that you would ruin any potentiometer to which you applied the product. And as for disassembling the potentiometers, I can’t recommend it. They are not meant to be disassembled. First of all you have to desolder them from the PCB to open them up. And the PCB material used in units like the 388 are a less robust phenolic resin type base material. They require greater skill and care when removing and soldering to avoid damage to the traces and pads. So if you are not skilled at this I would not do it until you can practice on scrap PCBs and develop your skills or damage is likely. And even after you get the pot removed, then you have to carefully pry the tabs of the pot body away from the chassis. That allows you to then remove the body from the chassis, but that only allows for better cleaning and inspection. And this is much more complicated on multi-element pots, particularly stacked pots. And none of this helps with doing anything with the grease that’s up in the chassis. To get to that you have to drill out the end of the shaft which is swedged into a nylon retainer at the bottom of the assembly. And, again, this is all way more complex on multi-element and stacked pots. And then when you try to put it all back together it’s hard to get everything to stay together because you’ve removed (by drilling) the material that was swedged so you have to strategically punch the shaft end and, at times, use super-glue to get everything to stay together. And it’s hard to do this without bending the shaft. And sometimes it never feels the same again. It’s all just a bad idea. How do I know all this? There are some pots on my prototype console that were made by ALPS specifically for that prototype project. And one of them was broken…broken shaft. And I couldn’t stand for that and wanted to swap in a good shaft from a spare pot. I have lots of parts laying around here so I sacrificed maybe 6 more common pots just learning how they go together and learning how to do the transplant and get things back together successfully. And I was successful in the end. But it was a tenuous chore and definitely tested my skills and patience. So I don’t recommend disassembling the pots to service the shaft lubricant…at all. If you’re skilled at soldering and removing multi-pin components, then getting the body off for better visual inspection and cleaning is an option if you really have a problem, but 99% of the time I get the results I need by flushing and exercising as I described in my previous post…like, follow the procedure…and then also often coupling the effort with a recap, depending on the device and the age of it.

Switches…do not under any circumstances use a cleaning agent that includes any lubricating properties. The switches do not have wipers and elements, they are metal-to-metal contacts that need an agent for that purpose like DeoxIT D5 or in extreme circumstances Gold or D100. The problem with the ALPS switches like what’s in your 388 and scads of other devices is the contacts are brass, and the oxidize, and the oxide is non-conductive. The switches can be disassembled but it’s also a challenge. If you want to clean them well though that’s what you have to do, and it’s a challenge. I use Brasso and then thoroughly clean with iso alcohol and then reassemble and apply D5. But you can often improve things just by liberal application of D5 and lots and lots of exercising and then follow-up application of the cleaning agent. And if things are stubborn the Gold or D100 can help. So don’t go crazy disassembling things. Try what you can with proper products and techniques as described, and by “proper” I just mean recommendations I’m making that are from trial and error experience and studying what other do, and studying how these things are put together and understanding what the problems are and deriving mitigation strategies. That’s where I’m coming from. Ultimately sometimes switches need replaced…”re-switching” is a thing that has to be done sometimes, but, again, I see that more in even older consoles and moreso in consoles that have been in a true production environment with higher miles. But the ALPS switches are still available. But don’t assume you have to go to that length…try application of a proper product, lots of exercising, and then additional flushing first.

 
Last edited:
@sweetbeats

Thank you for sharing all this wealth of information. This is so valuable and answers the majority of the questions I've had crawling forums for parallel subjects.

Since the screechies are gone with this contact cleaner, I'm just doing that and nothing else, only the EQ band selectors. No disassembly of anything and not touching anything else. I thought I'd be thorough but why mess with something that already works.

I've seen people uploading super deep and extensive videos about potentiometers and cleaning them and taking them apart and doing all kinds of things, applying silicon lube on the carbon parts, silicon lube on the metal housing and whatnot. For the life of me I prefer exercising than doing that. I lack both skill and patience and after all I just want to make music.. So broad strokes, get as many things as I can to shape with the console, calibrate and we'll take it from there.

Thanks again @sweetbeats for sharing all that with me!
 
You’re welcome.

I thought I'd be thorough but why mess with something that already works.

This ^^^^.

Yeah I’m super-prone to going to the nth degree, but I’ve learned over the years to temper that inclination against what makes the most sense to do, and part of that is knowing my own limitations and also recognizing, while I may think I understand everything about the thing I’m thinking of doing, I probably don’t, especially if there is anything new about it. And I’ve learned these things by repeatedly diving into things, with forethought and some skill mind you, but many times encountering the unanticipated outcome and finding myself thinking “Well I didn’t see that coming…”, and regretting diving in. The most important thing, as you’ve identified, is to get it working right.

I’m glad the cleaning helped the EQ pots. The EQ pots can be touchy…I’ve found multiple instances where a device I’m working on that has skritchy EQ pots can sometimes end up howling or feeding back at the extremes of the sweep range, especially if it’s boosted…so I might have the band boosted and if I sweep to the high end of the sweep range and sweepy it around up there it will squeal almost like feedback. In those more extreme cases cleaning and exercising helps, but ultimately a recap kills the problem. Audio signal is AC voltage. You don’t want DC voltage in your signal path. But it is normal for there to often be some small measure of “DC offset” at the output of an opamp. Capacitors, among doing other things, block DC but let AC pass. So you’ll find coupling capacitors at those opamp outputs to block that naturally occurring offset. As caps age they may not block that as well. And then dirty pots can make those static-ey sounds as the wiper struggles to maintain consistent contact with the element…kind of like when you switch the pickup select switch on a guitar you might get a little click as the contacts switch…that’s a little DC pop and that’s what the skritchies are. I think with aged coupling and other caps in the EQ circuit blocks, the DC artifacts can make the opamp feedback loop resonate or oscillate. I find this more often with the JRC/NJM branded opamps found in devices like the Teac stuff. Anyway, that’s my theory. Sounds like you are able to manage your issues with simple treatment from the exterior of the pots and exercising. Your 388 may have lower than average miles on it. You should post a pic of your lifter posts on the transport.

Also, those videos you see about people going crazy with their cleaning, yes some higher-class pots are easier to get into, but they’re all put together kind of the same way. They higher-class pots are conductive plastic instead of carbon element and have higher quality wipers. That helps them last longer, get less dirty and also be more forgiving of contaminants…also easier to clean.
 
@sweetbeats so!

After letting the channels dry from the spray only channel 2 still has scratchy EQ band pots. I will give it another go, otherwise recap it is (for this one at least?)..

About calibration. I got a tape from Ural91. Im not sure I did the procedure correctly. Did 2 things:
1. Left the machine at Line and played back the tape, set everything to 0 when the 250nWb 400Hz sine played back.

2. Put the machine on mixdown mode, assigned each channel L/R and panned it and again calibrated for 0

I tried these both with DBX on and DBX off. I guess the tape came without dbx encoding so the decoder would kill the highs - still don't know if that concerns the faders.

Problem is, for any other tone I never got a -10 reading on the VUs, VUs were barely moving... I got some weird readings at low Hz, like some channels were louder and some quieter..

Am I doing it wrong or is the machine cooked..

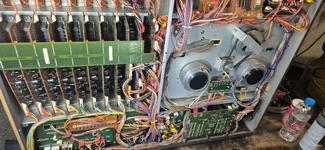
Also here are some photos of the machine!
 

Attachments

  • 20260702_185153.webp
    20260702_185153.webp
    1.8 MB · Views: 14
  • 20260702_182423.webp
    20260702_182423.webp
    1.4 MB · Views: 16
After letting the channels dry from the spray only channel 2 still has scratchy EQ band pots. I will give it another go, otherwise recap it is (for this one at least?)..

The caps in the unit are going to age at the same rate. If one channel is not performing well I would not attribute that to bad caps if the others are okay. I mean, really, it’s at or pushing 40 years old, so the caps are suspect, but, again, if the rest of the channels are good #2 should be good…I’d treat and exercise again before recapping. Make sure it’s dry and then exercise afterward. Be realistic in your expectations. It’s likely there will still be some skritchies, but you should be able to make them go away with some exercising at power up and they should not be an impediment in signal quality or signal passing. If these issues exist *then* you’ve got a bigger problem. But don’t expect it to be perfect.

About calibration. I got a tape from Ural91. Im not sure I did the procedure correctly. Did 2 things:

1. Left the machine at Line and played back the tape, set everything to 0 when the 250nWb 400Hz sine played back.

I don’t know anything about that vendor and can’t endorse the quality or veracity of those test tapes. I can’t find any information about how they are made. Test tapes matter. And it’s the only way to truly calibrate your machine. I still defer to MRL as a source for test tapes.

2. Put the machine on mixdown mode, assigned each channel L/R and panned it and again calibrated for 0

I’m sorry but I’m not following you here.

I tried these both with DBX on and DBX off. I guess the tape came without dbx encoding so the decoder would kill the highs - still don't know if that concerns the faders.

No test tape should be encoded with any type of noise reduction, and, per the service manual, calibration is done with dbx off.

Problem is, for any other tone I never got a -10 reading on the VUs, VUs were barely moving... I got some weird readings at low Hz, like some channels were louder and some quieter..

I don’t know how to help you…I can’t see what you’re doing, what you’re doing wrong if that’s the case, can’t visualize your machine to look for physical or operational issues, etc. I also have no idea if you’re following the steps in the manual. They are laid out in the order they are supposed to be done, starting with the mechanical checks and adjustments. Those are to be done first. You don’t have to do every single one of them, but they are interdependent, some of them, and so you have to be thoughtful about this if you’re not doing all of them. Proper mechanical performance has a direct and substantial impact on proper electronic performance. And the electronic checks should start with calibrating your meters. And you have to do this with a proper dedicated external audio frequency level meter. I have no idea what test equipment you have. The manual outlines what you need to perform the mechanical and electronic checks and adjustments.

Am I doing it wrong or is the machine cooked..

As above I have no idea. I think you need to take it to a tech…I have no idea if you are executing the steps in the manual properly, have the right equipment or skill, etc., and it is extremely time-consuming to walk somebody through all of this remotely when everything is this ambiguous. Sorry.

Also here are some photos of the machine!

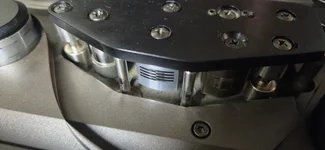
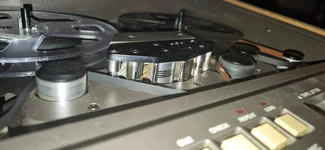
It’s hard to see much here since the lighting is so dark and the picture is at such an angle, and the highlight is on the erase head rather than the r/p head. All I can say is it looks like a nominal mileage machine just based on the wear pattern on the lifters but that’s just a guess because, again, it’s hard to see much from the picture.
 
@sweetbeats

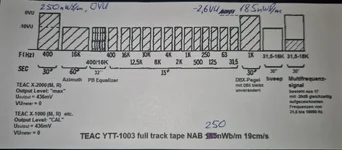
The tape is a YTT-1003 at 250nWb. Ural tapes are used by many here in Europe. I'm also attaching more photos.

So my steps are:

DBX on, RMX mode, all panpots in the middle, faders at grey, and only the red L/R buttons pressed. EQ off.

I playback the 400Hz tone and use R128 to calibrate. I hit 0VU with my Multimeter showing .320 VAC on RCA Tape Out 1. So the VUs agree with the VAC.

Now when the 16KHz tone "azimuth adjustment" plays I get nothing on the Multimeter... (And of course nothing on the VU as well..)

I have the UNI-T UT89XD multimeter...
 

Attachments

  • 20260703_184706.webp
    20260703_184706.webp
    930.8 KB · Views: 14
  • 20260703_184452.webp
    20260703_184452.webp
    402.8 KB · Views: 13
  • 20260703_184440.webp
    20260703_184440.webp
    354.7 KB · Views: 13
  • 20260703_184402.webp
    20260703_184402.webp
    1.9 MB · Views: 14
As per my last post and the manual, dbx OFF for electronic checks/adjustments.

Please tell me you are using the manual.

If you are referencing the TAPE OUT jacks none of the mixer settings matter. The TAPE OUT jacks come straight off the reproduce amp.

Stop posting pics of the erase head. That tells me nothing.

And it doesn’t matter what the VU meters register if you haven’t calibrated them. Have you calibrated them?

I don’t want to research your meter for you. You find the manual online and post the link to it here please. Is it true RMS measuring? Can it even measure 16kHz accurately? Again, the manual calls for an audio frequency rated level meter. Is that what you have? You do realize the 388 only goes up to 16kHz at best, right? That’s the -3dB point in the specs. If you haven’t done all the other mechanical checks and adjustments as well as bias and EQ and other electronic calibration adjustments as per the manual, don’t expect to get 16kHz out of it. It falls off quick at that range at best. And, again, you have the dbx on. And maybe your meter isn’t rated beyond 1kHz I don’t know.

AND…now I know you’re not reading the manual fully. You don’t use 16kHz for azimuth adjust anyway. You use 10kHz for fine set azimuth. And yes you should be checking azimuth with your scope or some other appropriate method before even starting the electronic calibration. Follow the manual.
 
@sweetbeats ah sorry, this is just how ignorant I am about all that. I did not go into full manual detail you are right, I just wanted to quickly see if there was a problem.
I have a week of the studio now where I'll read the manual in detail and hope I'll come back wiser.. Also I will post a picture of the correct head.. now that I know :D
 
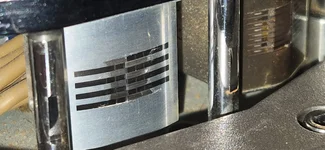
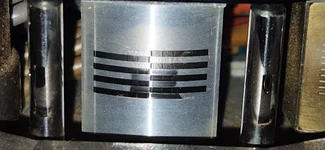
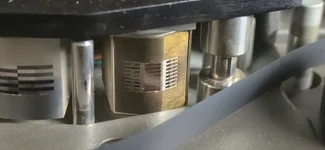
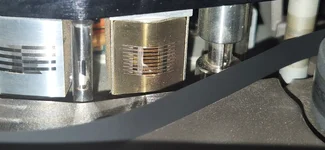
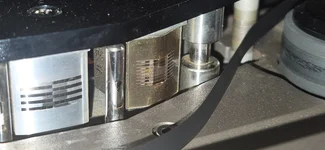
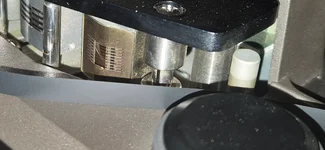
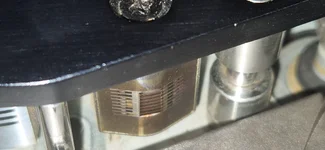
@sweetbeats Finally some photos of the correct head... Not much progress on other topics yet so just updating on the head subject.
 

Attachments

  • 20260711_210928.webp
    20260711_210928.webp
    235.3 KB · Views: 8
  • 20260711_210957.webp
    20260711_210957.webp
    447.2 KB · Views: 6
  • 20260711_211004.webp
    20260711_211004.webp
    482.2 KB · Views: 7
  • 20260711_211010.webp
    20260711_211010.webp
    523.4 KB · Views: 7
  • 20260711_211751.webp
    20260711_211751.webp
    381.8 KB · Views: 7
Back
Top