You are using an out of date browser. It may not display this or other websites correctly.
You should upgrade or use an alternative browser.
You should upgrade or use an alternative browser.
S
stevieb
Just another guy, really.
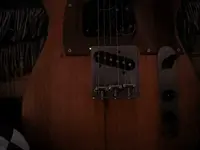
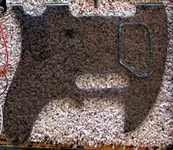
THE MAN MAKES HIS OWN FREAKIN' PICKUPS FROM SCRAP. I am impressed.
But wait, maybe not so much- he didn't make his own PIEZOS from scrap. Now, I am so dissappointed.
But wait, maybe not so much- he didn't make his own PIEZOS from scrap. Now, I am so dissappointed.
guitar junkie
Guitar User.
I have been learning a lot from this thread, it sure has been fun to watch this one come together!
crazydoc
Master Baiter
crazydoc
Master Baiter
crazydoc
Master Baiter

crazydoc
Master Baiter
crazydoc
Master Baiter
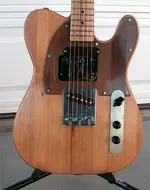
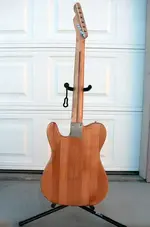
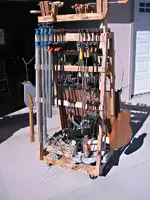
I sprayed polyurethane from a left over rattlecan for the finish - about 3 coats on the body and 5 on the neck. They're hanging to dry from my clamp rack. You can't have too many clamps (or guitars or mics.)
Yes, I was too lazy to take the tuners out before finishing.")
Yes, I was too lazy to take the tuners out before finishing.
Attachments
Rust E-Z
New member
This happens once in a great while, your just cruizing some of your old haunts on the internet trying to get tired enough to fall asleep and then out of nowhere, a new hero reveals himself. I think this is the coolest project thread I have ever seen. Really, I'm being serious.
Really, I'm being serious.rayc
retroreprobate
This project & its DIYist are plainly insane.
It's as a result of such insanity that innovation, invention, craft & art come into the world.
I assume that the finished product will be described as a Telecaster Copier;
That the knobs will be for number and toner;
That the selector switch will choose degree of brightness;
That the Piezos will go through the bypass;
That when oit goes out of tunes a message wil blink telling you it's time for a service
BUT
my only worry is what you'll do if you get into ajam & run out of paper!!
Superb piece of work - will you post a sound sample?
crazydoc
Master Baiter
I think this is the coolest project thread I have ever seen.
Thank you Rusty. But I have to disagree that "There are two kinds of people, those that pigeonhole everybody into two generic categories, and those that know better."
My belief is that, yes, there are two kinds of people in the world, but the categories are: those that pick their noses and admit it, and those that pick their noses and won't admit it.
I'm blushing at the comment - I'm not deserving of such high praise.This project & its DIYist are plainly insane.
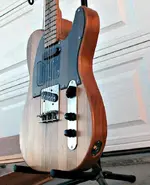
I could post a sample, but I'll have to record one first. We'll have to see how that goes. I'm not much of a guitar player, especially electric.
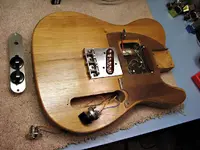
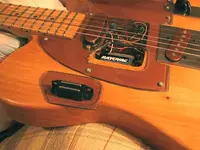
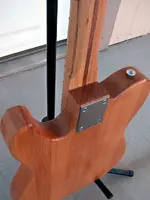
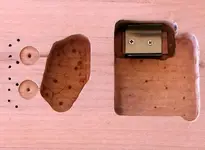
Anyway, time to wrap this up. I don't have many pics of the assembly process - it's pretty straightforward screwing things together and wiring. Here I was just trying it out, bypassing the volume and tone controls.