P
pk1
New member
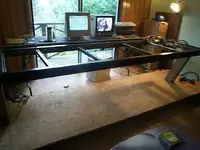
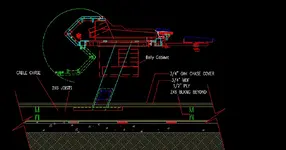
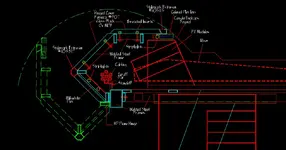
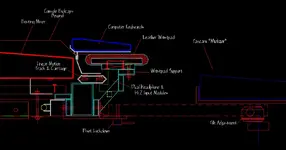
if i were you.. i would just wait a few days for me to finish these plans and post them... i need to check i can post them here if not i will sort a site out to grab them from.. also the base is easy, you make the legs, front and rear panels then the rear and front shelves then you need to put a mixer onto the top and measure the base to the top of its meter bridge ( if it has one) to get the height of the rear bracket that supports the rear upright panel that takes thhe flyover shelf 140 degrees hinges.
this is simple but you need to see the whole thing also the inserts have a step in them this is because, the front shelf is flush with the top of the side panel but the rear shelf sits on top.. thats why the inset has a notch cut into the rear for it to sit into the shelf to prevent rear movement, also when the armrest is fitted it stops forward movement and therefore locks it in place.
the cam and dowels have to be exact and the depths have to be exact also otherwise you may comethrough the panels. the hinge holes are the same. but!!!! i will post all measurement for these in detail and how to line up and place them..... it will be an idiots guide.... i cannot make it anymore clear.. all the work will be done.. you just follow the plans.. personally i cant wait to see your own creations..
")
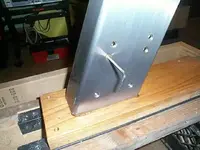
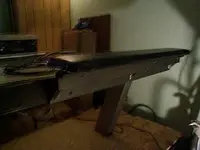
") however, i do like the layout of the unit, cant wait to see a full picture..
however, i do like the layout of the unit, cant wait to see a full picture..