sweetbeats
Reel deep thoughts...
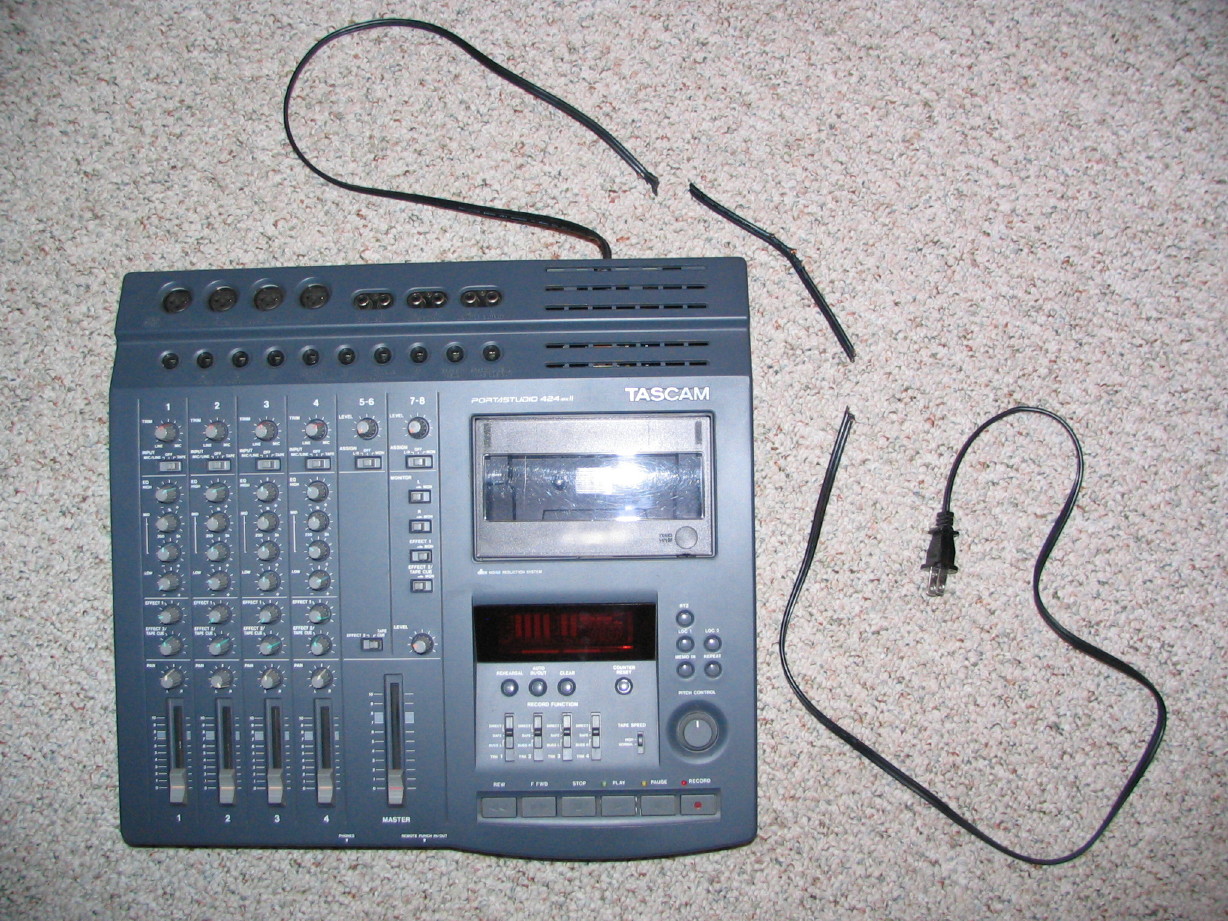
Our rabbit that has never chewed on anything decided it was time to try it out and in one fell swoop turned two mic cables and the power cord to my Tascam 424 mkII into pieces...here's the victim:
Needless to say we watch bunny a little more closely now. So it was time to open up the 424 and replace the power cord and I thought it'd be a good opportunity to put up one of those little pictorials that can be referenced in other threads when needing to do servicing on a 424 mkII. I don't know how applicable these instructions are to the mkI and mkIII models so if you are using these instructions to open one of those two up proceed with caution.
Step 1:
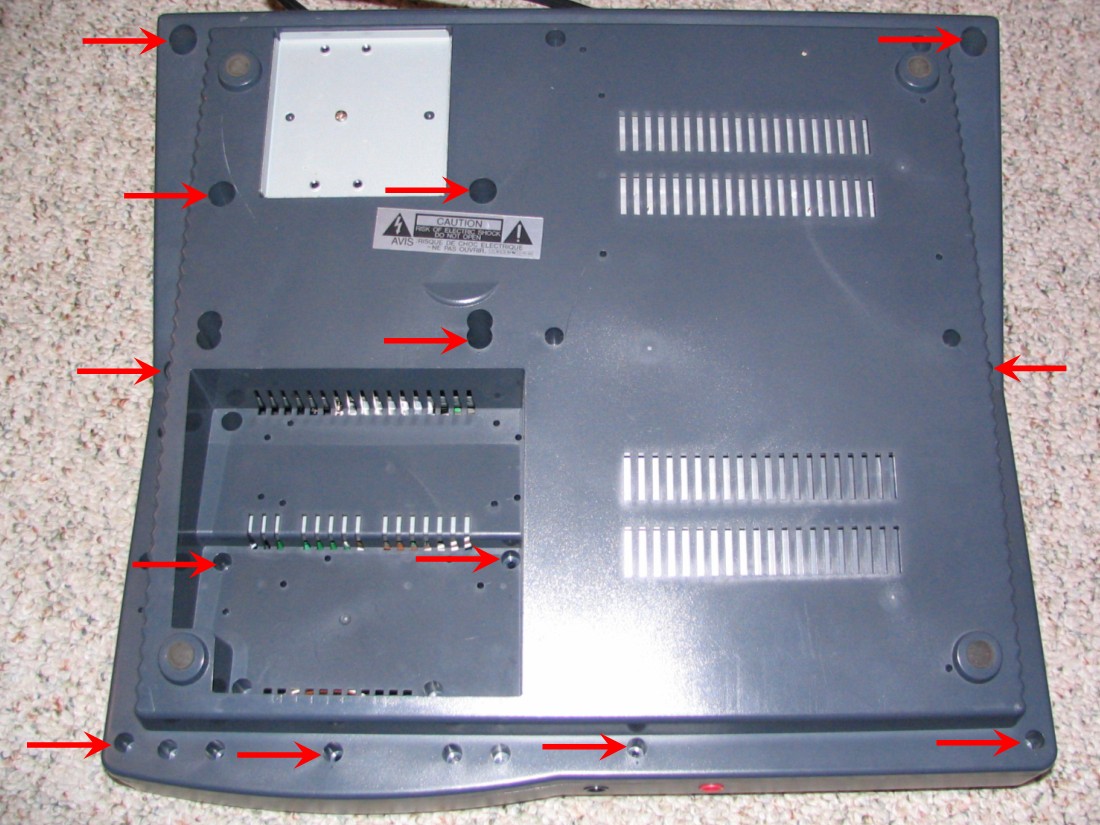
Unplug the thing (unless your pet took care of that for you), flip it over and remove the screws as indicated by the red arrows. Make a note of where you took them out of or use the picture as reference when reassembling...all the screws are the same:
Step 2:
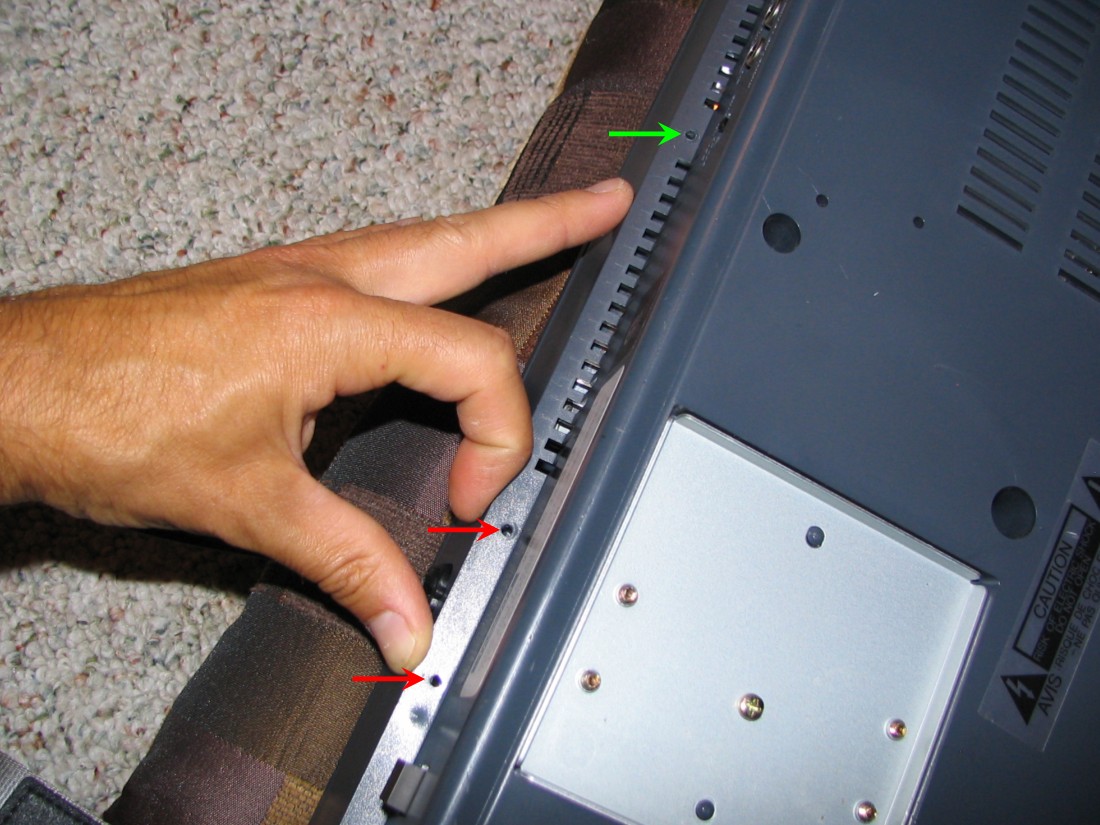
There are three more screws around the back of the unit as indicated. One screw is different...it is indicated by the green arrow. All the other screws are the same so make note that the screw that is different goes back in the same hole:
Step 3:
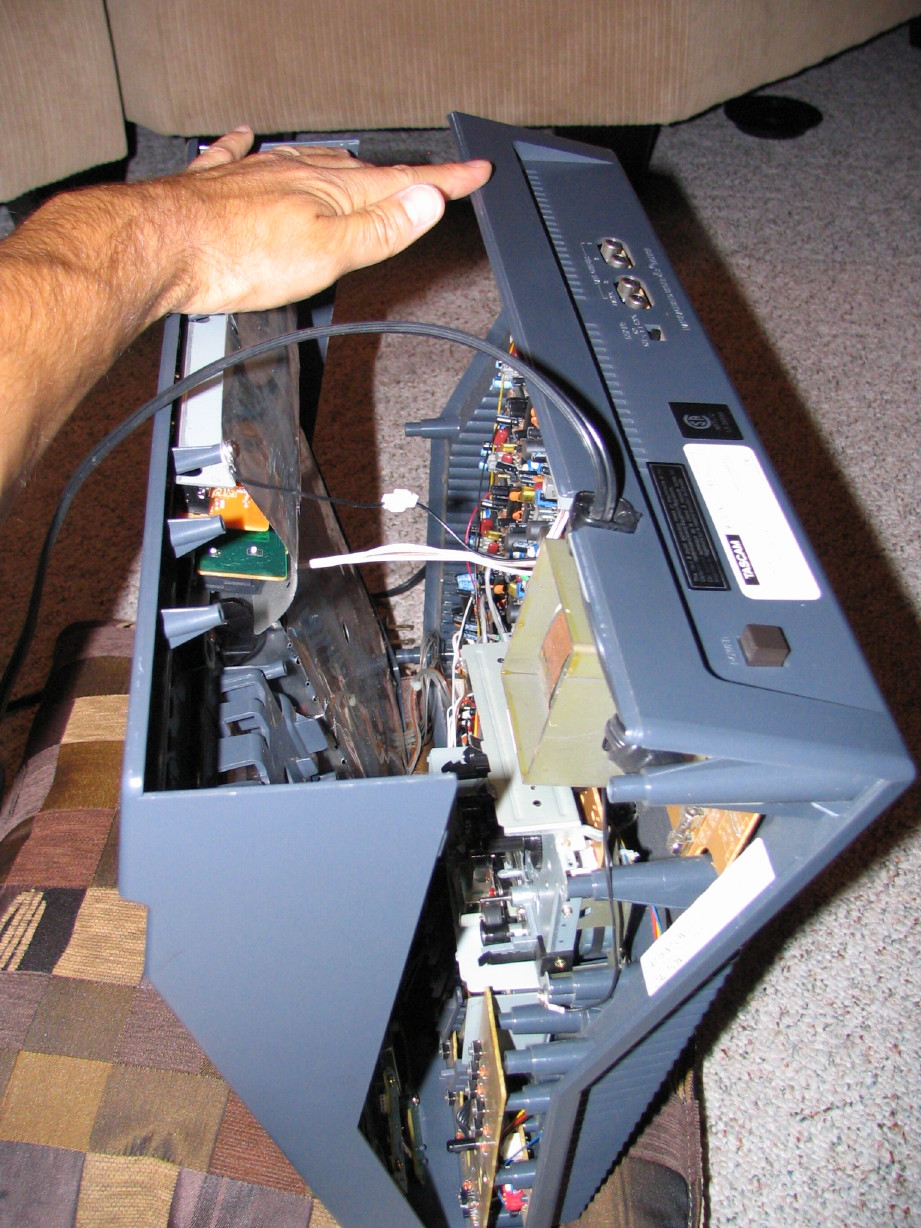
Now, holding the bottom and top of the case together tip the unit so it is resting on its nose like below and gently open it up like a big clam from the back. It should come apart easily...don't pull it too far open as there are two wires that need to be disconnected as you can see:
Step 4:
Disconnect the first wire, a little black single ground wire. The connector is right there and just pulls apart:
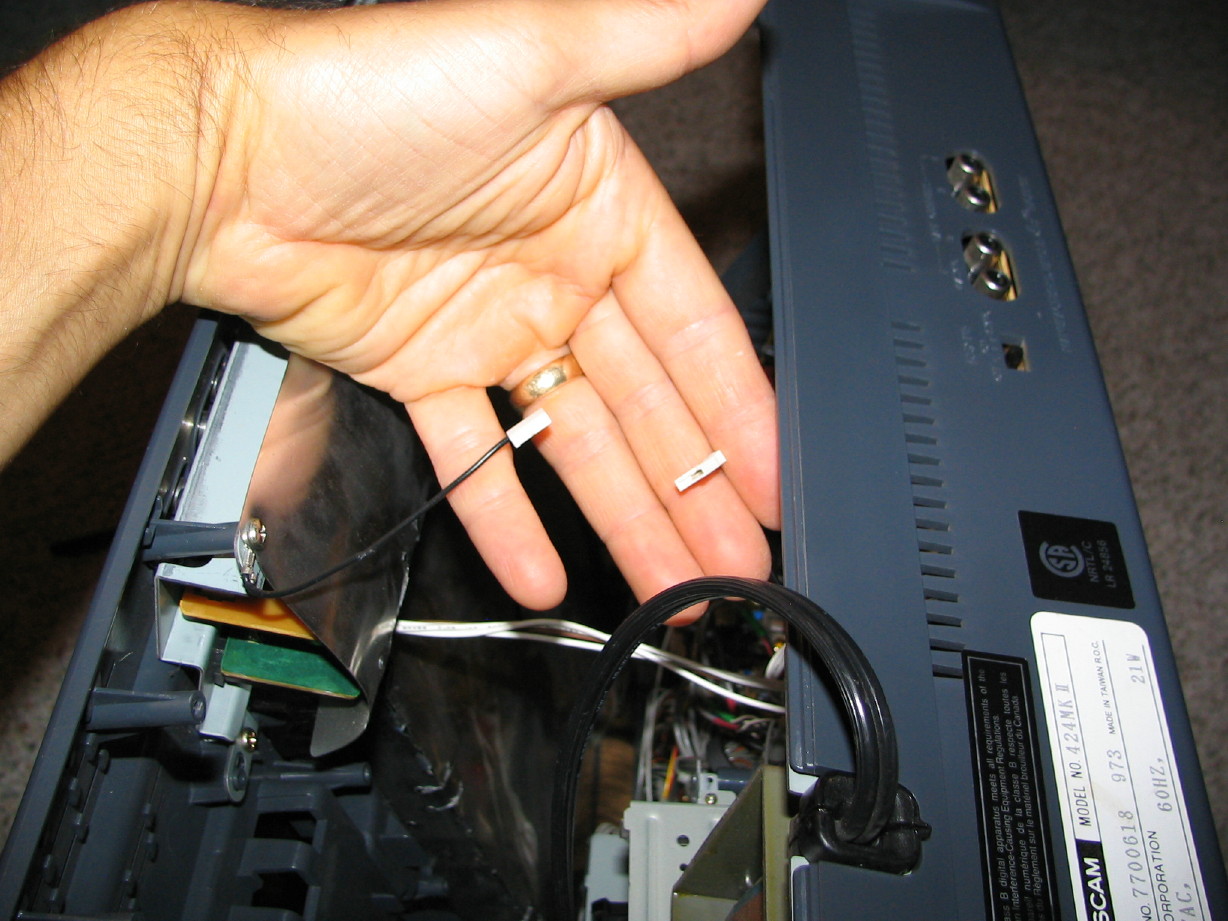
Step 5:
Now disconnect the other wire that is keeping the clam from opening all the way up...it has 4 wires and plugs into the power supply PCB. Just gently rock it a little as you pull grasping the connector as much as possible. There will only be one like this to reconnect in this spot when it goes back together so don't be nervous about not being able to get it back together right...plus, it only goes into the socket one way, or at least easily:
Step 6:
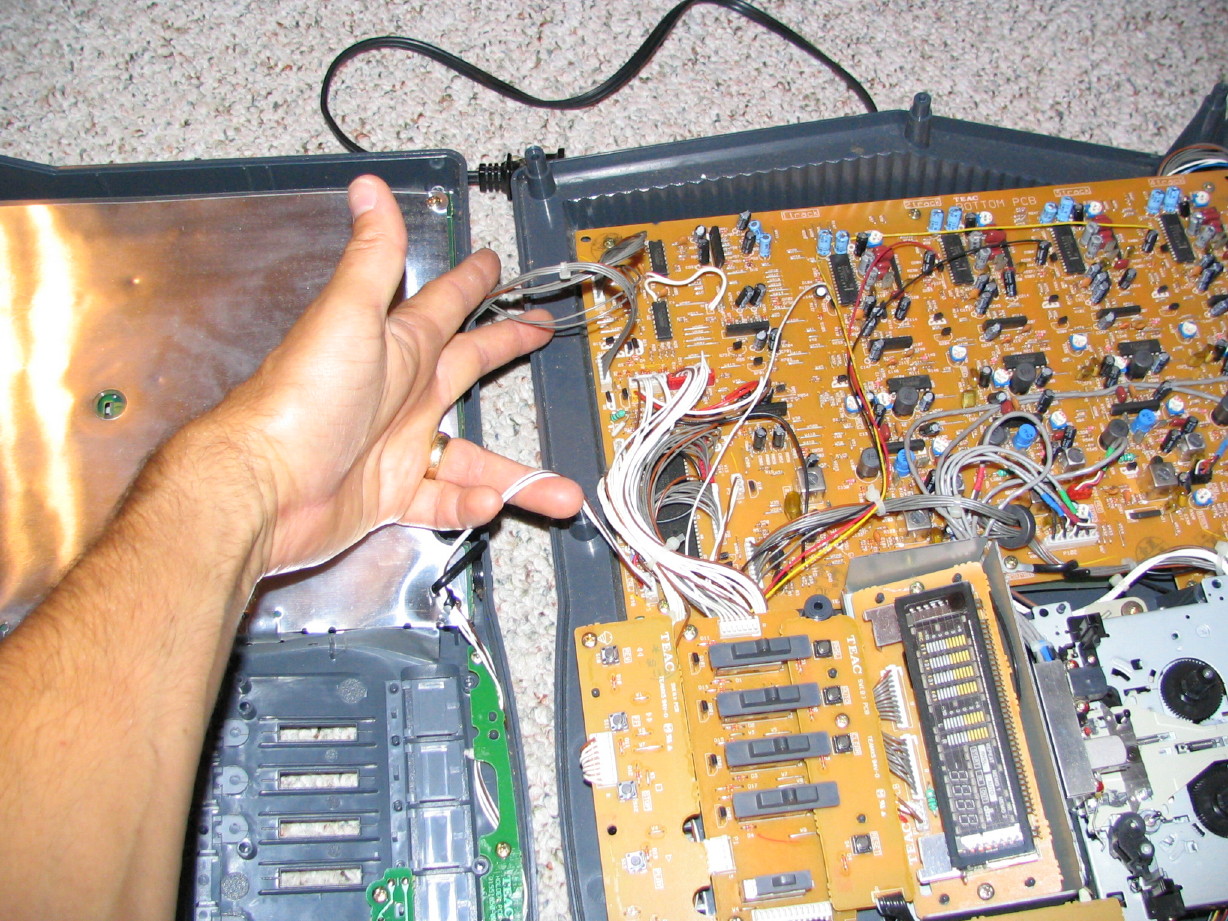
No you can open the clam all the way up like this:

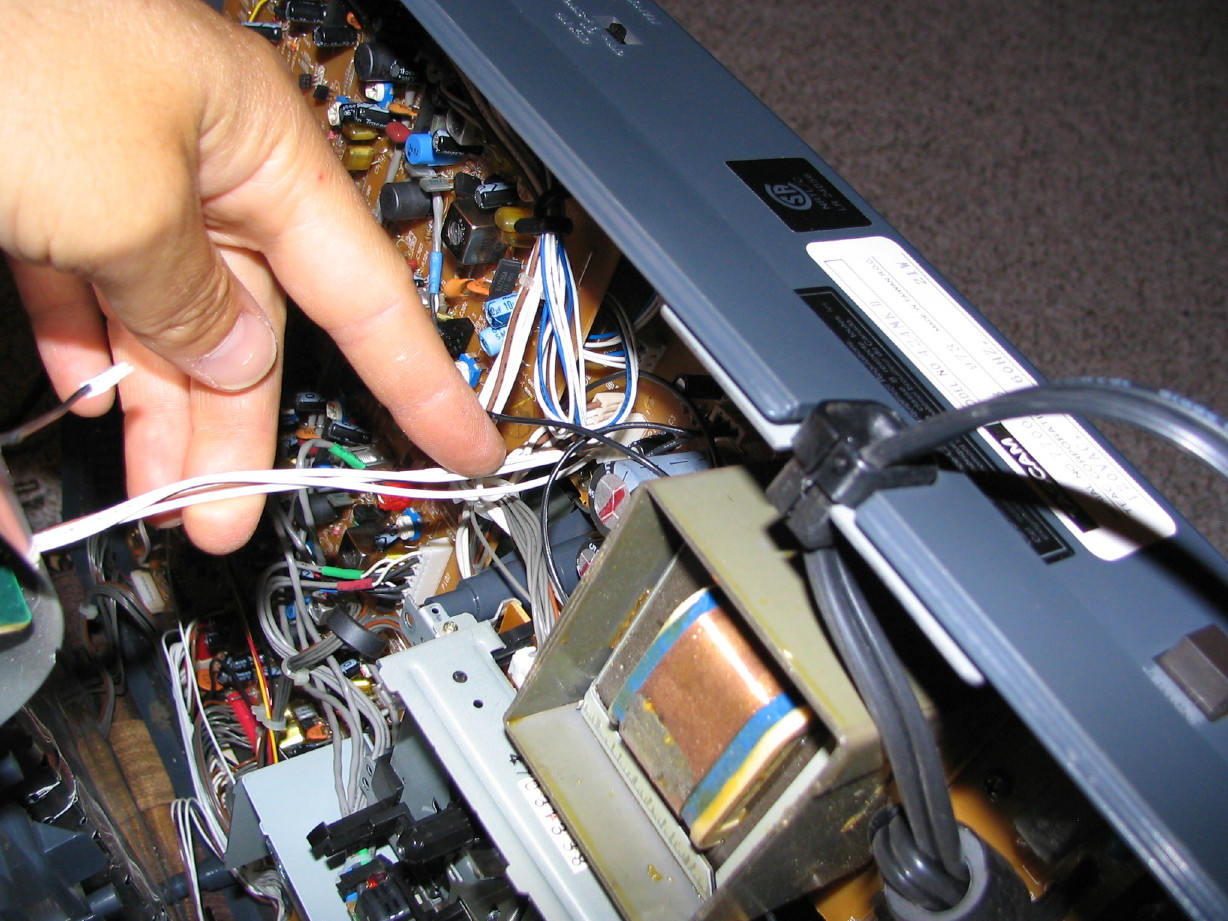
If you need to completely separate the top and bottom half, it is easy to do and makes it much easier to work on and move around. There are three wire sets to remove kind of like the last one you did...each one is a different sized connector than the other and only go back together one way so, again, don't be nervous about putting it back together wrong...here, I'm holding on to the sets...two grey sets and one white set. Same as before, just gently rock as you pull, grasping the connector as much as possible:
That's all there is to it! Reassembly is the reverse of disassembly. Just be mindful not to pinch wires when you put it back together. Best wishes, and I hope this helps you keep your 424 mkIII going!
Needless to say we watch bunny a little more closely now. So it was time to open up the 424 and replace the power cord and I thought it'd be a good opportunity to put up one of those little pictorials that can be referenced in other threads when needing to do servicing on a 424 mkII. I don't know how applicable these instructions are to the mkI and mkIII models so if you are using these instructions to open one of those two up proceed with caution.
Step 1:
Unplug the thing (unless your pet took care of that for you), flip it over and remove the screws as indicated by the red arrows. Make a note of where you took them out of or use the picture as reference when reassembling...all the screws are the same:
Step 2:
There are three more screws around the back of the unit as indicated. One screw is different...it is indicated by the green arrow. All the other screws are the same so make note that the screw that is different goes back in the same hole:
Step 3:
Now, holding the bottom and top of the case together tip the unit so it is resting on its nose like below and gently open it up like a big clam from the back. It should come apart easily...don't pull it too far open as there are two wires that need to be disconnected as you can see:
Step 4:
Disconnect the first wire, a little black single ground wire. The connector is right there and just pulls apart:
Step 5:
Now disconnect the other wire that is keeping the clam from opening all the way up...it has 4 wires and plugs into the power supply PCB. Just gently rock it a little as you pull grasping the connector as much as possible. There will only be one like this to reconnect in this spot when it goes back together so don't be nervous about not being able to get it back together right...plus, it only goes into the socket one way, or at least easily:
Step 6:
No you can open the clam all the way up like this:
If you need to completely separate the top and bottom half, it is easy to do and makes it much easier to work on and move around. There are three wire sets to remove kind of like the last one you did...each one is a different sized connector than the other and only go back together one way so, again, don't be nervous about putting it back together wrong...here, I'm holding on to the sets...two grey sets and one white set. Same as before, just gently rock as you pull, grasping the connector as much as possible:
That's all there is to it! Reassembly is the reverse of disassembly. Just be mindful not to pinch wires when you put it back together. Best wishes, and I hope this helps you keep your 424 mkIII going!
 and that's how the 424 innards look like! Pretty cool to see and thanks for sharing the dis-assembly instructions. I'm sure someone will find it helpful in the future.
")

")

 Anyway, nice to see you're still here. Now I don't feel like a stranger. Been a long time since I posted on HR. But I'm back and I'll be posting my own "rebuilding" thread pretty quick. Drop in and say hello.