You are using an out of date browser. It may not display this or other websites correctly.
You should upgrade or use an alternative browser.
You should upgrade or use an alternative browser.
muttley600
Banned
muttley600
Banned

muttley600
Banned
muttley600
Banned
muttley600
Banned
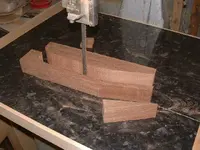
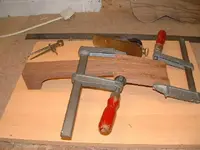
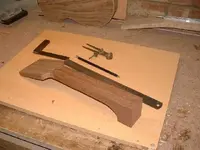
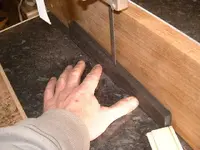
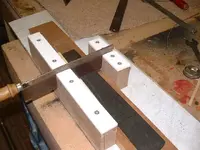
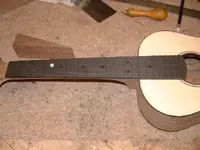
Needs fingerboard. An off cut of ebony that I can't get an archtop tailpiece from and is too short for a regular fingerboard is perfect. First rip it to thickness on the bandsaw and then cut to shape and as it is no longer square I slot it by hand on a home made mitre box as I can't use my table saw to slot a tapered board.
Attachments
muttley600
Banned
muttley600
Banned

muttley600
Banned
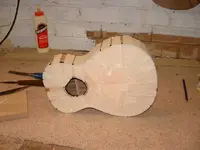
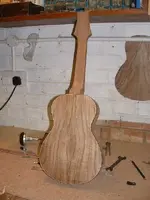
Had about 2 hour left at this stage so abandoned all hope and camera as the batteries died on me stuck on a bridge and drilled out for the tuners. and spent the last hour cleaning up and added a few coats of tru oil. Left it over night and strung her up the next morning. Sounded sweet and didn't collapse.
When time permits I shall strip her back and finish it properly.
When time permits I shall strip her back and finish it properly.
muttley600
Banned
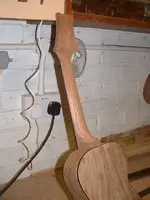
To finish, It was a lot of fun to do. A bit rushed but a nice functional instrument.
The only parts that weren't scavenged from the scrap bin or useless for anything else were the tuners strings and frets. Even the nut and saddle came from a rough bone I experimented with bleaching way back. The neck from and old window. The spruce for the linings and braces cane from an old Ikea sofa that fell apart on me. The only half cheats were the back and top which came from cleaning cuts on decent timber but that was deemed to be OK.")
The only parts that weren't scavenged from the scrap bin or useless for anything else were the tuners strings and frets. Even the nut and saddle came from a rough bone I experimented with bleaching way back. The neck from and old window. The spruce for the linings and braces cane from an old Ikea sofa that fell apart on me. The only half cheats were the back and top which came from cleaning cuts on decent timber but that was deemed to be OK.
Wish
Never Sarcastic....Honest
That was really interesting, Muttley. Thanks for taking the time to post all of those pictures and take us along on your uke making journey.
That's really amazing that you could do that in 2 days. Great job and congrats on your victory!
That's really amazing that you could do that in 2 days. Great job and congrats on your victory!
suprstar
It aint ez being green
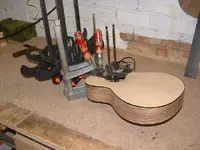
That's awesome man! You know that'd prolly be easier if you had a couple more clamps 
muttley600
Banned
That's awesome man! You know that'd prolly be easier if you had a couple more clamps
You can never, and I mean never, have enough clamps.
")
Zaphod B
Raccoons-Be-Gone, Inc.
I can't begin to tell you how impressed I am.
Chili
Site Moderator
You can never, and I mean never, have enough clamps.
Funny, I say the same thing about napkins!!
For the headstock, when you glued the two outer pieces on, did you use any kind of pins or screws for strength?? Or is the glue strong enough to bear the pull of the strings on the tuners?
Thanks for sharing this with us!!!
muttley600
Banned
Funny, I say the same thing about napkins!!
For the headstock, when you glued the two outer pieces on, did you use any kind of pins or screws for strength?? Or is the glue strong enough to bear the pull of the strings on the tuners?
Thanks for sharing this with us!!!
Just a good butt joint and you should be fine. There isn't much stress on that part and the 1.5mm veneer helps add strength. It's a pretty common practice on archtops and in a normal practice I would veneer the back as well to balance the veneer and stop it from pulling or cupping. Not really a problem here as the timbers are fairly straight grain and on a small area.
JCH
El Nacho
Very Cool! Thanks for sharing the pictures, and description.
guitar junkie
Guitar User.
So what kind of money are we talking for one of these bad boys?
muttley600
Banned
So what kind of money are we talking for one of these bad boys?
If I was building for a sale I'd do many things differently and wouldn't let an instrument like this one out on the open market. As I said it was a quick build for a fun build off and although it won't fall apart and will play well for many years. It is what it is. A fun little uke that was built quick and dirty.
If I was to build for sale I'd cost according to the spec or build a half dozen and sell them at as competitive a price as I could. Labour would be the biggy. I'd have to cost it out though and I've never attempted to use this place as a showroom so I'll hold back on a figure if that's OK.
CMunch
Well-known member
Congrats. 
Nice work muttley.
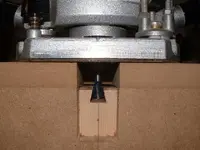
Is that an ELU router you have there?
Wish I'd gotten mine repaired, replaced it with a Makita, total piece of junk.
Nice work muttley.
Is that an ELU router you have there?
Wish I'd gotten mine repaired, replaced it with a Makita, total piece of junk.
Similar threads
- Replies
- 22
- Views
- 3K
- Replies
- 5
- Views
- 3K
D
- Replies
- 0
- Views
- 1K
D