Running cables between two rooms - advice?

bhuether

New member
I am drilling a hole in the wall that connects my studio room with my room that has guitar speaker cabs.

What is the correct way to do this so as to minimize sound bleed? Are there special fixures I can buy?

Basically, I am running up to 4 mic cables and 4 speaker cables.

Thanks!

Brian
 
I would install two jackplates, one in each room, and wire them together with a loop of wire long enough that you can service, resolder, and replace the jacks should that become necessary.

You could install gaskets behind the plates against the wall surface to reduce airfow and thus sound, as well as create baffles in the wall to redirect sound if that becomse necessary.

It all depends how much of a "purist" viewpoint you want to take.
 
A quick-n-easy method that works is to drill a hole with a diameter just large enough to fit a 2" PVC pipe into...this is easy if you are just drilling through sheetrock. There are special bits made for this...round, like a cup, with teeth on one end and an axel coming out the other that fits in your drill head.

Then just cut the PVC the right length to be flush with both walls on either side...push it in, hit the edges and sheetrock with some silicone caulk (in appropriate color) to hold in place...let it set...and then shove your cables through. No screws/nails needed. For any "space" left after the cables go through, just "stick a sock in it" :D (or some other material)...and it won't really bleed much at all, as it's a small hole and it will be full of cables and "socks". ;)

A 2" diameter PVC will give you room for maybe 4 XLR and a couple guitar cables...and you can pull them out any time you want. If you need more cables...go wider, but I would keep it "snug" rather than using a 4" PVC pipe and having a lot of unused space. Put the cables through one at a time...so their connectors don't fight.
I've use this method once in the past when I didn't want to install jack plates...and it worked like a charm.
Of course...the jack plates ARE the cool/pro way to go...but more cost and more work.
 
That actually is a great idea, however I wouldn't fill it with fabric and instead something more airtight. Maybe something like "great stuff", an expanding foam/filler from a home center?

Personally, I would go with the panel route because then with jacks, you can use it for other purposes much easier.

I cannot count the number of times I've used one of the XLR jacks in my vocal booth as a midi in, out or thru jack :)
 
At Ace Hardware they sell small sheets of rubber that's reddish color and maybe 1/8" or so thick, maybe 10" square, in the plumbing section, probably to make your own gaskets. I have a hole through my wall and I've thought about putting a sheet of rubber over the hole and cutting a slit in it pass cables through.

That was my original plan, but in the end there's so much stuff around where that hole is (drumset #3 is there) so it really isn't an issue.
 
That actually is a great idea, however I wouldn't fill it with fabric and instead something more airtight. Maybe something like "great stuff", an expanding foam/filler from a home center?

That makes it more permanent....but sure, expanding foam would work.
I liked the less permanent approach for being able to remove the cables (or change cable types) as needed.


I cannot count the number of times I've used one of the XLR jacks in my vocal booth as a midi in, out or thru jack :)

I'm loosing you here...
...how do you use a 3-Pin XLR jack to connect a 5-Pin DIN MIDI cable???
 
... I'm loosing you here...
...how do you use a 3-Pin XLR jack to connect a 5-Pin DIN MIDI cable???

I'd like to see that too. :)

In the 80's I made ridiculously long (like 60') MIDI cables with 3 wire telephone wire so I guess with a DIN to XLR adapter (everyone has several, right?) it could be done with mic cables.

I was told that the 4th and 5th wire in the MIDI jack were going to be used for a MIDI spec version 2 but that never happened and probably won't since USB won that race.
 
Midi uses only two of the 5 pins, not including the shield. XLR jacks also use two pins, plus a shield. Making an adapter is easy, you simply decide on a pinout and call that your 'standard' and make funny looking cables - one that has an XLR on one end, and a midi/din5 on the other:

Midi in:

1 - NC (not connected)
2 - NC
3 - NC
4 - IN +
5 - IN -

Midi out & thru

1 - NC
2 - NC
3 - Shield
4 - +5V 10ma
5 - out

Since midi out and thru jacks drive an LED or an optocoupler (which is an LED facing a phototransistor in a plastic or resin housing), the shield is generally not necessary because you can't really collect enough radio waves to drive an LED but you can connect it up if you're a purist :)

XLR cables have three pins:

1 - Chassis ground / cable shield
2 - positive signal
3 - negative signal


So, passing midi through an XLR patch panel is very easy - you have an XLR connector on one end, and a midi/din-5 connector on the other as I said above, like so:

XLR MIDI
1 ------- 3
2 ------- 4
3 ------- 5


--

If the cable is of good quality, you can pass other things through low-impedance mic wire, including s/pdif, aes/ebu (aes3), rs-422, midi as I described above, even rs-232 if you use no handshaking or software-only handshaking. All of the above simply requires homemade cables - one end matches the patch bay the other end matches the device, whatever it is.

You can also combine XLR/TRS jacks with homemade octopus cables to pass more complicated signals through the existing XLR/TRS patch bays. An example of this that I've done is Tascam's TDIF - and before anyone says "BULLSHIT! TDIF CANNOT GO THROUGH AN XLR CABLE!", I will say they are correct - not "an" XLR cable, but multiple cables! A TDIF cable is really just 8 low-impedence TRS cables in one rubbery sleeve with two 25-pin connectors on the ends. Nothing particularly special.

So, instead of using a TDIF cable that's 25p to 25p, you simply make two "octopus" cables that have a 25pin connector one end, and 8 TRS or XLR plugs on the other, matching your patch bay - one for each side - then you can pass TDIF through the existing low-impedence mic wiring that's between the vocal booth and the console room, getting a TDIF connector on both ends.

Of course you have to have eight XLR or TRS jacks available to do this, if you want bi-directional TDIF capabilities, as would be the norm.

My reason for doing this was to be able to place an old Tascam MA-AD8 in the vocal booth, and pass TDIF through the vocal booth wall to the console room, using the existing XLR and TRS patch bay I wired up years earlier. Since the MA-AD8 is not a bi-diretional device, I only had to wire up 4 TRS cables on my octopus cable instead of 8 - the MA-AD8 only has outputs, no inputs, so why bother wiring them? I guessed at this based on various tascam high-level schematics I saw at the time (5-6 years ago or so) and it turned out my guess was correct.

Anyway, sorry this became so long-winded, I wanted to share the TDIF thing because even if you yourself don't need TDIF to pass through a patch bay, the idea of combining TRS wire pairs into a bigger connector for a specific device works very well and maybe now that's more obvious.

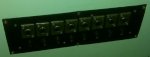
Sorry this is such a terrible picture, the flash on my ********** stinks. This is my patch bay, which has eight XLR jacks, and eight 1/4" TRS jacks immediately underneath - giving me 16 TRS pairs to work for non-standard functions as well as what would be considered the norm - a mic cable :)
 

Attachments

  • vb-patchbay.jpg
    vb-patchbay.jpg
    8.8 KB · Views: 614
Making an adapter is easy ----- one that has an XLR on one end, and a midi/din5 on the other

Yeah...OK...that's all you needed to say...I thought you were doing something else. :)

But if you have the MIDI needs...why not just add a MIDI jack to your panel?

That must be one ugly looking adapter!!! :D ;)
 
Yeah...OK...that's all you needed to say...I thought you were doing something else. :)

heh-heh, just trying to share as others may find this usual.

But if you have the MIDI needs...why not just add a MIDI jack to your panel?

Mostly because chassis-mount midi jacks are cheesy and not durable. XLR jacks can survive many connect/disconnect cycles whereas every chassis mount midi jack I've bought has fallen apart fairly quickly.

Add to that I didn't really see a need to record a device (synth) that can be attached to the console directly with a patch cord. But as it turned out, I did need midi in the vocal booth after all - for when I'm recording myself.

To record myself, I have to arm a track, push record, then run into the vocal booth, put on the cans, sit down, pick up the instrument, lay the track, put down the instrument, take off the cans, then run back into the console room and push "stop".

That gets real old real fast.

So, I dug around in the attic for a while and found my old JL Cooper Cuepoint. It looks like this:

http://www.gearslutz.com/board/atta...24-classic-vs-alesis-hd24xr-adat_cuepoint.jpg (900k image)

By running a midi in and out through the XLR jacks, I can now control one of my Akai DR16 hard disk recorders and arm/disarm tracks, set cue points in and out, and of course, the transport, all while sitting on my ass, cans on my head, instrument in my hands.

The cluepoint is fairly small too, and I have mount mounted on the wall and out of the way. I have a spare Akai DL1500 remote which can also do this job as well as control all of the recorders rather than just one, however it was just too darn big (19"x19" or so) thus it ate up a lot of space inside my tiny vocal booth.

Anyway, that's the long winded story as to how and why I spent any time at all thinking about how to pump midi through a bank of XLR jacks. It was far less work than tearing into the wall, making the panel larger to accomodate midi jacks, and constantly dealing with the expectation that they'd break "any time now".

Weird patch cords are easier to make :)
 
Weird patch cords are easier to make :)

Yeah...like the time my console was wired for +/pos on the #3 pin...
...and I had all these conversion cables (+2 at one end, +3 at the other).

Then one day...I opened up my console and just rewired it internally for +2.
Now iI had it following the more standard wiring practice.


The conversion cables were bugging me. :D
 
Back
Top