My Quasi-Recording/Mix Room Build

Mogami cable, Neutrik XLR connections. And after I chopped stripped and soldered everything, I bought big ass 1" BRIGHT YELLOW heat shrink tubing to encase the connectors. So if I ever take my cables to a gig or studio, I know they're mine.

Oh, and guys.... just in case you didn't know, this is your mic cable's best friend.

9904c2fb-6c11-4795-9a24-9fe7dad71e8f_400.jpg


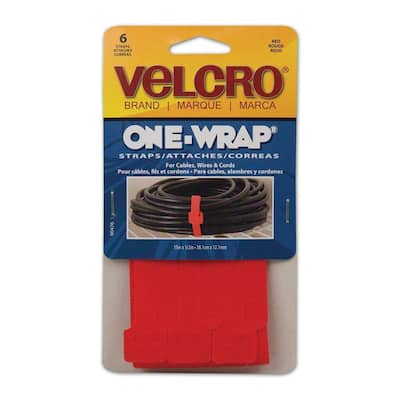
Every damn cable I own has one on it. Power cables, extension cables, cables on drills routers and belt sanders, mic cables instrument cables midi cables speaker cables, even pedal board snakes.

And being red, they don't hide on the floor wrapped around cables. Don't put black Velcro on black cables. Red is easy to spot on the ground.

But where did you get the cable and connectors? Redco? Marketek? I'm looking for options.
 
Well, I went and picked up some cinder blocks today for speaker stands. I guess I figured out what I"m going to do. I'm going to liquid nail these things together, spray paint them black, wrap them in burlap, and then liquid nail some stained or painted oak platforms to the top and bottom. I'll use Auralex mopads for now for decoupling until I can locate some sorbothane or neoprene. Lowe's didn't have either one of those.

I hope they fit behind my desk. There's less room there than I expected, honestly. My listening position is about 38% into the room so it's where it should be.

Questions:
1) Will using liquid nail to attach the wood to the cinder block create a decoupling from the mass that I don't want to happen??
2) On the bottom wood place, can I put rubber feet on it? Or would that be a no-no? I have "hand-scraped" wood flooring and it's a little uneven in some spots because of that so I'm worried about movement.


EDIT:
Well, I just got in from the garage after liquid nailing a couple sets together. I put a pretty healthy dose of liquid nail on them, no doubt. I made sure they were lined up and then put another block on top of them for pressure. I hope they don't drift any. After those set up, I guess I'll do the other pair. I'm really hoping these turn out well.

On another note, this was the first time I'd been out in the garage in a while. I have a couple of personal notes. 1) Holy shit, it's hot. 2) The garage is a disaster area. Saw dust everywhere, tools sitting out everywhere, wood scraps thrown around, insulation just sitting around. I have got to clean that up. Maybe in a couple of weekends after I get the mix room done.


EDIT AGAIN:
Here are some pics.

Stands setting up...hopefully.
Stands_Nailed.jpg

The liquid nail I used. It said "HEAVY DUTY" so I got it.
Liquid_Nail.jpg

And pics of the mess...complete with guitar amp. I need to get that out of there. :spank:
Mess1.jpg

Mess2.jpg

Mess3.jpg

On an unrelated note, my HTC Thunderbolt takes way better pics than my iPhone did. Now to work on holding it still while taking pictures...:cool:
 
Last edited:
I knew this table saw would eventually come in handy.

These are the tops setting up and also my experiment with black spray paint. I'm still contemplating what I'm going to do. I thought about liquid nailing some wood up over the cinder block but my "want to" is waning.

Top_SetUp.jpg
 
Questions:
1) Will using liquid nail to attach the wood to the cinder block create a decoupling from the mass that I don't want to happen??
2) On the bottom wood place, can I put rubber feet on it? Or would that be a no-no? I have "hand-scraped" wood flooring and it's a little uneven in some spots because of that so I'm worried about movement.

1) No it won't because Liquid Nails is not a permanently mastic material.
2) You could. What I would do is to glue some cardboard to the bottom (cereal packet cardboard, not corrugated cardboard) simple to act as a a scratch protector for the surface the cinder blocks will be on, and then put a sheet of sorbothane on the top so that your monitors are acoustically isolated from the stands.
 
I hit up my local Guitard Center for the XLR connectors, and when I said I needed 160 feet of cable, the guy said, "I don't wanna spool out and count that much, how about I just sell you a whole spool and charge you for 160 feet worth?" Hell YEAH you can!

Now, I bet you could order up the XLR's from Parts Express or Sweetwater or wherever you find the best price, and do a few cents cheaper per connector. But getting a whole spool at 2/3" cost was something I don't think I'll be able to beat!

Setting up your cables in stages will help increase efficiency. Measure cut strip and tin all your cables, to get consistent lengths and repetitive efficiency. Tin all your connectors' leads. Then start assembling. I just laid the cable ends across the table like an open package of pencils, and lined up the connectors at the end. When I finished soldering an end, I let it fall onto my lap and then pulled the next line towards me. Quick and orderly.

Then just leaned back, and started screwing the strain relief clamps together, and let them drop to the floor. Once I was done, I reversed the whole mess of cables and started on the other end.
 
For your concrete pillars, I'd say to use rubber feet underneath your base planks. Get the biggest rubber feet you can find. I think I posted a link to them earlier in the thread. Big diameter rubber feet, so they're stable.
 
I thought about liquid nailing some wood up over the cinder block but my "want to" is waning.
I understand fully about.."want to is waning". I go through this all the time. However, when it comes to some things, the priority of importance takes precedence. In this case, there is a reason to clad these in wood. So you can fill the voids with sand. Think about it. You don't even need to clad all 4 sides. Just the two that are open to the voids.

Another suggestion. These don't have to look great. After cladding, use some spray adhesive and wrap them with INDOOR OUTDOOR carpet. Cheap. Comes in black, grey etc. Just buy 3 linear feet of a 12' wide roll. That should be enough for both stands. Although, since they are behind the console..hell, just paint them all black after cladding...who cares?

BTW, congrats on making a decision. You won't be sorry using this method. Another thing...check these out.

4 SORBOTHANE 1 1/4 inch VIBRATION ISOLATION FEET 50D | eBay

Kinda expensive, but these ARE the answer.
 
For your concrete pillars, I'd say to use rubber feet underneath your base planks. Get the biggest rubber feet you can find. I think I posted a link to them earlier in the thread. Big diameter rubber feet, so they're stable.
I already have some that are currently on the bottom of my old (yet unused) stands. I'll just take those off and put them on the others.

...there is a reason to clad these in wood. So you can fill the voids with sand. Think about it. You don't even need to clad all 4 sides. Just the two that are open to the voids.
You know what, fitZ? No. LOL! These damn things are heavy enough as it is! It's gonna be a bitch just to carry them from the garage and into the room (via a small hallway at that). I'm gonna skip the sand for now. I was thinking of putting some lighting in those holes in the block, anyway. I think I've decided to just spray paint the entire things black. It's a shame to spray paint that oak, though. Oh well. It was extra scrap anyway.


On another note, I ordered my cable and connectors today. Even though the connectors were a little more at RedCo, it certainly didn't justify ordering it from somewhere else and pay the shipping there, as well. Now I have to invest in a soldering iron. Found a decent one that people seem to like...Weller WES51 I think. $84 at Amazon. Then I have to order my solder from yet ANOTHER place. Ugh. EDIT: I went with the Aoyue 937+ Digital Soldering Station instead at $54.
 
Last edited:
You know what, fitZ? No. LOL!
:laughings: I don't blame you. Probably overkill...but you know me.:D


I was thinking of putting some lighting in those holes in the block,

Yea, that might be cool. Try some RGB LED's. You could even power them from your computer via a PCI slot cover with a Molex connector. There are tons of these things on the computer mod sites. Hell, there's even some kits that make the RGB's change colors and stuff. Of course, don't wanna make it like a Carnival..but what the hell:p

Check some of this stuff out. People are doing some amazing things with RGB led's.

YouTube - ‪RGB LED cube 8x8x8 (5)‬‏

Even VU stuff. Just search around youtube.:eek:
 
...Now I have to invest in a soldering iron. Found a decent one that people seem to like...Weller WES51 I think. $84 at Amazon. Then I have to order my solder from yet ANOTHER place. Ugh. EDIT: I went with the Aoyue 937+ Digital Soldering Station instead at $54.

Ordered the WES-51 last fall. Best soldering iron I've used yet, and it has more features than the older WES-51 here at my work. Love this sucka.
 
YouTube - ‪RGB LED cube 8x8x8 (5)‬‏[/url]

Even VU stuff. Just search around youtube.:eek:


We found some color changing light bulbs and put them in my mother's old tiffany lamp. As the bulb cycles through the colors, and then shines through all the stained glass, the living room looks so cool.

Amazon.com: Slow Color Changing and Fade E26 LED Light Bulb 110v Red Green Blue, 1005: Home Improvement

31ACq64k1vL._SL500_AA300_.jpg


Paint up the blocks, then tape/glue wax paper over the outward facing holes in the cinder block, then mount the bulbs inside using simple clamp light sockets like these guys:

41QFL%2BzA1LL._SL500_AA300_.jpg


Then wrap the pillars with the burlap, or even maybe speaker grill cloth, and the light will shine through with these ominous, moody squares just rolling through the colors!
 
Today I disassembled the old stands to salvage the screws, the rubber feet, and some of the better boards. I think I've made a good choice by deciding to redo them in cinder block form because when I took out the screws, they practically fell apart. My speakers probably would have wiggled them loose after a while and then my speakers probably would have got damaged after the stands collapsed.

Anyway, I liquid nailed the bottoms onto the cinder blocks today as well. I figure they'll be dry enough tomorrow to start painting them. I hope, anyway. If not tomorrow, I'll have to get to it Saturday but by then, they'll be pretty solid. They're heavy as hell, too, which (oddly) I like.

Still waiting on my cable and solder iron to get in...Amazon has yet to ship my iron even though I ordered it on Monday. WTF?
 
Amazon has really been half assing their shipping lately. It has taken at least 3 days for them to ship my last 2 orders.
 
Amazon has really been half assing their shipping lately. It has taken at least 3 days for them to ship my last 2 orders.
Seems like a read from someone else that they were really taking their sweet time on shipping stuff via the super saver free shipping. Didn't used to be that way.

So I just went out to the garage for the hell of it and it's a good thing I did. The stands that I had sitting on the tablesaw had drifted off of my markings. Lucky for me, I was still able to move the cinder blocks back onto the lines I drew once I put them on the ground. Hope they do okay after having moved them. They've been out there for several hours. It's a wonder I was able to even move them. I figured the liquid nail would have been solid enough by now. Guess not...

Moving them off the saw wasn't fun. Those are heavy sons-o-bitches. My back hurts now.
 
You didn't use any masonry anchors or bolts or anything?

I wouldn't have relied on only the Liquid Nails. Even just two holes with a countersink in the wood and fender washer and nylon locknut underneath would be a wise upgrade. It's not even too late to go add this.

Drill two holes through the wood at a diagonal, swap to a masonry bit, punch through, then countersink the wood for the bolt head and washer, then fender washer and locknut underneath.

No, I didn't use any bolts at all. I thought about that while I was laying in bed last night. But really...is it that big of a deal? I mean, I can pick up the cinder block and carry it around and the other cinder block that is liquid nailed to it doesn't budge. It's like one big block. And after I put them back behind my desk and no one ever goes back there, is it really going to matter?
 
Well, let's say it SHOULDN'T matter.


But....


...why bother doing something, when you can OVERDO something!!!!
 
Back
Top