Velvet Elvis construction (pics!)

  • Thread starter Thread starter Velvet Elvis
  • Start date Start date
Velvet Elvis

Velvet Elvis

Ahh humma humma humma
Hey all...

Sorry for the crappy pictures, but here are some shots of my rooms which are FINALLY nearing completion.

Long story, but the city sort of forced me to complete the space.

Doors went on order today... trim arrives this next week... carpet and flooring is being worked out as we speak.

Enjoy!!

Jim
Velvet Elvis
 

Attachments

  • control_room.webp
    control_room.webp
    15.5 KB · Views: 138
  • drum_room.webp
    drum_room.webp
    18.2 KB · Views: 136
  • live_room.webp
    live_room.webp
    21.1 KB · Views: 137
  • vocal_booth.webp
    vocal_booth.webp
    19.3 KB · Views: 132
Very cool! More pics and details as you have time!
 
The details are as follows:

4 rooms-

dedicated control room
dedicated drum room (though small... will act also as another "booth")
dedicated vocal room
home theater room, which doubles as a larger live room

All rooms are in the basement with no windows. All walls are two layers 5/8 drywall hung on resilient channel with proper caulking around corners/seams and fire putty packs around all wall outlets etc.

HVAC is shared with the rest of the house, but is structurally isolated from the main trunks etc. So far it seems to work really well (though I won't know entirely until I get the doors put up).

Doors are all 1 3/4 solid core doors on exterior jambs with thresholds and ball-bearing hinges.

There are two doors between the control room and drum room and between the control room and live room, just to help out a little.

Trim is on order, but I have to work out how to attach it (since I can't nail it to studs). I'm thinking of using finish screws and fastening it to the RC.

I'll grab more pics when I get a chance.

Jim
 
My studio is in an unfinished section of my basement (stud walls, nothing more) with finish work on tap for this summer. Seeing your work is very motivating--thanks for posting!
 
My studio is in an unfinished section of my basement (stud walls, nothing more) with finish work on tap for this summer. Seeing your work is very motivating--thanks for posting!

Strat...

How's this for you... I've been working on this here and there for 3 years.... at the start of December it was nothing but studs and rough electrical. HVAC wasn't done. Low-voltage/studio wiring wasn't done. Nothing was caulked. etc, etc.

On December 18th, the city told me it HAD to be done by Dec 31st "or else".

So, from the 18th through the 31st I called in every favor from every friend I could... and what you see is the result. It all passed inspection at the top of the month and I got my occupancy permit yesterday!!!

Jim


Why'd the city pull that on you? I build my whole house! Took me 6 months longer than scheduled, but the county didn't care--they just charged me more inspection and extension fees!

In any case, looks like you had some good favors to call in. Congrats!
 
Because the permit was out for 3 years. They only allow it for a single year... with a one year extension... and so I was pushing their patience. :D

Its funny... my wife always says the same thing of me!! hahaha

Jim
 
stupid idea maybe, but seems to me you could just liquid nail the trim to the drywall...or at least use drywall anchors and screw it in, countersinking the screw heads.... or finish washers, (not sure if they are the same as the "finish screws" you mentioned... but nice looking 3D washers that a pan or flathead screw looks good in... you see 'em on speaker cabs, etc.)

looking very nice so far.
 
I thought about liquid nails, but there isn't anything to clamp against to keep pressure on it while it dries.

With finish screws, I can countersink them and fill them just like I would a trim nail.

Jim
 
I thought about liquid nails, but there isn't anything to clamp against to keep pressure on it while it dries.


Jim


That's why they invented things like cinder blocks. Plus, I think there is a fast cure liquid nail too. I know you can glue drywall up with it and it'll stay once pushed against the studs.

Or...maybe a combo of liquid nail and a couple screws to hold it until it sets.... then pull the screws out (assuming you go into the studs) and fix the hole.
 
cool. i'll be the cheering section to motivate you to finish this studio. Go Elvis! GO!
 
Hey dude, looks absolutely great:D Did you ever build the duct plenums? Just curious how that worked out. :)

As to your trim, why would you screw the trim to the studs, THROUGH drywall thats hung on resiliant channel?:confused: Seems that would
short out the decoupling all over the place. Especially on jambs that seperate two iso spaces. :eek:
fitZ
 
Rick,

Well.. there are some duct boxes, but because of the city's little game with me, I had to cut bait on some non-crucial ones. It might come back to bite me, but so far so good.

I *did* get all of the electronic dampers and flex ducting installed!!

As for the trim, my thought was to attached the baseboard only via screw to the RC channel (NOT the studs)... this shouldn't short anything. The door jambs/casing would be attached to the door jamb itself and NOT the wall, so that the door wouldn't short the wall.

Speaking of shorts... the drywallers caused me all kinds of headaches. I had to go down CONSTANTLY and check their work because they kept "forgetting" how to do resilient channel. Grrrr... I fixed probably 20 screws a night after they did their work on the first layer.

The GOOD news is, when they did the second layer, the screws weren't long enough to touch the framing even if they tried... that made life a little easier.

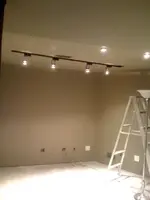
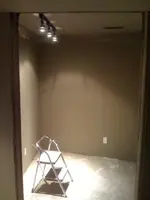
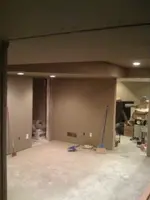
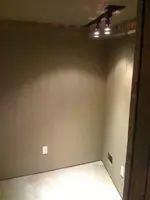
Its hard to tell how effective everything is right now, because there are gaps in the walls where the doors will go... so putting anything down there that makes noise right now simply jumps through those open gaps and can be heard upstairs.

Interestingly enough, while the workers were here... they had their radio CRANKED and I couldn't hear it upstairs... even without doors!

My sons guitar amp on the other hand was a completely different beast :)

I'm optimistic and anxious to have it done. My thought is, it can't possibly be any worse than where I have to record now... and it stands the chance to be 1000 times better!

I'll grab better pictures this weekend if I can.

Jim
 
As to your trim, why would you screw the trim to the studs, THROUGH drywall thats hung on resiliant channel?:confused: Seems that would
short out the decoupling all over the place. Especially on jambs that seperate two iso spaces. :eek:
fitZ

I'm thinking you misunderstood my suggestion. Glue the trim and hold it place with screws (even into the studs) until the glue drys. Then remove the screws.
 
Lookin good man!

And yeah, more pics as you can. I love these threads. :D
 
Back
Top