Hello frederic, how ya doin guy?
Overall, I'm doing okay. Been a rough few months (multiple re-orgs at work, commercial building problems, 23 y/o cat passing, carpenter ants, etc). But I am okay now, the world didn't beat me down enough to collapse into a hefty bag just yet.
And the day gets better, I hear my wife grinding coffee beans

Wow, I thought I was the only one with mess's and problems like that. Ha, are we havin fun yet?
")
Sorry to hear about the commercial thing. Hope you get it resolved soon. I havn't had a chance to read your posts lately so excuse me if I'm sticking my nose in here.
Stick your nose in all you want, you're more than welcome. I missed our exchanges, actually. While you've been away, so have I. I returned a week or two ago from a frustrated hiatus.
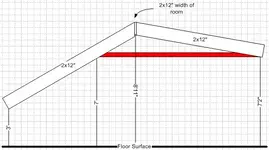
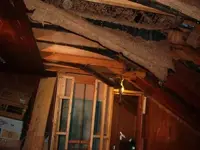
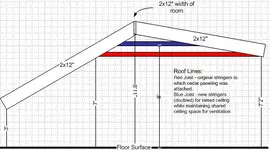
I have to figure out how to do a ridge vent on a multi-pitch roof (30 degrees one side, covered in slate, 7 degrees otherside, covered in tar), without destroying the slate.
Then I have to figure out if the stringers can go, or not. I'd like them to leave
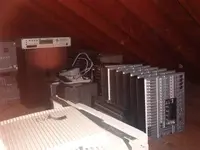
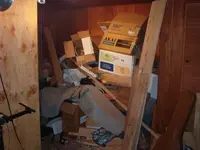
Other than that, studio tear-down is going okay. Got out several bare, unterminated electrical out of the ceiling.
All the wildlife (ants, termintes, mice) have been evacuated successfully.
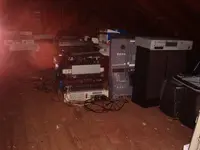
Its coming along slowly, but there is progress every weekend which is good. Today's effort once I get my lazy arse off the sofa is to relocate the stack of gear in the vocal booth into the attic, then tear down the vocal booth, then continue tearing down the ceiling/walls. Then, seal 4-5 holes in the tar roof section.
Well, I'm in the middle of a move, and when I get moved in, my gear will be in a bedroom temporarily also. I've got a big pole barn to temporarily brace till I decide what I'm going to do with it.
Barns are cool... I wish I had the space here for a barn - my home studio would move there instantly
The roof is new construction and big, so I want to keep it in the air via the poles untill I pour a foundation and couple of slabs, while keeping the poles in place till then. Ha, what a nightmare. Can't afford to tear it down and start from scratch.
Yeah, I hear you. I wanted to raise the roof in the studio so that both sides were pitched the same, and give me more ceiling height, but every estimate I got was ludicrous. And its not something I can do quick enough as to avoid ruining the garage below, so I'm going to do it the "lame" way. Its mostly for my composing needs, so its not like it has to be "perfect", just better than what it is now.
No mice/ants!!!!!!! lol.
Well good luck with the rebuild project and the commercial one too. Keep us posted and I'll be back on line soon.
Cheers, fitz
Thanks, glad you're back online. I tried your email address about two months ago, and the message bounced back. I didn't realize at the time you were moving. Glad you're well and still around!!

 I wanted to replace it anyway, but I didn't want to do that today. I think I'm going to add more nails to the frame so it doesn't fall out. Today is not window day.
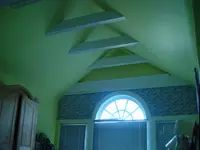

")