famous beagle
Well-known member
Hey everyone, for those interested:
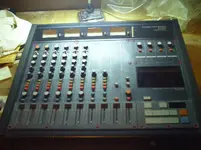
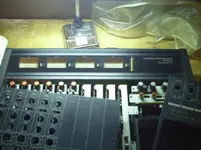
As I mentioned in another thread, I picked up an alleged fully-functional AT-RMX64 4-track in all original packaging for $65 off Craigslist. When I met with him to pick it up, he already had it packed up, and I had my 3 year old son with me, so I didn't have time to ask him to unpack it and hook it back up for a test drive. (And he didn't live too far from me ... and I obviously knew now where he lived.)")
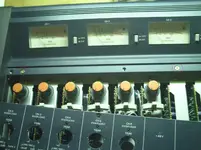
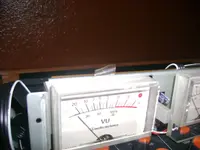
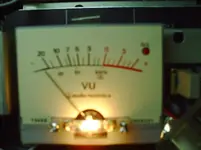
When I got it home and turned it on, the first thing issue was that the bulbs in the VU meters 1 and 2 were out. Not a deal-breaker I thought, because I knew those could be replaced.
Then I put a tape in and pressed play: all good. When I pressed rewind though, it tried for a few seconds, the tape didn't move, and then it stopped. I pressed FF, and it started to move sluggishly. After a few seconds, it began to pick up speed and was soon off to the races. I let it run the length of the tape (a 90 minute), thinking that maybe it was good to be "stretching its legs," so to speak. Once it hit the end, I hit RW, and low and behold, it worked. It rewound the whole tape without a problem. I then began testing the recording functions on each track, EQ, and the input channels with a 57 (and then with an Oktava MC 012---the AT has phantom power!), and everything worked flawlessly. The transport continued to work without any trouble this whole time (including the return-to-zero function).
That was all I had time for that day. The next day, I fired it up again, and again the RW function wouldn't work at first. I played the tape for a bit, then FF for about 10 seconds. I then hit RW, and it was sluggish at first. Soon, it hit full stride and, again, I didn't have any problems with the transport for the remainder of that session.
So ... my question for the porta-experts is this: Is this a sign of impending death for the transport? Or could it theoretically continue working this way indefinitely? If it stays like this, I can live with it. It's still usable. It's just that it seems to take a few minutes of warm up before it hits full stride. But if this is a sign of its last legs, I'm a little concerned because of the scarcity of these machines (and therefore the parts).
On another note, I decided to document the repair of the VU bulbs in the hopes of saving someone else some time should they ever have the same problem.
Step 1: Unplug power cord from wall (obviously).
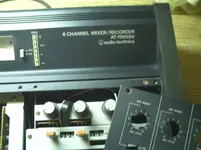
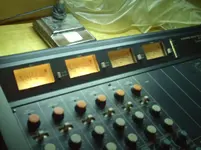
Step 2: Remove front panel screws. There are 16 of them, and they're circled in photo 01.
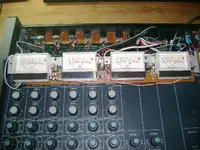
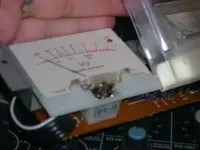
Step 3: Remove the three screws holding the meter bridge cover on (circled in photos 03 and 04)
Continued
As I mentioned in another thread, I picked up an alleged fully-functional AT-RMX64 4-track in all original packaging for $65 off Craigslist. When I met with him to pick it up, he already had it packed up, and I had my 3 year old son with me, so I didn't have time to ask him to unpack it and hook it back up for a test drive. (And he didn't live too far from me ... and I obviously knew now where he lived.)
When I got it home and turned it on, the first thing issue was that the bulbs in the VU meters 1 and 2 were out. Not a deal-breaker I thought, because I knew those could be replaced.
Then I put a tape in and pressed play: all good. When I pressed rewind though, it tried for a few seconds, the tape didn't move, and then it stopped. I pressed FF, and it started to move sluggishly. After a few seconds, it began to pick up speed and was soon off to the races. I let it run the length of the tape (a 90 minute), thinking that maybe it was good to be "stretching its legs," so to speak. Once it hit the end, I hit RW, and low and behold, it worked. It rewound the whole tape without a problem. I then began testing the recording functions on each track, EQ, and the input channels with a 57 (and then with an Oktava MC 012---the AT has phantom power!), and everything worked flawlessly. The transport continued to work without any trouble this whole time (including the return-to-zero function).
That was all I had time for that day. The next day, I fired it up again, and again the RW function wouldn't work at first. I played the tape for a bit, then FF for about 10 seconds. I then hit RW, and it was sluggish at first. Soon, it hit full stride and, again, I didn't have any problems with the transport for the remainder of that session.
So ... my question for the porta-experts is this: Is this a sign of impending death for the transport? Or could it theoretically continue working this way indefinitely? If it stays like this, I can live with it. It's still usable. It's just that it seems to take a few minutes of warm up before it hits full stride. But if this is a sign of its last legs, I'm a little concerned because of the scarcity of these machines (and therefore the parts).
On another note, I decided to document the repair of the VU bulbs in the hopes of saving someone else some time should they ever have the same problem.
Step 1: Unplug power cord from wall (obviously).
Step 2: Remove front panel screws. There are 16 of them, and they're circled in photo 01.
Step 3: Remove the three screws holding the meter bridge cover on (circled in photos 03 and 04)
Continued