C
casenpoint
New member
I knew when I took on the task of building a studio/control room months ago I didn't know it would be as expensive as it has been.
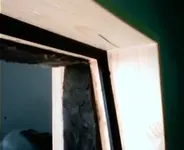
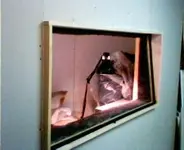
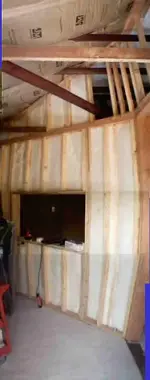
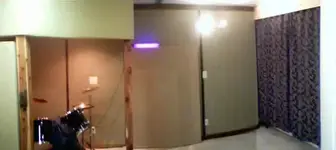
After finishing the studio portion done I had to turn my attention to the control room. The window I decided on was going to be a custom made double pane with neoprene seals. I started with 2x3 walls sharing a 2x6 base all of it secured to the ground. Sandwiched between the bottom sill and the floor was a closed cell sponge rubber a rough. Then secured to the floor with 5/8 threaded rod epoxyed to floor. The opening(for the window) was framed in and two layers of drywall on each side was screwed into place. Another finished opening was framed in with 1" pine. 3/4 by 3/4 pieces were then cut to form the actual frame that will hold the window in place. Seals were then glued in place. A perimeter reveal was also decided on and a plan was in the work. I needed to stuff rigid insulation between the 2 glass pieces around the perimeter as seen in the picture.
I should be out working on it but I thought I would share it with you.
I'll have some sound issues in my control room. But till it is drywalled, mudded and painted I can not address these problems.
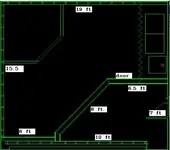
If you would like dimensions of the room let me know and I will post them.
Catch ya later,
casen point
After finishing the studio portion done I had to turn my attention to the control room. The window I decided on was going to be a custom made double pane with neoprene seals. I started with 2x3 walls sharing a 2x6 base all of it secured to the ground. Sandwiched between the bottom sill and the floor was a closed cell sponge rubber a rough. Then secured to the floor with 5/8 threaded rod epoxyed to floor. The opening(for the window) was framed in and two layers of drywall on each side was screwed into place. Another finished opening was framed in with 1" pine. 3/4 by 3/4 pieces were then cut to form the actual frame that will hold the window in place. Seals were then glued in place. A perimeter reveal was also decided on and a plan was in the work. I needed to stuff rigid insulation between the 2 glass pieces around the perimeter as seen in the picture.
I should be out working on it but I thought I would share it with you.
I'll have some sound issues in my control room. But till it is drywalled, mudded and painted I can not address these problems.
If you would like dimensions of the room let me know and I will post them.
Catch ya later,
casen point