Just for clarity's sake - correct me if I'm wrong on this one, Lee - that cost is including the cost of labor for someone to actually run all the cabling and do all the soldering*, right? We're not talking a grand as the street price for a purchasing a 24x2 piece of hardware, at least not for the grade of panel needed for anybody with anything less than a studio who's rest of the gear cost a hundred times that. Just for the record for readers of this thread, 24x2 patch bays typically run about $100-$150 for the entry-level stuff and can go up from there.
*While many entry-level patch bays have TRS jacks on the back, the better patch bays typically do not use mechanical jacks, but instead use something like DB25 (25-pin) or D50 (50-pin) jacks or something similar for their connections. As such, with these kinds of patch bays custom cabling is typically run from the equipment to the bay (to keep the signal path only as long as necessary) and then the leads soldered to their respective pins on the multi-pin plug or jack. This is a tedious, time consuming manual job which drives labor costs up when contracted out. If one is good with a soldering iron (as any audio engineer or electric musician should be
")
), one can save a LOT of money by doing their own wiring.
Those rookies or hobbyists out there like Studiomaster who have only a basic compliment of relatively entry-level gear can get by fine with standard TRS cabling and rear patch bay connections. A hundred dollar Chinese condensor running through an Alesis or Behringer 6x2 mixer isn't going to suffer greatly going through a $100 TRS patch bay. But as one's signal path gets more pristine (better mics, better preamps, better converters, etc.), better-quality patch bays with better connections are definitely in order.
G.
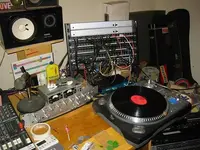
P.S. Mad, what I want to know is what's on the turntable?
")
. It looks like it might be something from Mercury Records. Am I even close?

 .
.