The Building of MixMagix

mixmagix

New member
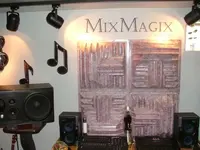
I have always liked looking at pictures of other people's home studios to see there creativeness on building a place to work on their music projects. I bought my house about 22 years ago and immediately gutted the finished basement to create my own "little cave" to hide out and try to create the next "Stairway to Heaven". I poked at it paycheck to paycheck- year after year till I was done, it took 15 years to complete. At the risk of "Getting My Woofers Kicked In" by some of you, (there's always a critic in the wood pile somewhere :-) I have decided to share my story and pictures of building my home studio...... known around these parts as Mixmagix Recording Studio.
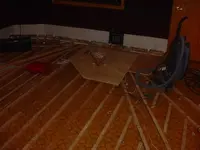
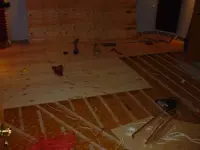
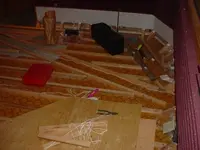
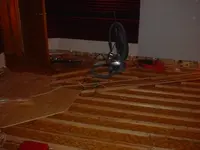
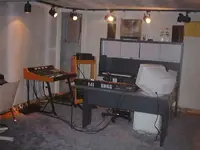
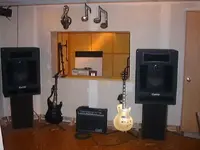
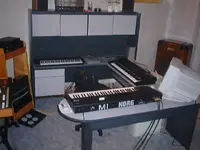
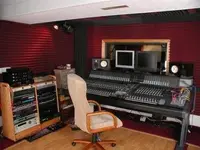
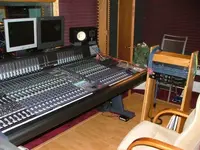
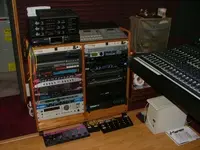
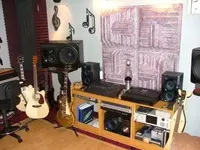
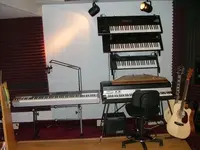
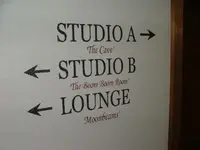
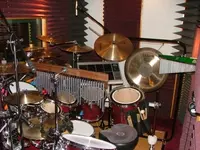
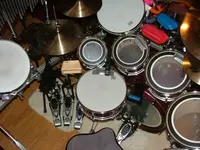
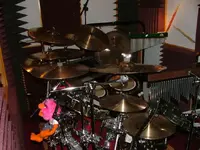
I stripped everything to the concrete walls and then built a staggered dual 2x4 wall between the studio and what would become the game room ( the rest of the basement). The studio is a two room affair made up of a control room for the console, keyboards, guitars and then a separate drum room. I also built another wall of the same staggered design between the control room and the drum studio with 4 panes of laminated glass for sound proofing and so I could see my drummer. Here are some pics of the construction of the control room floor which I "floated" so I could have all the cables that run from each wall hidden under the floor to keep the floor "clean".
 

Attachments

  • Floor2.JPG
    Floor2.JPG
    60.3 KB · Views: 94
  • Floor1.JPG
    Floor1.JPG
    61.7 KB · Views: 95
  • Floor3.JPG
    Floor3.JPG
    62.9 KB · Views: 93
  • Floor4.JPG
    Floor4.JPG
    60.3 KB · Views: 93
The Building of Mixmagix cont.

In the hunt to build the best studio I could (since I'd never done this before) I read a lot of books from the local college about how sound travels, acoustic principals, soundproofing, and even toured a couple recording studios a couple hours away from home and asked them what they liked and DIDN'T like about their own studio.
In the ceiling I floated a layer of Owens Corning 1" Sound Board to keep the music downstairs and then installed 2 layers of 5/8 sheet rock. All the walls also got 2 layers of 5/8 rock on both sides and inside the walls I did R-12 insulation on one wall and left the other one alone for "dead air" space, part of the sound proofing. 20 or so years ago I hadn't seen any of the acoustic "corner treatments" that we have today so I angled every ceiling to wall, wall to wall and wall to floor joint with a lot of work with 2x4's and sheet rock. And every angle was different to keep the sound moving until it dissipated. A 33 1/2 angle in this corner,a 45 degree on that one , a 22 degree there. MAN ! ... I just had a flash back on how much time went into building those rooms ! I also chose to do track lighting so I didn't have any extra holes in the ceiling with recessed lighting and defeat the soundproofing. Here are a few pics after the sheet rock was done and I did music in the rooms like this for awhile while my funds built back up.
 

Attachments

  • studio.jpg
    studio.jpg
    36.2 KB · Views: 95
  • studio2.jpg
    studio2.jpg
    36 KB · Views: 93
  • studio3.jpg
    studio3.jpg
    37.7 KB · Views: 94
Last edited:
Heya, I merged your threads. Please keep just one thread going for your studio. If you want to put up additional pics, just post a reply in this thread.

Studio looks cool.

Thanks,
 
The Building of MixMagix Finished

After numerous years, an X wife, a couple of girlfriends, lots of E-Bay shopping and sheer determination I finally completed my little slice of auditory heaven.... Mixmagix. Hope you all enjoy the pictures and remember.......Don't ever accept the "Nay Sayers" that spout " You can't do that, you don't know anything about it". Get knowledgeable, Keep your nose down, and keep the finished vision in your mind ! This world needs more musicians and more music, help spread the wonder of music.
 

Attachments

  • P1010117.JPG
    P1010117.JPG
    31.4 KB · Views: 91
  • DSCF2942.JPG
    DSCF2942.JPG
    58.2 KB · Views: 89
  • Rack One.JPG
    Rack One.JPG
    61.2 KB · Views: 89
  • DSCF2965.JPG
    DSCF2965.JPG
    33.1 KB · Views: 89
Oops

Sorry Chili.... I'm new to this posting thing. You may have one more to merge ! ! LOL But I think I got it together now.
 
Mixmagix Pics Cont.

Here are a few more pictures of the control room and the wall outside the studio as you enter in. "The Cave" is a nickname by my girlfriend for the studio, "The Boom Boom Room" and "Moonbeams" are a couple jokes between some friends of mine. Besides...have ya ever seen a studio that didn't have more than one studio room and a lounge ? ?
 

Attachments

  • DSCF2947.JPG
    DSCF2947.JPG
    56.8 KB · Views: 93
  • DSCF2950.JPG
    DSCF2950.JPG
    58.6 KB · Views: 91
  • DSCF2952.JPG
    DSCF2952.JPG
    52.1 KB · Views: 90
  • Wall outside studio.JPG
    Wall outside studio.JPG
    17.1 KB · Views: 89
Mixmagix Pics Finished

These are obviously from the drum room, it's pretty tough to take good pics in there cause I can't get back far enough from the kit......should have built a bigger drum room....go figure ! !
 

Attachments

  • DSCF2960.JPG
    DSCF2960.JPG
    62.4 KB · Views: 88
  • Drum Pic 3.jpg
    Drum Pic 3.jpg
    27.5 KB · Views: 87
  • DSCF2956.JPG
    DSCF2956.JPG
    61.2 KB · Views: 87
  • From the Doorway.jpg
    From the Doorway.jpg
    63.4 KB · Views: 87
Looks amazing...just a couple of treatment suggestions: you need more bass trapping in a room that size, and the foam stuff in the corners isn't going to be enough. That looks like an awful lot of foam at the reflection points...are the decay times balanced?
 
The reason behind the treatment

Looks amazing...just a couple of treatment suggestions: you need more bass trapping in a room that size, and the foam stuff in the corners isn't going to be enough. That looks like an awful lot of foam at the reflection points...are the decay times balanced?

The reason the bass trapping is the way it is, is because when I worked out the logistics of the treatment with Auralex. I told them I was not only going to mix in the room but I would also be doing some recording in the same space. We decided to go with the Male Sunburst ( Broadband Absorption) treatment vertically in the corners with the added 4" Wedge ( Additional Bass Trapping) around them to cover both circumstances.
As far as the reflective points go ( I'm assuming your talking around the console) it's my understanding from my research and theirs that in a control room most studio designers will tell you that the front of the room (walls and ceiling) should be absorptive as far back as the engineer. The ceiling from the engineer back can contain a mix of diffusion and absorption and it's also felt that the rear wall should have a diffusor array surrounded with some broadband absorption. I could add some broadband to the left and right of the array but above is limited and below is taken up with one of my racks. As far as the decay times go I'm still lookin' for my notes on that. Both rooms actually sound awesome and record nicely. The acoustic treatment on the walls in the drum studio (minus the corners) is actually pinned in so I can add or remove the treatment to change the "liveness" of the room. Thanks Weasel for taking the time and your interest in my rooms.
 
That's one way of doing it, definitely. Typically I'd rather take a less-is-more kind of approach, where you only use as much treatment as is necessary to fix the problems. The problem I'm seeing is that you have a whole buch of absorption above 900Hz and very little below 500Hz. I know that Auralex plugs the corner wedges as bass traps, but they're really not very effective down that low. Their own test results will bear that out. Some 4" or thicker bass traps in the corners will do you a ton of good. You could even leave the foam wedges in place in the corners and simply cover them with a bass trap straddling them. That would be about as effective as a superchunk.
 
Back
Top