Rip Da SysTeM - DIY Patchcords

Somnium7

Noise Criminal
Why bother? Have you seen the price of gas? Have you noticed the price of groceries? Can you say R-E-C-E-S-S-I-O-N?

I like patchcords, I use them pretty much everyday. But they always seem to give up the ghost when I need them most. Hey! Ima poet and don't even know it... :D

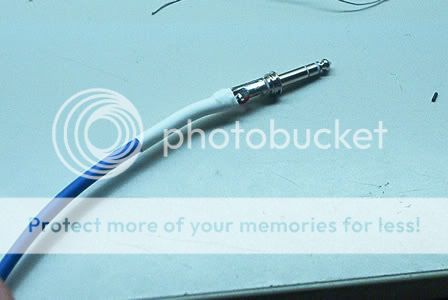
Patchcords cost alot of freakin' moolah in large quantities. Lemme show you how to get patch cords of any length and superior quality for about $5 each.

You'll need to buy a large roll of cable. Then a large number of connectors. How much depends on how many cables you need. Thus I won't get into the where's and whatfors of obtaining these things.

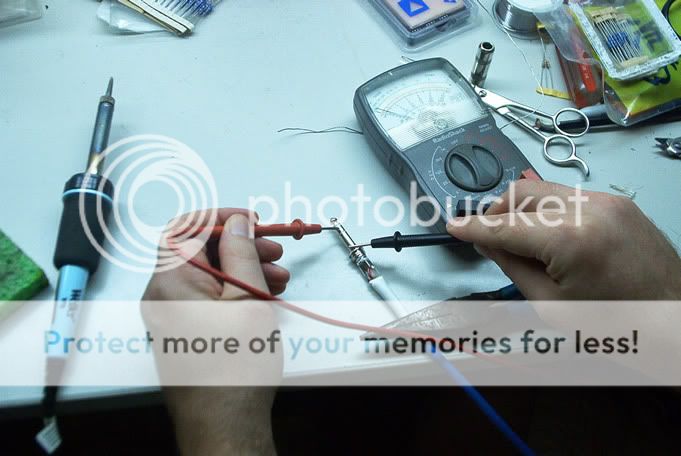
You'll also need heatshrink tubing, solder and tools. Here are the basic tools you will require:
441001.jpg


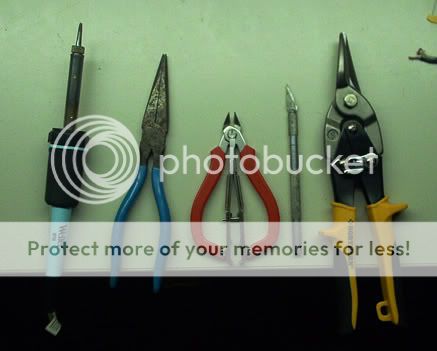
Scissors are helpful too. Notice that the thing with the red handles is 2 tools in one - snipper and stripper.
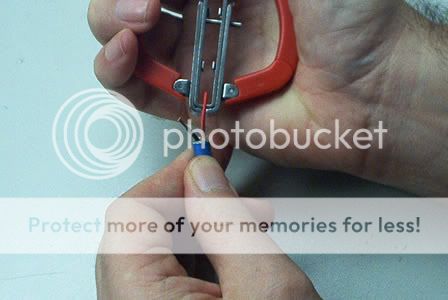
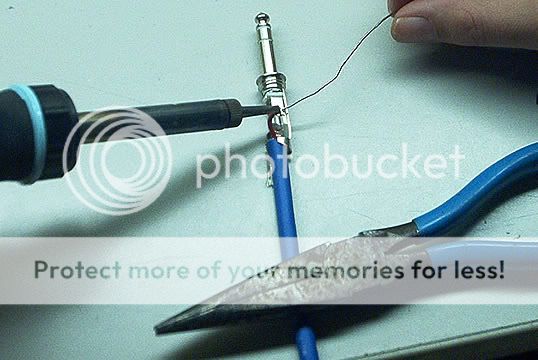
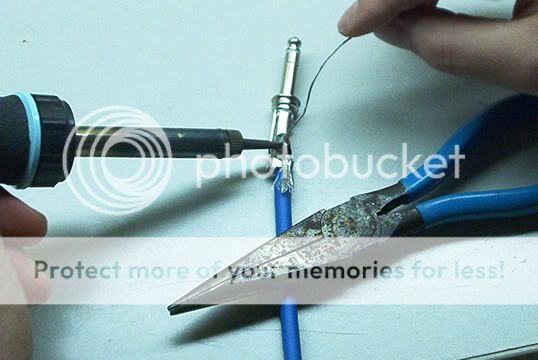
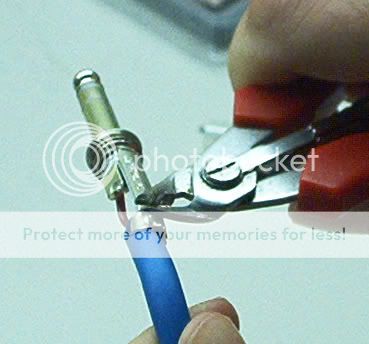
The big shears (yellow handles) are for cutting the cable. The little hobby knife is for removing the cable's jacket. Big needle nose to crimp the strain relief. Soldering iron for - you guessed it - soldering.

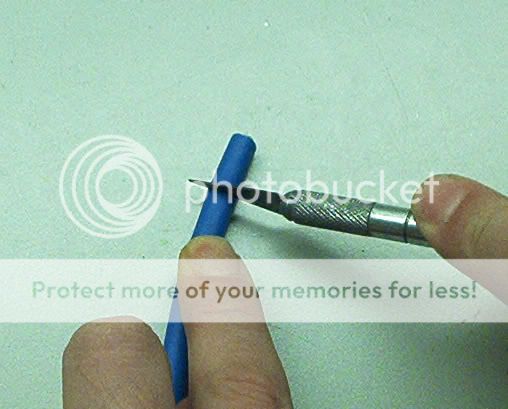
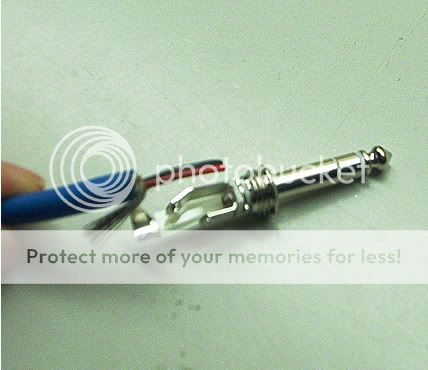
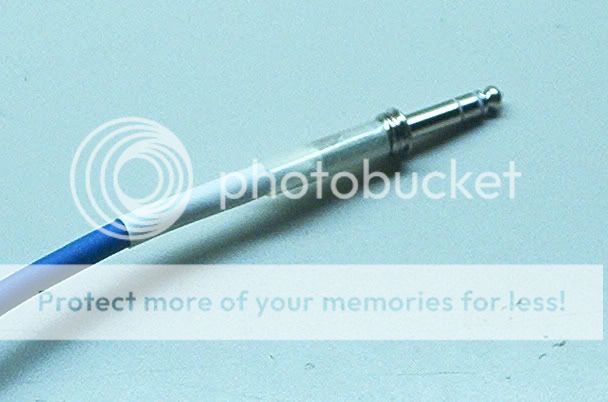
Begin by cutting 1/2 inch of jacket from the cable. Just apply knife and roll across your work surface. When you feel metal through the knife handle you are done.
441003.jpg


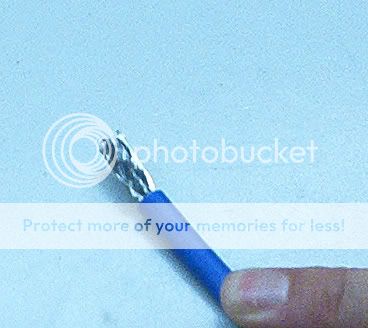
After removing the jacket it should look like this:
441004.jpg


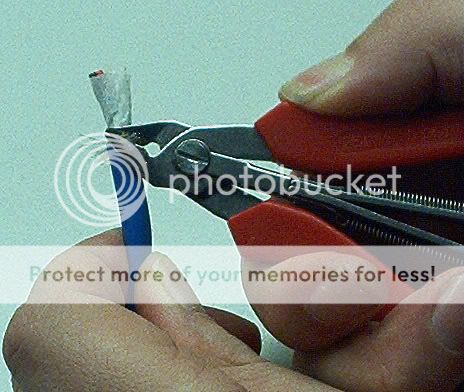
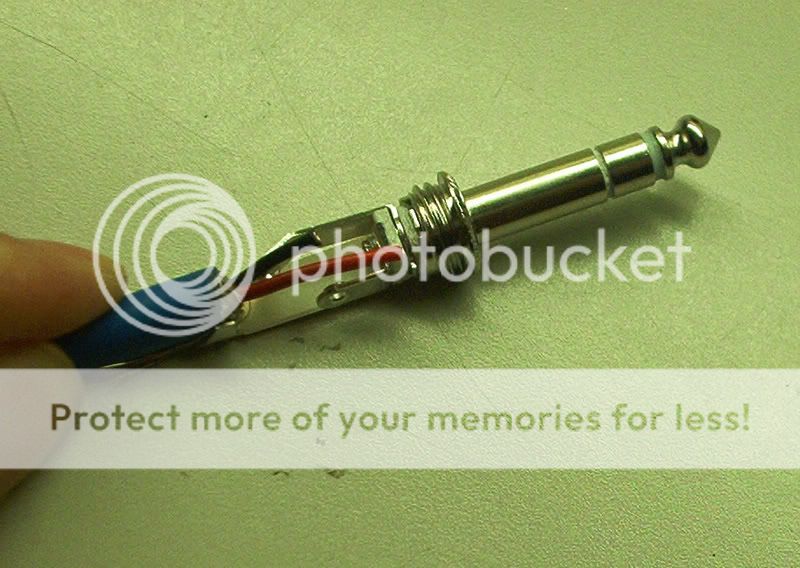
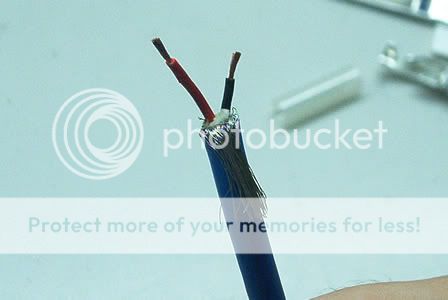
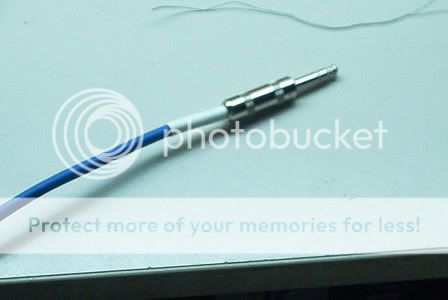
Now you want to trim away half the braided shield wire with your snips:
441005.jpg


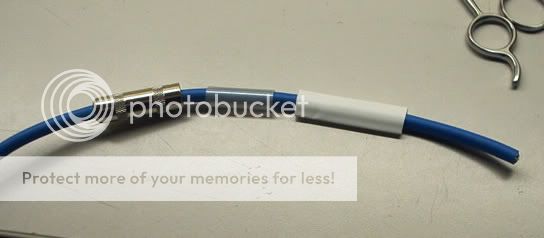
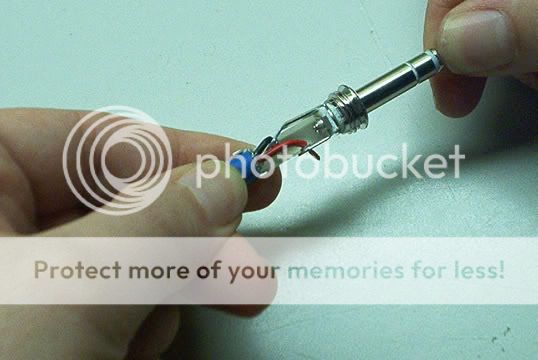
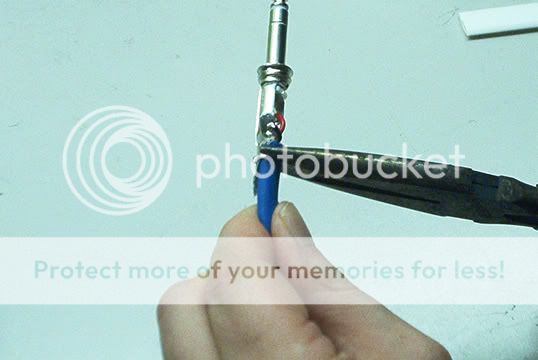
VERY IMPORTANT! Trim a 2 inch length of heatshrink tubing and then slide your connector shell, insulator sleeve and heatshrink onto the cable. Remember to do this for both ends of the cable now or you will be sorry later :eek:
441006.jpg


Continued in next post.....
 
Now place the stripped cable up against the connector body and work the shield around so it is on the side of the longest tang:
441007.jpg


You will have to trim the length of one wire (black) to accomodate the length of the ring tang.

441008.jpg


Now you can strip the insulation off the signal wires. Remove roughly a 1/8 inch worth:
441009.jpg


It should look like this when completed:
441010.jpg


Next, bend the wires as such and insert them into the holes in the tangs:
441012.jpg


Continued in next post...
 
Nice post. I'll give you another reason . . . am I the only person in the world who wants RA patchcords? Because I have a glass door in front of my rack I like to keep closed? Well, I guess so, because I hafta make 'em :(
 
Time to burn shit up. Grab your iron and solder the wires to the tangs. start with the tip wire (red). Note: a big iron is best here, 25-35 Watts. There is alot of metal to heat and you want to do it quickly...

441013.jpg


Spend too long with the heat and the insulation of the wires will begin to burn away. This is not good. :mad:
Now do the ring wire:
441014.jpg


With those two soldered grab the big pliers and crimp the strain reliefs down. Make sure the shield wire is to the bottom in contact with the long tang.

441015.jpg


Solder the shield. Do it quickly so you don't burn the jacket. A little meltage is alright and unavoidable so don't sweat it. You don't want charred blackness though.
Now trim excess wire from all solder joints:
441017.jpg


If you have an ohm meter or continuity tester, now would be a good time to check that nothing is shorted out. You have to be careful of this since the ring wire can melt through the insulation of the tip wire during soldering if you aren't careful. Seen in this pic is a $12 Radio Shack analog multimeter. Works fine for simple stuff like this.
441021.jpg


Now slide your heatshrink over the connector body till it hits the plastic insulator between the tangs.
And shrink it baby... I have a heat-gun, but a candle can do just as good a job if you are careful not to burn down your house :p
441019.jpg


Continued in next post...
 
Your 2 inch slice of heatshrink should look like this now:

441020.jpg


Next slide the insulator sleeve up onto the connector body as far as it will go:
441022.jpg


All that is left is to screw on the backshell.
441023.jpg


Repeat the above steps for the other side of the cable. Be sure you have put your backshell, insulator sleeve and heatshrink on the cable BEFORE soldering the wires to the connector.

So... what are you waiting for go save some money.
Connectors used in this tutorial are Switchcraft 297.

Moderator can you please make this a sticky?
Thanks :)
This has been brought to you by the letter M and the numbers 2, 9 and 7.
 
nice! do you make XLR cables? (or 7 pin "tube mic" cables?)

Most of the above will apply to XLR cables. Since those are physically larger it is actually alot easier to work with them.
I only wish I had a tube mic - gosh people are so spoiled... ;)
 
I've made lots of my own cables, but somehow, you made it look more fun--certainly more professional than when I do it. Great post. I'm sure you've helped lots of folks by taking the time to photograph and write up the process.
 
I've made lots of my own cables, but somehow, you made it look more fun--certainly more professional than when I do it. Great post. I'm sure you've helped lots of folks by taking the time to photograph and write up the process.

Wow just inflate my head why don't you? Thanks WS. LOL Your new avatar is pretty awesome!

It truly is the nicest benefit of DIY when you can save some money doing stuff you enjoy.
 
Wow just inflate my head why don't you? Thanks WS. LOL Your new avatar is pretty awesome!

It truly is the nicest benefit of DIY when you can save some money doing stuff you enjoy.

Mr. Clean & I thank you for the comment on the avatar.

You're right about saving money doing stuff you enjoy. Often the kicker is that with a little time and knowledge you can end up doing something yourself that you'd never dream of paying for.

I'm gonna start building out my studio in about 3 weeks. One of the things I'm most looking forward to is the custom wiring (XLR in, XLR out, TRS) in all the walls, under the floors and then into the patch bays in the custom console with all my rack gear built into it.

I can't imagine how much that would cost to pay some company to do--I'm sure I wouldn't--I'd just use one of my stage snakes.

But by doing it myself, I'll end with a cool custom set up for a whole lot less money (but probably a lot more time! :D)

Long live DIY!
 
Just what I was looking for.

Awesome info. Oddly enough, I came here this morning to ask about DIY patch/guitar cables and what not.

I have been checking out places to pick up cable/connectors, and so far www.best-tronics.com seems to be the most promising. Do you have any places that you recommend pricing out before I buy?

-Wes
 
damn "5 star" DIY post... the time I could have saved with stuff like this!

digital pics, internet, the young gun's have a wealth of info at their dispose.
 
Yoohoo! Moderator? Any chance this can be made a sticky?
Not trying to stroke myself off here, but this topic is essential DIY material that can benefit everybody.
 
Nice job! Except....in my experience shrink tubing makes it a pain to repair your lovely home-brew cables...and if you treat your cables like a normal person not a drooling goon you won't need the extra strength.:)
 
Somnium7, great job on all fronts.

Described eloquently and depicted accurately. After reading it, I actually believed that I, myself, could actually make my own patch cables. I gave it a 5 star rating to help support the sticky.:)

Long live DIY!
 
Nice job! Except....in my experience shrink tubing makes it a pain to repair your lovely home-brew cables...and if you treat your cables like a normal person not a drooling goon you won't need the extra strength.:)

In all honesty, yes you can get away with omitting the heatshrink and save a few cents per cable. However, I am very much the Drooling Goon and as a Drooling Goon my mental options are rather limited which means I tend to view the world and those in it from the Drooling Goon level. Therefore I tend to see all other quasi-bipedal creatures as Drooling Goons like me. :D

In short, heatshrink good! :) - broken cable bad! :mad:

Thanks Erockrazor :D
Described eloquently and depicted accurately. After reading it, I actually believed that I, myself, could actually make my own patch cables. I gave it a 5 star rating to help support the sticky.

Hmmm don't doubt yourself without giving it a try. You never know what latent cable-building-talent lies within! :eek:
Cool about the stars! Much appreciated :)
 
Back
Top