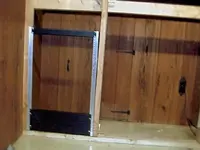
What's that little existing access door in the panneling back there? Hope you're not blocking off something you may need to get to later, like electrical or plumbing access??
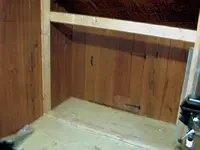
In the studio, there are two such doors. One larger, one smaller. These go to the attic space thats immediately behind this short wall. I debated not closing them up but then I realized I have nothing in there but newly installed A/C ducts so when I go central air I have the ductwork done. I have easy access from the bathroom next door. In fact, the door to this space is 4'x4' which is much nicer to climb through
")
I've also mounted a large autotransformer in the attic, mounting it on a small cement slab (2"). All around the transformer are 2' square asbestos tiles I recycled from the furnace room when I redid it. Since I can't toss asbestos into the trash, I figured I might as well re-use it. This is in case the transformer decides to go phoooof. It shouldn't because I'm not drawing anywhere near its limit.
Whats the sub flooring? is it concrete or wood?
Is any of that equipment resting directly on the floor?
I guess its hard to see, but the racks sit upon a 2x4 sill, so none of the equipment is sitting directly on the floor. I did this more for structural integrety than anything else.
Its an interesting loft - tongue and groove cedar panels on all walls and ceilings, stained with a yecky brownish pine color. The floors joists are 2x16's oak. And they really are 2x16, not the more modern slightly shorted variety. The subfloor on top of that are two 1" thick layers of plywood, and on top of that (what you see in the pictures) are really disgusting yellowed office tiles glued on.
Originally I was going to raise the floor by building a 2x4 grid to put wires and such, but with this new layout I only need to electrical and audio to the vocal booth, and everything else can sit (seperated) against the back wall you see in the picture in hangers (haven't mounted the hangers yet), so the A/C is seperated from the audio. Anyway, this allows me to not raise the floor. I have a 7' ceiling, so every bit of height works for me.
What I'm going to do now is scrape up all the office tiles (and cut them right in front of the racks) then lay down 1/4" of rubber then 3/4" of engineered dark mahogony tongue and groove floorboards. Improve the lighting, slap foam everywhere, and it will be tolerable.
Sorry, thats all the questions I could think up right now. Looks like it comming along bud!
Its coming along. I just need to stop changing my mind and finding "improvements" along the way. See my day job interferes with this, so there is often large amounts of time between major steps, which gives my brain time to re-engineer.
I should just take a week off work and just hammer it out.