Midimonkey Construction continues

  • Thread starter Thread starter frederic
  • Start date Start date
frederic

frederic

New member
After a long break (since early spring), I decided to finish up mudding and sanding. I'll be priming this weekend. I had hired contractors to finish up, and they showed up one day, did practically no work, then never showed up again. I can't wait until they send their bill, its been two weeks plus. So in a fit of disappointment, I finished. I have one spot in the vocal booth to redo, but other than that, I'm ready to prime, then paint, then slap on acoustical treatments and molding. Guess I better decide what color to paint the walls. The ceiling will be a glossy white, like most ceilings.
 

Attachments

  • IM000722.webp
    IM000722.webp
    15.6 KB · Views: 230
More pictures
 

Attachments

  • IM000723.webp
    IM000723.webp
    14.4 KB · Views: 213
second picture
 

Attachments

  • IM000724.webp
    IM000724.webp
    14.5 KB · Views: 197
fourth picture
 

Attachments

  • IM000725.webp
    IM000725.webp
    17.5 KB · Views: 197
fifth pictire
 

Attachments

  • IM000726.webp
    IM000726.webp
    8.5 KB · Views: 198
Thats great frederic. I too have been busy all summer, and like you, I'm starting this weekend AGAIN :rolleyes: :D

I had hired contractors to finish up, and they showed up one day, did practically no work, then never showed up again.

Maybe cause its DANGEROUS in there frederic? :p (just kiddin with ya!)

That seems to be a problem here too. People have a hard time just getting contractors here to come out, let alone stay and finish. I don't get it. Maybe THEY don't have to make a living, or don't REALLY want to work for their money. :confused: On my last job, the client couldn't believe I finished ON TIME, ON BUDGET, and actually did a great job. They gave me a small bonus for keeping my word. Hmmmmm, maybe I could get a contract with the ARMY and do nothing, and make a ton of money while I'm at it. Just like ole Halburton INC. :D
Well good luck frederic and keep us up to date. Don't get "sanders or painters elbow" :D

fitZ
 
At long last!! I tried holding my breath waiting for you, Fitz, and Michael to get back at it but I finally had to concede to the need for air.

I hope your weekend is productive and we can begin to see that monster studio desk begin to take shape (almost sounds like a "monster garage" episode with film clips required!!).

My nephew is in kinda the same boat with his drywall contractor. They came out and started the job on his spare bedroom in his basement (that I helped him frame about a month ago), but didn't bring enough drywall to finish the job. It's been 3 weeks and they still haven't come back to finish up (excuses like "I got the flu" and "I shot myself with a nail gun and can't work for a few days" seem pretty lame sometimes; could be true but it makes you wonder).

Anyway, glad to see you guys are getting back to it. I've sure been enjoying the chance to do some recording and lots of mixing the last few months. One of these days I hope to build a proper sized studio (now that I've got the bug from you guys), but until then I'm enjoying what I've got.

Keep the pix coming!!

Darryl.....
 
man, now all we need is the monkey cam back and we're in business. :D
 
Yeah, finally got back to work. Its too cold to work on my truck anymore, though I have a lot of sanding to do for the new dashboard before I reinstall it. I spent a good part of this week between the two projects, which is why neither really got as far as I wanted to.

The monkey cam is still up, though its in the garage for when I was allowing people to see "superbumper" construction process. Then the new intake manifold construction, then the exhaust manifolds construction.

Busy summer :)

So tomorrow is going to be split between priming the studio, tacking up molding (and priming), and between coats I'll be outside sanding the dashboard. I'm soooooooooooooooooo sick of driving my truck around with all the wiring hanging on my lap!
 

Attachments

  • IM000715.webp
    IM000715.webp
    23 KB · Views: 179
Is THAT part of your custom CONSOLE frederic :D :D (hey, that gives me an idea :rolleyes: :p
fitZ
 
fitZ2 said:
Is THAT part of your custom CONSOLE frederic :D :D (hey, that gives me an idea :rolleyes: :p
fitZ

heh-heh, no, that's the fiberglassing, bondo, epoxy, steel, cloth, glue, stapled section of my "doghouse" as I hacked up the factory dashboard for my truck. Well, a junkyard equivelent. Didn't want to hack up the original dash just in case it didn't work out. Putting in a 13" touchscreen, digital gauging, linux, new GM EFI (ford truck), twin turbo 600cid stroker motor, linux controlled climate control, ABS, air suspension, etc.

However, I didn't work on that today. Instead, I bought paint, and started painting my vocal booth. I decided to do the room in "areas" so I'm not so overwhelmed by the entire studio. Which is why I keep procrastinating.

I've chosen various greens to go with the "Midimonkey" theme I have on my down-at-the-moment website.

Vocal booth window/frame. Hunter green moulding, "light mint" walls. Super white ceiling. With the minimal light that will be in there, plus the somewhat large hunter green fabric covered 409 treatments, it will look fairly nice. Without the fiberglass/cloth acoustical treatments, it's a bit over-minty.
 

Attachments

  • IM000729.webp
    IM000729.webp
    8.3 KB · Views: 145
looking in the door of the vocal booth, you can see the original window color on the outer sash, and the new color on the inside sash.

Don't mask things you don't want to paint with masking tape, it peels off the paint. Use the overpriced blue painter's tape (3m). Worth the extra bucks, you don't have to repaint. I have to do the ceiling, and the moulding, again.
 

Attachments

  • IM000728.webp
    IM000728.webp
    14 KB · Views: 137
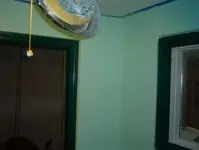
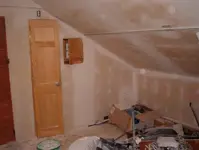
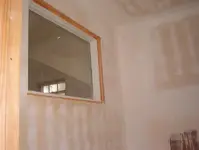
And finally, standing in the back corner, looking out. Not an interesting shot, but gives you an idea of the contrast of the two greens, and hopefully the white ceiling. The lighting is a bit strange because I use flourescent drop lights rather than incandescent, and the ceiling light is hanging off unpowered at the moment.

BTW, I heard "munching" in one of the walls of the console room (not the room in these pictures), so I opened the "wall hatch" and looked inside, sure enough, a large collective of field mice munching on peanuts. Peanuts? WTF?

I thought I sealed off all the holes with the new structure I built, and I don't have any peanuts anywhere. So, I scooped up all the mice using a pool net (which was a lot of work mind you, they don't hold still), and put them in an empty spackle bucket, and dumped them over the fence into my neighbor's yard :) Turns out, I did seal up everything really well, except for one hole in the eave of the garage which used to have a vent right next to the gutter leader on that side, whereas the 4" vent "fell out". So, I epoxied a new one in place and that's the end of the mice, I hope. I didn't hear any additional scurrying or munching, so maybe I've gotten them all.

I still can't figure out where they found peanuts. Whole peanuts too!
 

Attachments

  • IM000730.webp
    IM000730.webp
    7 KB · Views: 144
I peeled off the remainder of the tape, to see what I have to touch up. Zapped the moulding this evening, no big deal, was just a few spots on the window sill.

The ceiling peeled off pretty good, so looks as though I'll have to paint it again. I'm going to lightly sand the mint green spots so I don't need 400 coats trying to cover the splatters on the ceiling.

At the bottom of the wall where the flip floor flips into (say that three times fast), a chunk of mint green painted spackle decided to fall off. This was one of the spots the contractor who only showed for one day had done... looking at this particular spot I'm glad they didn't come back to finish the rest of the place. Looked very strange... so peeled a little bit, and found they swadged on some spackle, placed over that a 4"x8" piece of 80 grit sandpaper, then spackled over that building the area up to the depth of the 1/2" sheet rock. The hole looks about the size of a boot heel.

Great, kick my walls, then fill it with sandpaper, cover with spackle. Thanks.

Only in my life.
 
DDev said:
I hope your weekend is productive and we can begin to see that monster studio desk begin to take shape (almost sounds like a "monster garage" episode with film clips required!!).

If you're into metalworking, you're really going to like this desk. I'm even going to have a foot rail underneath :)

I just haven't decided the method of final assembly. I could easily weld it together in the room as one unit, but should my wife and I ever move, it has to stay, or get cut into sections (and rewelded somewhere else). I could also make the legs and some of the under carriage as one piece, and the flatter top piece as a seperate unit, and bolt the two of them together, however each piece will be extremely heavy.

Now, I'm thinking the two sides are seperate pieces, and the top section is three individual sections bolted to each other, and the legs, with two diagonals across the back side to side for triangulation. Since my wife is pregnant, I'll be carrying this up myself if I choose not to make it in the room.

Decisions decisions.
 
frederic said:
Don't mask things you don't want to paint with masking tape, it peels off the paint. Use the overpriced blue painter's tape (3m). Worth the extra bucks, you don't have to repaint. I have to do the ceiling, and the moulding, again.


Masking sucks. Learn to cut in clean, and you will get a much better result. I never mask, unless I am using a paint sprayer. Every time I try to mask (even with the Blue stuff) it comes out looking crappy. And I know how to mask. I do a lot of very fine detail pinstriping on my guitars. Masking sucks there too, but as I am spraying lacquer, I don't have much choice.


Light

"Cowards can never be moral."
M.K. Gandhi
 
may I tax you to explain cutting?

I genuinely have no clue...
 
Hello frederic, hey, "cut in" is simply using a brush, to paint the wall where it meets all the trim, corners of walls and ceiling, and along the edge of base board with flat latex(or whatever your using) before you use a roller to fill in the areas between the "cut in". Masking is time consuming. I use a long piece of sheetmetal to cover the edge of casing and baseboard while I "cut in" on the adjacent drywall with an angled "trim" brush. Hope that explains it.
fitZ :)
 
No excuses guys, but I am so friggin' busy right now. Seems like this is always my busiest time of the year.
Then to top that off, my wife's business is just exploding! I'm helping her with that too, but she and I have an opportunity to make some serious money this month, so we're pretty focused, its just..... not on the studio right now.

Anyway, last time I picked up a hammer in there, I got this done:

The finish out for the window frame. (both sides are done now)
https://homerecording.com/bbs/showthread.php?t=134851

And some drywall has gone up:
 

Attachments

  • dwall1.webp
    dwall1.webp
    12.2 KB · Views: 121
Back
Top