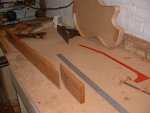
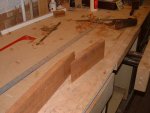
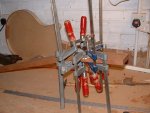
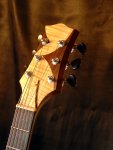
I'm building a new guitar

looking good.

How are you doing the one piece neck into the body? Same as that HR build thing? I must chuck up some finished pics of that. I completely forgot.
 
looking good.

How are you doing the one piece neck into the body? Same as that HR build thing? I must chuck up some finished pics of that. I completely forgot.
Thanks :)
The neck joint will be PRS style. It will join the body at near the 17th fret. I want to go without a pickguard, so I'm not absolutely sure how I'll treat the truss rod adjuster. The tenon will be plenty long enough for stability. I have no plans, so I'm designing on the fly on this one.

I'd love to see the pictures of the completed HR guitar. I was curious what happened with that one.:thumbs up:
 
The truss rod on the one piece neck wasn't as difficult as I anticipated. Everything's moving along.
 
That guitar looks awesome... Hope it sounds well :)
Thanks Man!

I've been busy, and haven't had a day off in a couple of weeks. I'm waiting for some parts for the bass before I can proceed with it. I hope to put the telmaster together this weekend after a final polish.

In the meantime, I made jigs to do scarf joints with the router sled. The first couple came out great. I'm using the homemade sled for many functions now. Really a useful tool, and I built it from scrap.


I had a day off yesterday and accomplished a little. I did the abalone dot inlays, and fretted the one piece neck for the bass. Here it is mocked up on the floor.

 
Are the scarf joints held together only with glue or do you use a dowel or screws for strength?
 
Are the scarf joints held together only with glue or do you use a dowel or screws for strength?

Glue only. There is a veneer on the face and sometimes on the back of the headstock that adds strength depending on where the scarf lies once surfaced I always try and finish it back from the nut on the face.
 
JCH, just want to say I dig your builds! They suit my need for elegant subtlety. I know there are a few more builders up here, would y'all go into a little bit of detail explaining how you achieve fretboard radius and rounding the back of the neck (are there jigs involved? JCH, maybe some "work in progress" pics of the new bass?) Thanks!
 
Are the scarf joints held together only with glue or do you use a dowel or screws for strength?
I used a couple of toothpicks to keep things aligned in the clamps. As always Titebond Original holds it together.
Glue only. There is a veneer on the face and sometimes on the back of the headstock that adds strength depending on where the scarf lies once surfaced I always try and finish it back from the nut on the face.
I'm not sure if I'll do an overlay or not. I laid it out so it wouldn't need one. I don't know what I'll use for a top yet. That will be a determining factor.
JCH, just want to say I dig your builds! They suit my need for elegant subtlety. I know there are a few more builders up here, would y'all go into a little bit of detail explaining how you achieve fretboard radius and rounding the back of the neck (are there jigs involved? JCH, maybe some "work in progress" pics of the new bass?) Thanks!

Thanks Neb, I went into a lot of detail earlier in the thread on most of the processes. The fretboard radii I acheived with a contoured sanding block. The neck shape is mostly by feel.
 
I don't want to bust JCH's thread but here is a pic of the basic scarf and a finished veneer headstock that gives some idea of using a veneer to strengthen the joint. Personally I'd always have a veneer on the front at leas 1mm thick for peace of mind. The final pic is the actual piece shown in the first three pics.

I'll let JCH bung up a some pics of the fingerboard radius blocks rather than chuck more of my pics in this thread. I'm pretty sure I've posted some before and how to make your own radius blocks.

scarf1.jpg

scarf2.jpg

scarf3.jpg

Headstock.jpg
 
Man, I just had an epiphany!!. I see what you did. Cut the headstock from the piece of lumber and then flipped it over to the back side of the neck. Very cool. Someday I would like to get to the point of making my own necks. These little tidbits I am picking up along they way will get stored until I'm ready to start. But that's probably a few years down the road.

(That's some nice veneering on the headstock, Mutt)
 
I don't want to bust JCH's thread but here is a pic of the basic scarf and a finished veneer headstock that gives some idea of using a veneer to strengthen the joint. Personally I'd always have a veneer on the front at leas 1mm thick for peace of mind. The final pic is the actual piece shown in the first three pics.
I hadn't considered an overlay as reinforcement. No doubt it would strengthen things a bunch.I oriented mine on top so I wouldn't need one. I liked the look of the piece. my billet was a piece 5X36" 8/4, and I wanted to get two necks from it.

I'll let JCH bung up a some pics of the fingerboard radius blocks rather than chuck more of my pics in this thread. I'm pretty sure I've posted some before and how to make your own radius blocks.
I've made radius blocks from lamination's of bendable plywood, and from pieces of some 24" sauna tube. I'd be interested in how you make yours. I have a few ideas, but they are a bit complicated.
 
JCH, just want to say I dig your builds! They suit my need for elegant subtlety. I know there are a few more builders up here, would y'all go into a little bit of detail explaining how you achieve fretboard radius and rounding the back of the neck (are there jigs involved? JCH, maybe some "work in progress" pics of the new bass?) Thanks!
I'm sorry for the way I originally replied to you, It was rude of me. I was on my way out the door for work, and didn't give it the respect it deserved. I really appreciate your kind compliments.

Shaping the neck is a fun part of the construction. Unless you have some serious computer drafting skills, and a CNC machine handy You're pretty much on your own. It's not easy to visualize a three dimensional image while looking at a flat piece of paper. The tools that I use the most after I have the billet shaped, and the truss rod installed, are a rasp, and a sanding block. With this one being a one piece neck, the blank was bigger at the start, but I needed to keep it as thin as possible because the truss rod had to be installed from the back side. I was limited by the depth I could cut with the router bit. The tolerances were much more critical than I've been used to, making it much easier to screw up. I had another blank on hand in the case that I wrecked this one.

Meanwhile on the telmaster, I ran out of 43 gauge wire while winding the neck pickup, but have some on order. I'm gathering stuff for the next guitar in queue. I'll use the sapele neck with the scarf joint. It's going to have a maple top on an alder body. The fingerboard will be Brazilian teak. Hardware so far is an adjustable stoptail, and grover tuners. I haven't decided on the shape, or electronics yet, but everything else is in the works.
 
I need to get this bass finished! Her birthday is only four weeks away, and the finish will take most of that.

I cut the groove for the binding with a 1/2" flush trim router bit on which I substituted a 3/8" guide bearing. This leaves a 1/16" deep step. I attached the black plastic with superglue gel. I glue a section that is a few inches long, and tape the binding down as I go. It only takes a few minutes to do the whole guitar.

I'm doing a simple contour on the top. A slight bevel that only comes in about 1 1/8" around the perimeter. I'm trying to make it very uniform.

I'm almost done with the neck. I need to make some edge marker dots so I can finish the sanding.

I've got the top glued up for the next one. Book matched figured maple.
 
No offense was taken. I thank you for your willingness to take the time to post pics and explain (even more than once). This thread has helped my imagination and pushed me to figure out how I could do a build next year. I would start with just fabricating a body (after the purchase of some tools) or 2 and attaching them to a store bought neck. Baby steps.
 
...This thread has helped my imagination and pushed me to figure out how I could do a build next year. I would start with just fabricating a body (after the purchase of some tools) or 2 and attaching them to a store bought neck. Baby steps.
Cool, You should give it a go. I try to challenge myself so that I can learn something on every one that I make. It's all about baby steps.

Meanwhile in a garage in Las Vegas... This is a cool little sanding block I made to help me keep a constant bevel for doing the carve on the top of the bass. It worked very well.

I'm trying to come up with a design for the pickguard on the telethingy. Right now I'm leaning towards this shape, except maybe a bit less symmetric on the bottom. It'll be gloss black. I have to commit soon. The 43AWG wire for the neck pickup showed up today. I don't have any excuses to not finish it.

On "The next one"(idk what to call it yet) I glued together a two piece alder body blank and attached the maple top to it. Here it is shown with the sapele neck, cumara fingerboard, tuners, and bridge.
 
I've wound the pickup, and made some rosewood side markers for the bass. The neck pocket is cut. The pickup cavity is mortised, and the cutout for the controls is done. I'm real close to gluing this one together.


Looking good.. What you gonna do with the pickup route where it has run into the body cavity?

It all looks remarkably clean round you bench and on the work piece.. I'm beginning to get a little suspicious...;)
 
Back
Top