tmix said:
Yeah,
That is what I'm talking about!
You guys have inspired me to tackle these things myself.
Go for it! It feels great when you're done to look at something you built yourself.
tmix said:
Did you buy the tops with laminate on them or do that as well?
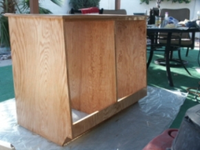
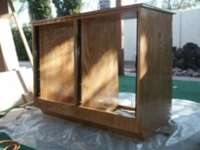
For the top of mine, I used a 45 degree chamfer bit in my router, set at a depth of 1/2" to make the edge (setup for that is shown in Pic 7 above), and then used iron-on veneer edging to make the sides look like the wood grain, instead of the sides of plywood (shown in progress in Pic 11 above, and finished in Pic 12.)
tmix said:
I need a triple rack (like frederics)
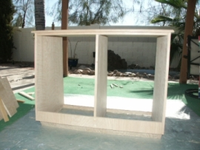
The rack I built can easily be made into a triple rack by adding another "side" piece, and lengthening the top and the braces. I was able to use only one sheet of oak hardwood (43 bucks a sheet at Home Depot) for the double rack, but a triple would take 2 sheets. I'm actually gonna make another double rack (one for each side of my console desk), which will take another sheet of plywood. So for 2 sheets, I'll get 4 rack "areas" (for lack of a better term), instead of 3.
tmix said:
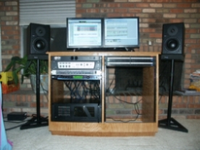
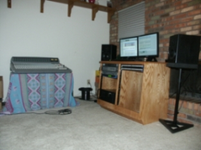
and a center console with a iso chamber underneath for my computer. I possibly want to embed my dual 17 inch monitors more into the console top so I can see over them easier and so that the wont be in the way of the speakers dispersal.
I have the same idea. I haven't found any designs by the major studio furniture manufactures that doesn't put your video monitors up higher than I would like. I'm going to design and build my own center console here in the next few months.
tmix said:
Thanks for ideas! Did you guys have dimensioned plans or did you just wing it?
Tom
I got an idea of the dimensions from the Argosy website (they have the dimensions for their products on the site), and then drew my plans up on graph paper (shown in Pics 2 and 3 above.) I refined them as I was building, but I now have a definitive set of plans. Since they are hand drawn, I plan on drawing them in Visio so I have an electronic copy. If you would like a copy of that when I'm done, let me know.
Chris


 (My stuff remains as unfinished wood, forever waiting to receive a coat of poly or some stain or something besides raw wood!!).
") , but I'm glad I did. The top came out way better than I expected. I used iron-on veneer for the edges, and it looks just like real wood. My only problem was staining over the wood filler I used to cover the nail holes, the stain didn't really cover that at all. I need to figure something out for the next time. I'll be sure to put pics up of the desk when I build it, but it could be awhile since I haven't even started designing it yet.
, but I'm glad I did. The top came out way better than I expected. I used iron-on veneer for the edges, and it looks just like real wood. My only problem was staining over the wood filler I used to cover the nail holes, the stain didn't really cover that at all. I need to figure something out for the next time. I'll be sure to put pics up of the desk when I build it, but it could be awhile since I haven't even started designing it yet.