The Crappernater - a spider bridge square neck resophonic guitar

crazydoc

Master Baiter
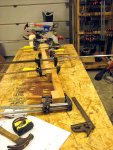
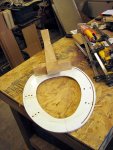
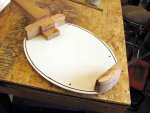
This is a guitar I made earlier this year.

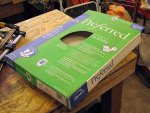
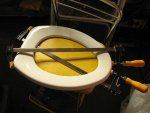
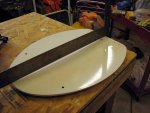
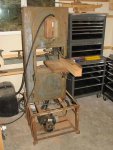
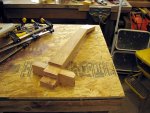
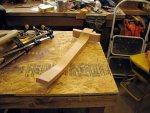
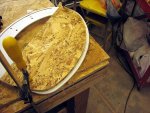
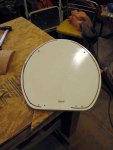
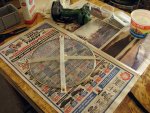
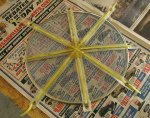
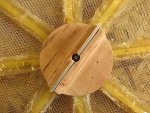
I was in the shop, thinking about materials for my next guitar, when I beheld this beauty sitting on a pile of junk. Eureka! I had replaced it a year ago due to a crack across it from too many uses by my fat ass, but since I seldom throw anything away, there it was waiting for a better life.
 

Attachments

  • box.jpg
    box.jpg
    56.1 KB · Views: 103
First, I tried to glue the crack back together. This wasn't very successful due to it being made of some type of powdery substance. Although it remained cosmetically blemished, the strength was adequate for its purpose. A little wood filler and paint later would do the trick for looks.
 

Attachments

  • cracked-top.jpg
    cracked-top.jpg
    56.9 KB · Views: 99
The neck was made from pieces of alder I'd rescued from a cabinet shop's scrap heap.

This pic shows the glue up of a neck, neckstick and tailblock for another guitar, but the process was the same for this one.
 

Attachments

  • neck-glue.jpg
    neck-glue.jpg
    59.7 KB · Views: 97
Cutting the neck on my bandsaw. The motor only runs for 70 seconds before a thermal overload switch cuts it off for 3 minutes, but 70 seconds is a lot of time to get something done.
 

Attachments

  • neck-saw.jpg
    neck-saw.jpg
    55.9 KB · Views: 97
Next I needed to route some grooves in the top and the bottom, to hold the formica sides. This is the template.
 

Attachments

  • routing-template.jpg
    routing-template.jpg
    58.4 KB · Views: 98
I used a 1/8" straight bit with no bearing - it was hard to control.
 

Attachments

  • oops.jpg
    oops.jpg
    33.9 KB · Views: 96
I like where this is going.......:eek::eek::eek:

In the crapper?

Turning attention to the guts of the guitar: first the spider bridge.

A frying pan splatter screen, purchased at the dollar store, was used as the foundation for the bridge.
 

Attachments

  • spider1.jpg
    spider1.jpg
    60.8 KB · Views: 82
Plastic package strapping (again, stuff I couldn't throw out) was used to form the spider.
 

Attachments

  • spider2.jpg
    spider2.jpg
    59.9 KB · Views: 80
It was built up in layers, and bonded with fiberglass resin.
 

Attachments

  • spider3.jpg
    spider3.jpg
    57.6 KB · Views: 77
A saddle holder, which sits on top of the spider, made from alder.
 

Attachments

  • saddle-holder.jpg
    saddle-holder.jpg
    60 KB · Views: 78
Aluminum saddles, made from a heat sink from a computer.

The hole in the middle is for a screw which will acoustically couple the center of the spider to the cone.
 

Attachments

  • saddle-holder-and-saddles.jpg
    saddle-holder-and-saddles.jpg
    35.6 KB · Views: 79
The saddle sitting on the spider to complete the bridge assembly.
 

Attachments

  • proto3spider-bridge-and-sad.jpg
    proto3spider-bridge-and-sad.jpg
    42.2 KB · Views: 78
Top view, showing the screw hole through the saddle and spider.
 

Attachments

  • proto3-saddle2.jpg
    proto3-saddle2.jpg
    33.7 KB · Views: 75
Next, the cone. Made from a large diameter black plastic plate, a smaller diameter white one, and a plastic soup bowel (from the dollar store, of course.) They were cut, then bonded with the resin. I poured a little on the bottom of the bowel, to make it stronger when coupled to the bridge with the screw.

Bottom view.
 

Attachments

  • cone1.jpg
    cone1.jpg
    57 KB · Views: 74
Back
Top