Sunburst Yellow Bass Build (Bass Porn)

Roguetitan

New member
I thought I would post a few pics of this jazz bass I am building

SYBB1.jpg

SYBB3.jpg

SYBB4.jpg


So now the body is primer'ed I will putty the little dings and divits then sand those flush, wet sand it then shoot a couple more coats of primer to it again.
 
Last edited:
Will do
I am using gold plated hardware but not sure what color pick guard to use
something that will go with sun burst yellow, almost a corvette yellow.
I am thinking maybe this
12003374195452061559494.jpeg
 
Last edited:
Here are some pics of the base coat going on

This gave me inspiration for the paint job on the LP build

SYBB5.jpg

SYBB6.jpg


Man I hate gnats!:mad:
Sybb7.jpg


and here is the front.
once I spot fill and water sand I will mock up the body with the neck and hardware and drill all the fastener holes.
This bass will be a string through so I will have to lay out and drill the holes for the ferrules to fit in the back of the body (waiting on parts) then everything will be disassembled and the finish coats will be applied, color sanded and two coats of clear to finish it off.
SYBB8.jpg
 
Looks good, you are off to a good start. Are you planning on the Sunburst like my old Strat in the picture below? If so--post plenty pictures of the process please!
SunburstStrat-GFSpickup.jpg
 
No this will be a solid color with a clear coat, Sunburst Yellow is the name of the color yellow that I am using however I have been inspired to do a very unususl burst paint job on a Les Paul copy bass I am building that will be royal purple with sunburst yellow burst:D
 
No this will be a solid color with a clear coat, Sunburst Yellow is the name of the color yellow that I am using however I have been inspired to do a very unususl burst paint job on a Les Paul copy bass I am building that will be royal purple with sunburst yellow burst:D

Yeah, I know those sunburst paintjobs take a lot of coats for the effect. I am hoping to paint a Tele kit this spring, it has a clear coat on it now but I don't think the wood is matched well enough to keep it as a clear coat. I'm leaning towards an early vintage like the old TV Gibson or original Tele color.
Finding the correct color is my problem for now.
The kit on the left will get the repaint! The white one will get some touchups.
Sagakits.jpg

you can dye it a transparent color that will hide the splices.
I have a method for transparent color burst that works remarkably well for me, instead of using transparent paints I use McFadden's Concentrated dyes for the base color then shoot it with clear, wet color sand the clear coat then use your solid color of choice for the burst, color sand to blend then shoot that with a clear coat and yes it is a long drawn out process before you get to the finished product plus with the clear on top of the dyed wood gives the body almost looks like the instrument is encased in glass and with the burst color on top of that gives it even more of a deep effect, it looks like you can reach into the body.
NOTE: a trick with dyes though is you want to sand the body slicker than owl poo before applying the dye and do not use any sealers use the dye as the sealer and dry sand it with 500 grit wet/dry silicon carbide paper then re apply the dye and until you get the results you want then you will want to lightly wet color sand the body with 1200 grit silicon carbide.
maybe I can post some pics of the LP build once I get ready to start painting because I will be using dye for the base color it I still have some router work yet to do on that one and waiting on parts for it too.

go to www.grizzly.com and check out the different dye colors; they may have something you like.type in the search bar......
H6851 Red
H6852 black
H6853 blue
H6854 medium walnut
H6855 Bordeaux
H6856 Van Dyke Brown
H6857 Deep Green
H6858 Yellow
H6859 Orange
H6860 Honey Amber

Roguetitan, looking good!

Thanks Mang!:D
 
Here are some pics of me laying out and cutting the nut slot on the neck also laying out the nut for roughing in the string slots and shaping the nut.


First I get the measurement from the center of the last fret to the where the face of the nut will be.
SYBB11.jpg


Then, I draw the line of the back of the nut then used masking tape to help protect the wood just in case I slip with the saw.
SYBB10.jpg


Here is a pic of the saw I use to cut the slots in the fret board and in the nut.
SYBB12.jpg


Here I am using a small gouge to remove the material from between the two cuts I made with my X-Acto saw.
SYBB13.jpg


Here is the slot all cleaned out and filed flat.
SYBB14.jpg


Here I am using a flat pencil lead sharpened only on the top side to trace a line which is transferred from the top of the last two frets
SYBB15.jpg


Here you can see the contour of the neck at the top of the last fret that has been transferred to the nut which is now ready for cutting in the slots
SYBB16.jpg

Here I have located the center of my nut then split the difference between the a and d string which would be half of 25/64"
SYBB18.jpg


SYBB17.jpg


Here I am cutting in the slots in at the centers.
SYBB19.jpg


Once I get the slots cut in I will cut in the smallest string sizes in first but the e and a needs to be filed out with a smaller file then graduating up to a larger size until I get the right gauge. Note how I have the file angled toward the head stock. you want to file the string slots at an angle to keep the strings from binding.
Sybb20.jpg


Then I sand the top on the nut to get the right angle and contour of the nut.
SYBB21.jpg


the finished nut should angle down towards the head stock
SYBB22.jpg

Here is a pic of the nut roughed in. I will put the finishing touches on it once the strings are installed to make sure I don't file the nut slots down too far.
SYBB23.jpg
 
Here are some pics of me laying out and cutting the nut slot on the neck also laying out the nut for roughing in the string slots and shaping the nut.

First I get the measurement from the center of the last fret to the where the face of the nut will be.
SYBB11.jpg


Then, I draw the line of the back of the nut then used masking tape to help protect the wood just in case I slip with the saw.
SYBB10.jpg


Here is a pic of the saw I use to cut the slots in the fret board and in the nut.
SYBB12.jpg


Here I am using a small gouge to remove the material from between the two cuts I made with my X-Acto saw.
SYBB13.jpg


Here is the slot all cleaned out and filed flat.
SYBB14.jpg


Here I am using a flat pencil lead sharpened only on the top side to trace a line which is transferred from the top of the last two frets
SYBB15.jpg


Here you can see the contour of the neck at the top of the last fret that has been transferred to the nut which is now ready for cutting in the slots
SYBB16.jpg

Here I have located the center of my nut then split the difference between the a and d string which would be half of 25/64"
SYBB18.jpg

SYBB17.jpg


Here I am cutting in the slots in at the centers.
SYBB19.jpg


Once I get the slots cut in I will cut in the smallest string sizes in first but the e and a needs to be filed out with a smaller file then graduating up to a larger size until I get the right gauge. Note how I have the file angled toward the head stock. you want to file the string slots at an angle to keep the strings from binding.
Sybb20.jpg


Then I sand the top on the nut to get the right angle and contour of the nut.
SYBB21.jpg


the finished nut should angle down towards the head stock
SYBB22.jpg

Here is a pic of the nut roughed in. I will put the finishing touches on it once the strings are installed to make sure I don't file the nut slots down too far.
SYBB23.jpg
 
I have Insomnia and bored to death so....

i figured I would upload some more pictures of my progress
I opted not to make it a string through so I got another bridge.

Here I am laying out the holes for the neck fasteners which will go down1/4" from the top of the plate to the top of the neck pocket and splitting the difference on both sides.
SYBB35.jpg


here is a refrence pic of the hole lay out
SYBB34.jpg


once I have drilled the holes and transferred the hole layout to the neck and all the holes are drilled and the neck is secured to the body I make two reference lines of the outside of the neck on the body where the bridge will be placed.
SYBB33.jpg


I then measure down 35 1/16" on both sides of the nut from the outside of the neck and draw a straight line this will be the bridge fasteners center line.
SYBB32.jpg


then I find the center of the the neck at the first and 20th fret and make a line then I find the center of the bridge and mark a line on the center of the bridge, place the bridge on the body and align the fastener screw holes on the bridgecenter of the center line I made earlier for the bridge screws.
SYBB31.jpg

SYBB30.jpg

SYBB29.jpg


you can use a hand drill to drill the fastener holes. just try to drill them as strait as possible and you will want to mark the drill with a piece of tape to use as a depth gauge. you will need to measure the length of the screw then mark that length on the drill use this guage method for drilling the holes in the head stock for the string tree screw and the machine head fasteners
SYBB25.jpg


Sometimes there is some slop between the shaft bushing and the shaft so you can make a shim our of paper by doubling it over a couple of times until you get a good snug fit then you can proceed to lay out the holes for the tuning machine fasteners.
SYBB27.jpg

place the tuner in the hole with thepaper shim then use a small tri square or a small ruler with a square end then square the top of the tuning heads base and mark the holes with a sharpie.
once you have all the holes layed out drill all at the proper depth then install the tuning heads.
SYBB26.jpg


well, now that I have it done this far I can take it all back apart.
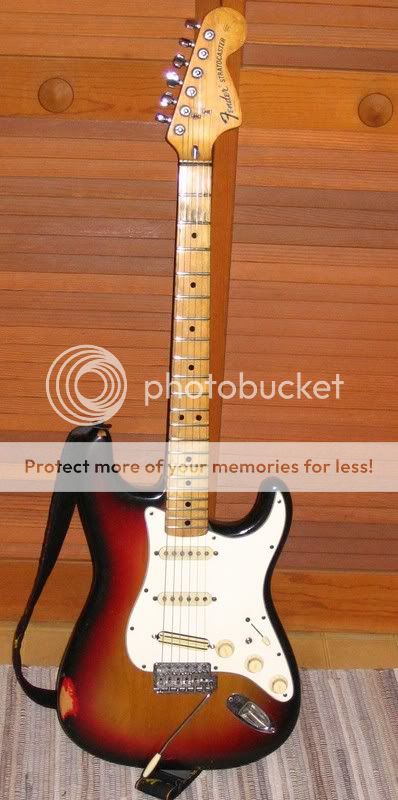
everything is in line and where it is supposed to be but I did not have an e string to check the saddle and nut but It has a nice low buzz free action
I am still waiting on pickups and the pick guard. by this time next friday it should be ppainted with a clear coat. Until then I have lots of prep work to do to the body before I can paint it.
LOL even at this point it plays better than that POS SX I bought last week:D
SYBB24.jpg
 
I'm very impressed - so much so that I will continue to pay to have work done for me as I have neither the facility nor ability to do such work let alone the patience required.
 
Back
Top