oak trim endcap

undergroundtoon

New member
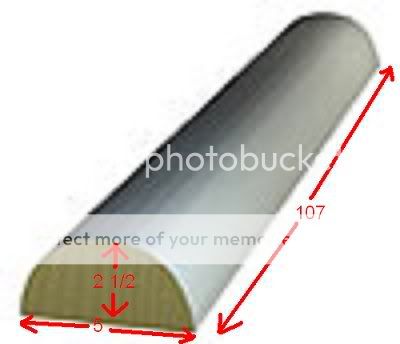
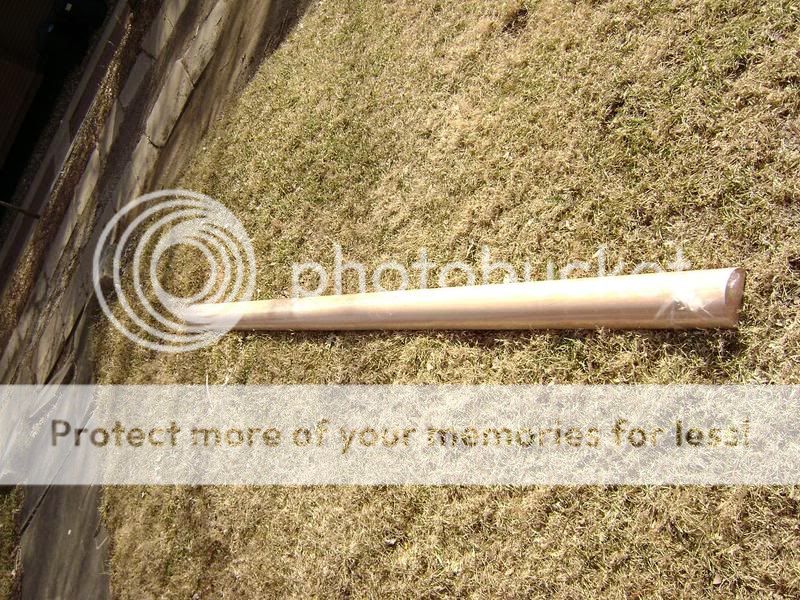
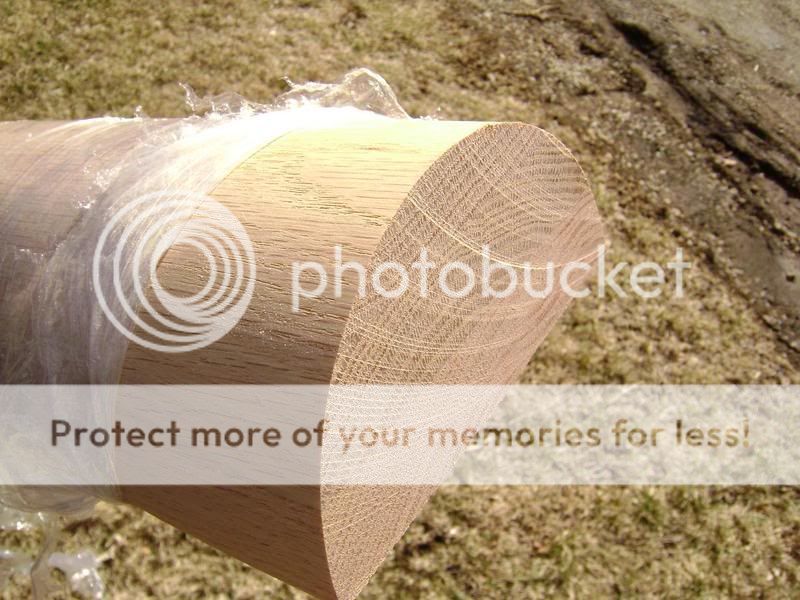
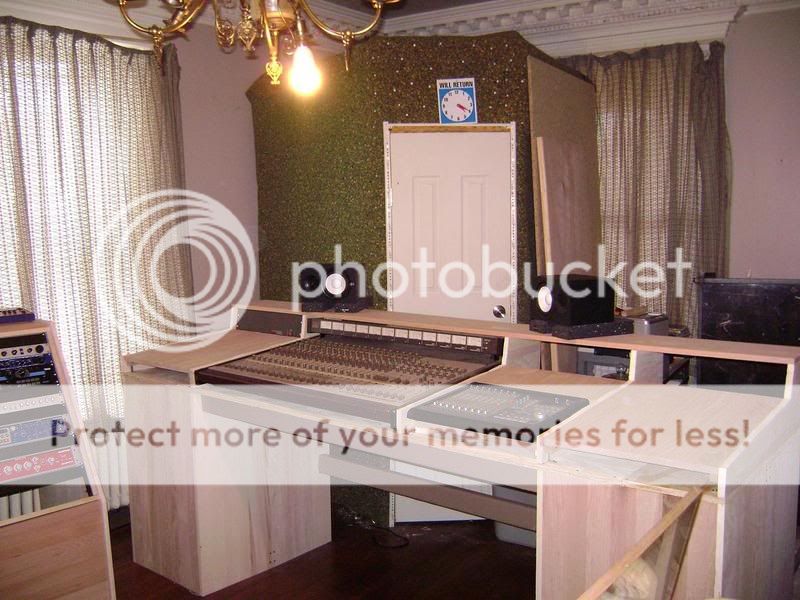
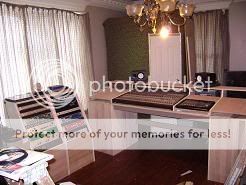
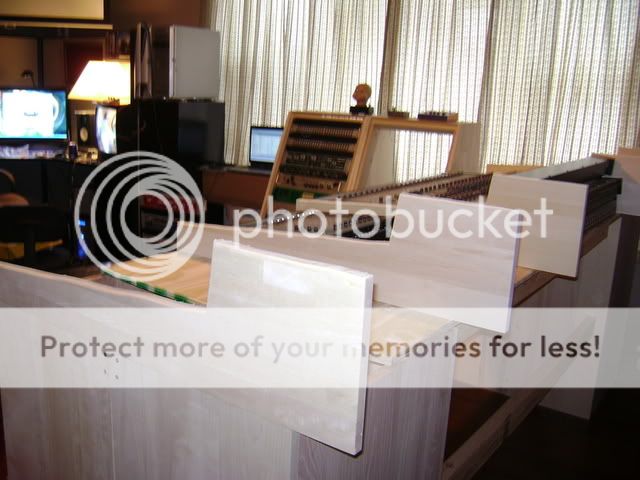
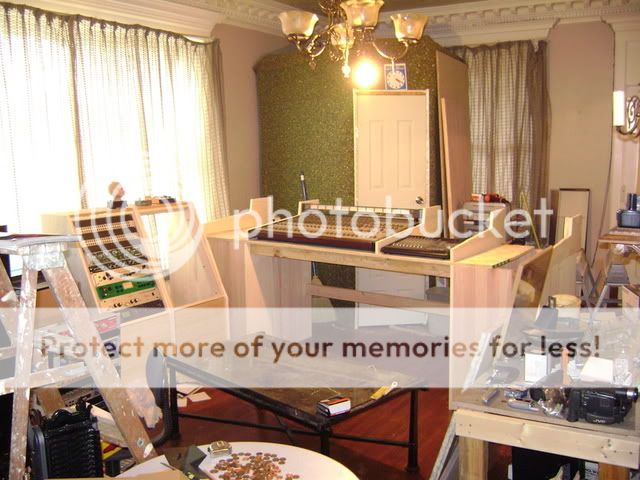
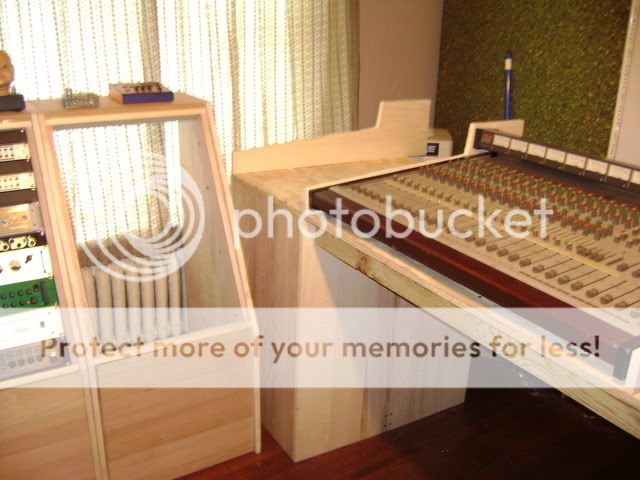
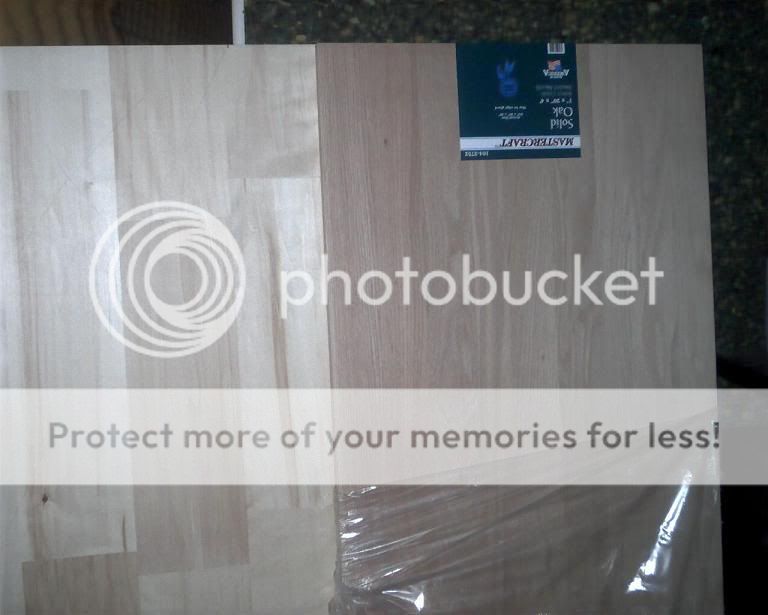
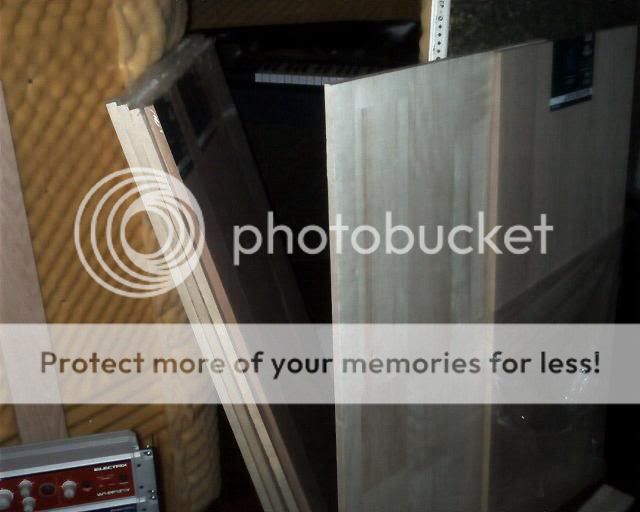
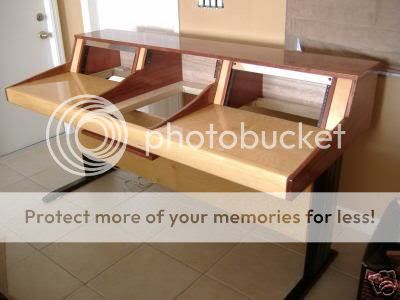
I have my new console just about done. I need an OAK(to match the rest of the desk) cap for the front. I tried looking up half rounds? but the biggest i could find was 2 1/2 in. and i need a 5 in.

....I have tried menards, lowes, and other wood shops around with no luck. I looked on the hand rail sectiontoo. Got a name for this? a website? I would search but i dont have a clue what key words to use.


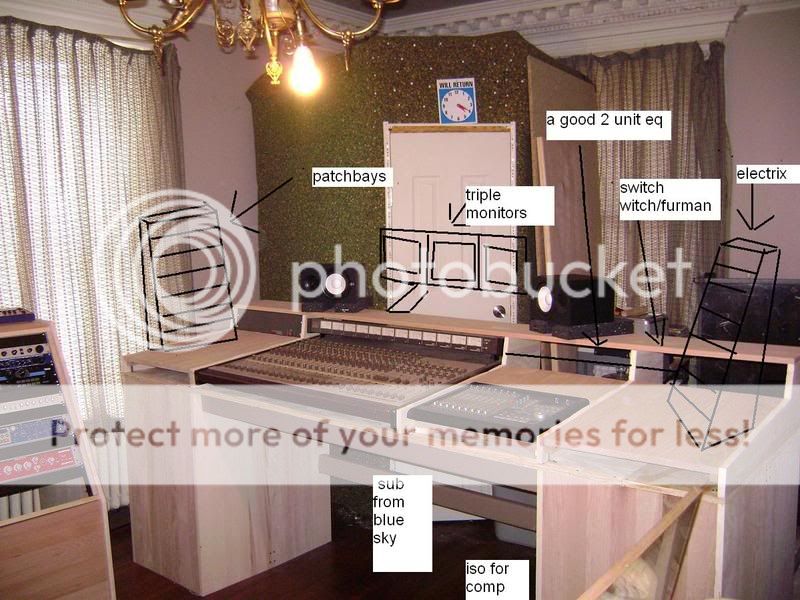
Here is a couple of pics to better show what i need.


oaktrim22.jpg

oaktrim2.jpg
 
Last edited:
Look around for a local Trim manufacturing company - there is always somebody around that does this. It might cost you a little, but you can have this made.
Actually, the part that will cost you is having the blades made for the milling machine, but just out of chance - you might luck out.

It shouldn't be super expensive though.

I worked as a Cabinet maker for years, and it isn't uncommon to find regional trim manufacturers that do custom work.

Actually, now that I looked at it again, if you go to a CUSTOM Cabinet shop, they should be able to make that for you with no problem. They would have to glue up stock if they can't get it in the size you want, and then route and sand it.


Tim
 
Find an incredibly large witch, distract her, and when she isn't looking, steal her broom
Brilliant.:rolleyes: I bet your rep will still be ZERO in five years.


Tims suggestion is about as good as it gets in regards to a Oak half round. However, the shop would have to have a shaper knife with a 5" half round profile, or a 2 1/2" quarter round. In either case, laying up this size profile won't be cheap, nor will the machining, even if they have the knives.

Another way is to get a piece of 5" PVC pipe, have it ripped in half lengthwise. Then cut a 3/4" ply insert to match the inside diameter profile, drill the PVC for screws and attatch the ply to the PVC. This makes an attatchment backer. Then veneer the PVC 1/2 round with oak veneer.

Although, I've seen these type edges before, I've always wondered why anyone would want this. Its uncomfortable and very expensive to make. Why not just make up a wrist pad. Its fairly easy and fairly cheap, and a hell of a lot more comfortable.
fitZ


fitZ,

That is a GREAT Idea!

I was thinking that he might be able to get some kind of solid wooden post, and have it cut in half, and then joined together and a venerr put over it, but your idea is a lot better.


Tim
 
There is a wood company in my town, they do a lot of custom wood, and have a large selection. i dont know they ship or not, plus im sure you would want to see it. And I also know it is a bit of a drive for you, but here is a link anyways:

http://www.owlhardwood.com/
 
Thanks for all of the help. I got it today. I had a guy at works dad do it for me. He is a good retired woodworker. It cost me $300 total, But it took a lot of work to make it. He used 3 peices of oak and glued them together. He let it sit for 2 weeks on a jig to dry. Then he mounted it and shimmed it down by hand(he made some sort of rig). I think he did a good job.....I am real happy with it. He did a rough cut on the ends and left me a little to work with ........so I could sand it down to size. It is strait too...unlike the wood at menards and lowes:rolleyes:

ENDCAP1.jpg


That plastic on the left end of the pic below makes it look fatter but its not

ENDCAP2.jpg


rough cut to be sanded

ENDCAP3.jpg


right side

ENDCAP4.jpg


left side

ENDCAP5.jpg


I have next weekend off ...So I will mount it up then..
 
Although, I've seen these type edges before, I've always wondered why anyone would want this. Its uncomfortable and very expensive to make. Why not just make up a wrist pad. Its fairly easy and fairly cheap, and a hell of a lot more comfortable.
fitZ

I thought about using a fake leather pad for comfort. Wrap it around a 2x4 with a smaller pieces of wood screwed on top of it(kind of like a piramid). Then put stuffing in it(to make it round like the pic above). When it catches on something i would need to take the desk apart to re-rap it every time I get a small tear or rip. This oak piece will hold up good over time with no labor. I am real happy with it.
 
Scha-weet. I'm with you on the wooden trim. Those kind of touches really make a piece.

I'm beginning work on a console/desk soon, and am hoping to be inspired, so please post pics of your console when you can. (If you haven't already in another thread somewhere.)
 
Scha-weet. I'm with you on the wooden trim. Those kind of touches really make a piece.

I'm beginning work on a console/desk soon, and am hoping to be inspired, so please post pics of your console when you can. (If you haven't already in another thread somewhere.)

Its nothing special. I made it out of oak and aspen wood from menards...still building it. I set the height at standing level so i dont get lazy. Everything in this studio came to be in my home thru a dodge neon one peice at a time. I will post up some more picks next weekend(I probaly have 2 or 3 hundred but very few in photobucket).

I first built the 2 boxes that set the depth and height. Then i used 2x4 set 6 inches apart. I layered the top with 3/4 in plywood and set the mixers where i wanted them. Then i cut out the 5 peices that made the top(you can see them good in pic 3) . and then started working on making the incert peices (top 3 peices of the deck of the desk). I then wrapped all of the visible 2x4's in fake leather that i got from a fabric shop. I then got the top peice that the speakers are sitting on and cut to lenght. the front cap( i just got) cover's the rest of the plywood in the front. The sides will have 1x3 oak trim to cover the plywood deck on the sides too. I set each of the 3 small parts of the desk to 20 inches, then used oak hand rails cut down to size(1 1/4 inx 30 inch before cutting i think) to mount the 19" rack gear(you can see the 3 ru power suply for the big mixer mounted this way). I still have 2ru above the taskam 1082fw..and 2ru on the left of that.

The first pick is the most recent.....then it goes backwards in time.


deskone.jpg

laugh2.jpg

openend.jpg

audioside.jpg

deskcorner.jpg

IMG_0337bb.jpg

IMG_0339bb.jpg


I liked this one and started the build based off of light and dark wood
10_1.jpg


my living room used to look like this....Now all of that crap is in my bedroom Stacked up in a big pile and I sleep on a love seat. I used to be able to walk in here(15x30x11ft high)........damn addictions
Copyofscan0001.jpg


next i will make a 10 rack unit on the right side and one on the left. the right will hold 5 patchbays and 5 empty rack space rails. i will use thes to lable all of the patches....the other 10 unit one will hold eveything electrix that i have. Behind the desk will be 3 sets of speakers(blue sky, genelec, yamahas). on the desk will be mix cubes next to the triple monitors(were the yamahas are now). i will use the switch witch to go back and forth between them. its hard to explain..its kind of like this
deskone2.jpg
 
After i move it to its permanant home I am going to sand, glue, and stain it(basicaly make it look nice). for right now its going to stay raw until the move.
 
oh yeah....here is the other side of the room taken a few weeks ago messy as hell:D:D:D
visualside.jpg

You say messy as hell, I say looks like home.

Thanks for posting these--sorry to have you do it twice, now that I see the pics, I remember seeing them elsewhere. But it's got me motivated. Nice job!
 
Last edited:
Back
Top