technominds
New member
Some regulars on this forum may remember a while back when I was completing my studio build I built a desk to house my Mixer and control surfaces. It has served me very well although unfortunately my crappy behringer MX 2442a wouldn't last me as long as the desk would.
I managed to grab myself a Soundcraft Spirit Studio 32 for a STEAL which has significantly increased the quality of my recordings but also the size of room my equipment now takes up!
The new console does not fit nicely on my desk and I am thinking of either modifying my current desk or just starting over with a new build.
The console is a bit of a beast, and unfortunately does not have (or have room for) a meterbridge.
I have come up with one CAD design, but I'm not too sure if it would balance correctly.
One other issue I had was that I like to use my control surfaces, so I couldn't really sit at the main desk all the time... so splitting my workspace into analogue/digital would be the way forward.
Here is the design I came up with, it's pretty simple and only calls for a couple of angles cuts (I'm no master with a saw).
Let me know what you guys think and also if you have any suggestions for designs. I want it to look pro/flush.
http://i28.tinypic.com/2q03bxh.jpg
Last edited:

")
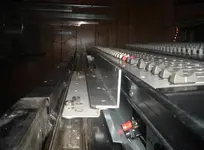
 The key to a linear motion track is BEVELED bearings with off center axles for adjustment into the track. I found these bearings in a specialty catalog for resturant supplys. Cost me $75 for four of em...dumb me. But I like cool stuff for my console
 The track is a Store fixture extrusion for a store front. Works great.


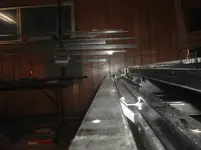


 . Had I changed the design to a boxbeam type(which is a fancy word for cabinet design instead of beams...kinda like ..whats that console company name? oh yea, Argosy) they may not have deflected, but I opted for welded steel tubing. I'm glad I did now. I've modified this console many times for equipment upgrades. The last was for