famous beagle
Well-known member
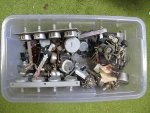
Might work.....
Uxcell a14071400ux0773 2 Piece B500K 500K Ohm Single Linear Rotary Switch Carbon Potentiometers: Amazon.com: Industrial & Scientific
Linear taper, rather than audio taper, but for the amp won't make much difference. Measure the shaft length on yours.
Seller/manufacturer site...
Buy Cheap 2Pcs B500K 500K Ohm Single Linear Rotary Switch Carbon Potentiometers
That looks right to me. I pulled the trigger. Should be here in two days.
")


")