Re-location/build of Diesel Dungeon Studio!

RecordingMaster

A Sarcastic Statement
Hello all, since I love and learn a lot from all the studio build posts I see online, i thought I might as well share my experiences as well. I recently moved from my old house where I had a separate control on an upper floor and a couple tracking rooms on the lower floor (one super dead, one live). The conditions were extremely far from perfect for a multitude of reasons I won't bore you with here.

So I recently upgraded to a newer, larger 2 story home in a waaayyyyy better neighborhood - and perfect timing too as I await my first child in about a week or so as I write this post! I managed to get my wife to give me about half (or more) of the basement to build a studio. I am doing a one-room style where control and tracking take place in one room. I'd rather have done that than to build two small rooms that both sound shitty and are claustrophobic. Room will be about 30'x11'x7'2".

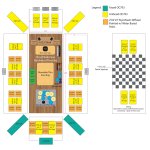
Here is a sketch of how I plan I will place everything.
Studio.jpg

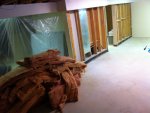
Here is the room after I stripped off most of the existing drywall, framing and insulation, since it all had to be water proofed inside and out just to be safe. (that's not mould on the walls, its residue from old tar paper I ripped off. The old windows were leaking probably for years and made all the studs below them moist and made insulation and tar paper stick to wall as you see below window. I have since replaced and had windows water sealed/insulated).
IMG_0174.jpg
IMG_0176.jpg


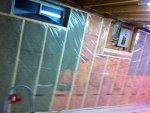
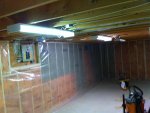
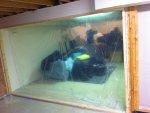
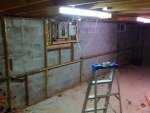
Here is a shot of when i was almost done installing Tyvek house wrap to the inside of the walls (plasticky side facing brick). That way if any moisture ever enters, it will trickle down into the trough system that was dug out and installed around inside perimeter of my whole basement which leads to sump pump.
IMG_0187.jpg

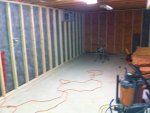
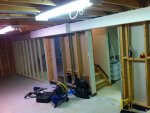
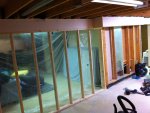
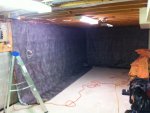
Here is with framing almost done
IMG_0198.jpg

I spaced the framing 1" off the outside walls to (maybe) prevent extra vibrations passing through the wall to the outside. It wasn't difficult so I thought it couldn't hurt!
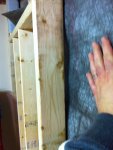
IMG_0200.jpg

I placed this foam liner underneath the permiter floor plate to (maybe) reduce floor vibrations transferring to studs (better than nothing and cheap) and to further elevate the wood from the concrete floor, in attempt to reduce/eliminate any ground moisture from transferring to the wood.
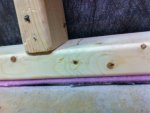
IMG_0199.jpg

Vapour barrier is now up, electrical done (for plugs) and the inside wall framing has begun, will post pics tomorrow!
 
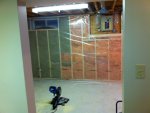
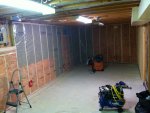
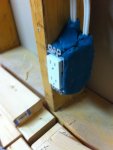
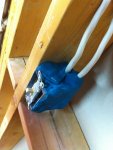
Vapor barrier up, electrical plugs wired up! If you'r wondering why there is mismatched insulation, it's because I salvaged what i could of the original stuff that was still usable. The rest of the junk gets stuffed into that bulk head you see in the 4th pic down. It's a steal I-beam, so I doubt much sound will pass through it to the other room, but better to be safe and stuff the cavity with the old ripped up fluffy I have instead of tossing it.
IMG_0206.jpgIMG_0216.jpgIMG_0207.jpg

Framing has begun for the portion I am "walling-off". Will be done tonight.

IMG_0208.jpg
 
Framing done for the "walled-off" area, more plugs installed, vapor barrier fully stapled/taped/trimmed.
IMG_0220.jpgIMG_0221.jpgIMG_0219.jpg

"QuietPutty" installed around plug/switch boxes. This prevents sound from transmitting through those spots in your walls (since you had to cut out drywall to expose the box). Every bit helps I guess.
IMG_0222.jpgIMG_0218.jpg

Going to be sealing anything in my ceiling that goes upstairs (ducts and cables) with this stuff.
IMG_0223.jpg
 
Last edited:
I finished filling all the gaps/protrusions (with acoustic non-drying caulk) that lead from in the studio to upstairs through the floor, like HVAC ducts, plumbing and cables. Pic is of one spot BEFORE I filled it.

IMG_0232.jpg

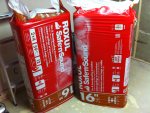
Picked up 5 of the 10 packs of Safe n' Sound for the interior wall and ceiling "soundproofing" (let's call it that since "partial sound isolation" is a little long).

IMG_0230.jpg

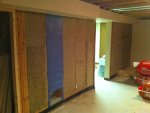
Finished filling half of the interior wall. The new walled off area which is the whole left side of this wall not pictured, will be filled once drywall is put up on one side. Started filling the ceiling...MAN is it ever a pain to work around all the cables, plumbing, hvac and lights that are in between joists, without leaving open spaces for sound to unintentionally travel upstairs!

IMG_0243.jpg

More ceiling filling tonight and soon after it is drywall time!
 
Last edited:
The pink sill seal under the walls isn't a bad idea. I did that in my room, but also put a double layer over the studs and floor joists before putting up the sheetrock. Like you, I figured it couldn't hurt, and it was cheap.
 
The pink sill seal under the walls isn't a bad idea. I did that in my room, but also put a double layer over the studs and floor joists before putting up the sheetrock. Like you, I figured it couldn't hurt, and it was cheap.

Thanks Bongo! Yeahs that's not a bad idea too I guess, never though of that. I may or may not, because I mean a small roll here is like $10. To cover ALL the ceiling and wall studs would probably cost too much for something that "might" help, ya know? Depends on where my budget sits after buying flooring and the firecode drywall, paint, primer, and superchunk material/fabric!
 
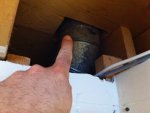
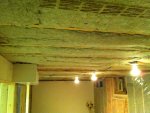
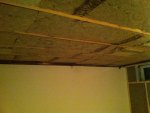
Almost all of the ceiling Safe n Sound is up, I only left the problematic cavities that have hvac pipes as i will need to raise those pipes up slightly in order to put drywall flat across joists in ceiling. Also, how in the hell am I supposed to even put insulation in those cavities when the pipe occupies a huge part of it?!? I guess I will have to put the stuff ABOVE the pipes which I hope doesn't lower the stc rating (having it closer to the upper floor and losing that air gap).

MAN is that stuff nasty to work with when you're holding it over your head and fitting it in overhead places. Itches on the face and even under my clothes!

IMG_0244.jpgIMG_0245.jpgIMG_0246.jpg
 
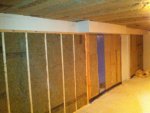
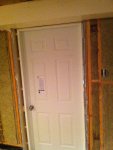
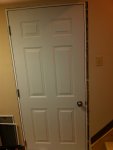
All insulating/sound isolation done. Steel door cut down and installed. Gaps around door filled with Safe n Sound, foam filler (like really skinny pool noodles) and acoustic caulking. Still needs drywall, finishing touches and trim of course.

IMG_0268.jpg

View from inside

IMG_0263.jpg

View from outside (needs trim)

IMG_0267.jpg

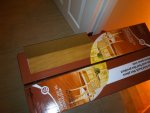
Flooring acquired! 100% vinyl, looks and feels like real wood. I went all vinyl in the event of worst case scenarios, as it is completely waterproof and super easy and relatively quick to install. It also conforms to uneven flooring (which basement concrete floors tend to be to some degree).

IMG_0265.jpg

Picking up the drywall today! Will be a combo of really dense 5/8" Firecode drywall (thanks for the tip John H. Brandt!) for the interior wall and ceiling (extra mass for more effective sound proofing), and 1/2" standard drywall for the outside walls (the walls against concrete block).
 
Hope you've got some assistance to do the drywall. Even the 1/2" 4'x8 sheets are heavy to manhandle by yourself. There is a pretty neat gizmo for doing ceilings, but you've still got to load the sheets onto it. I did a ceiling by myself about 15 years ago, but due to the sloping wall, they were only 4'x6' - I made 'helpers' from 2x4s, but it was still exhausting work.
 
Hey everybody...well my first child was born on Feb 28!!! Beautiful and healthy baby boy - named him Nash. We are very ecstatic! The build has been put on a slight hold but I will be resuming little by little this weekend. Just leaving to go get my last round of purchases for the room right now. Just wanted to let ya's know.
 
Been slow moving lately but the ceiling is done-zo and the first long wall done. So that is the wall that is officially "walled-off" now. In the meantime I have also picked up a couple additions to the monitoring chain!

IMG_0333.jpg

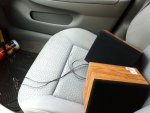
I picked these up at a local thrift shop. I am going to use these as pseudo Auratones aka Mix Cubes (will probably just use one of them in mono, away from the listening position and behind me). They are little cube speakers and are full range (meaning only one speaker per enclosure, crossover-less design) and are clearly "vintage".:D

IMG_0348.jpg


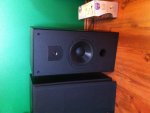
Found these at the same shop. They are JBL's from the 90's with 8" drivers. Freq response is 40 hz - 23 khz. Going to use these spaced wider and further back compared to my mains and using them more as "midfield" monitors. I will be using these just as reference for a good full-range hifi system, a little hyped-up sounding. Also just for fun listening, cranking them way up and for impressing the clients a little.

IMG_0362.jpg
 
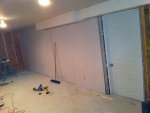
Moving slowly but surely! Drywall is finally almost all up! I'm dreading mudding/sanding this whole place especially the entire ceiling! :eek: haha

IMG_0380.jpg


In related news, I have stuffed some foam filler "backer rod" into all the perimeter crevices (see below) where the drywall meets (wall-to-wall and wall-to-ceiling perimeters) as well as around the door I installed. Then i will be filling those crevices with Acoustical caulking, cover with drywall tape, then mud. Actually for around the door, I will be placing strips of firecode drywall over top before mudding. That should hopefully seal the room together nice and tight (along with the other efforts i have made). On the actual door, if I find that the steel door isn't providing enough sound proofing (after I have the door sweep/seals installed), I will attach a sheet of drywall to the interior face of the door using "Green Glue". That oughta do the trick.

IMG_0395.jpg
 
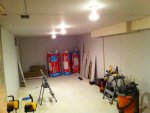
Well it's been a slow curve, but all the drywall (aka 'sheetrock') mudding and sanding is done for the entire room...finally! That was my biggest fear (especially the sanding)! I've sort of stopped taking pictures until another visible milestone happens because they all start to look the same (ie: endless pics of an empty room with drywall). Thing is, all those things that visibly look like no progress take the LONGEST and are the least appreciated after everything's done, haha, I hate that! But the walls/ceiling will look flawless when done. No amateur looking slapped-together studio here!

Painting commences tonight. My goal is to have everything painted and floors installed by the end of this coming weekend! Wish me luck! Will post more progress pics soon!
 
Back
Top