antichef
pornk rock
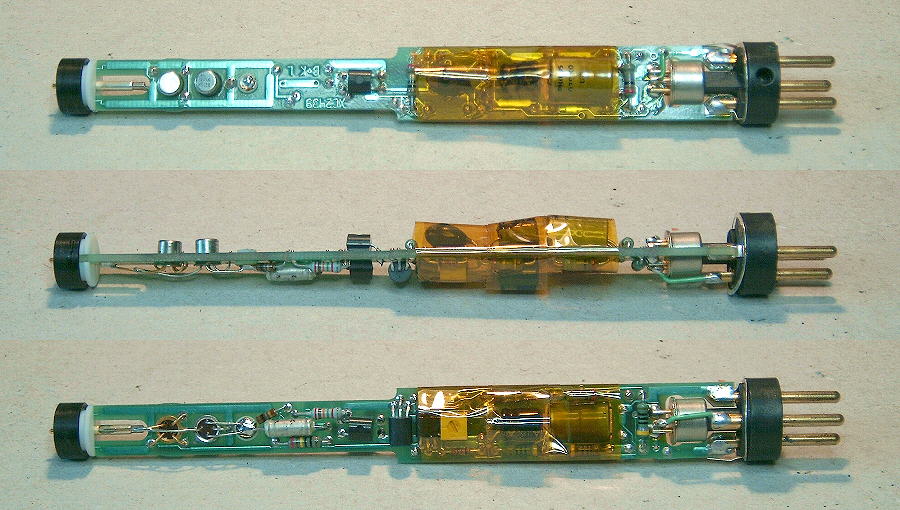
I decided to take one for the team and go get that KSM27 that the shop said was "distorted" - at least it was cheap  . At first, all I got was whooshing and popping - I took it apart to see what was inside. Indeed, SMT:

Nothing visually wrong (on the other side, either) but who can tell with all that little bitty stuff? After I put it back together, I recorded a little bit, and actually heard a semblance of my voice coming through the din:
http://www.recursor.net/ksm27/ksm27.wav (warning - turn your monitors down). Really messed up, because I normally sound just like James Earl Jones.
Any ideas? Worst case, I guess I can pull out the capsule and do something with it.
. At first, all I got was whooshing and popping - I took it apart to see what was inside. Indeed, SMT:
Nothing visually wrong (on the other side, either) but who can tell with all that little bitty stuff? After I put it back together, I recorded a little bit, and actually heard a semblance of my voice coming through the din:
http://www.recursor.net/ksm27/ksm27.wav (warning - turn your monitors down). Really messed up, because I normally sound just like James Earl Jones.
Any ideas? Worst case, I guess I can pull out the capsule and do something with it.
") crosseyes: ).
crosseyes: ).") -- I might first try to mount the capsule better in the MXL2001, though - I think I could do it by drilling one hole in the capsule base-plate of the that mic.
-- I might first try to mount the capsule better in the MXL2001, though - I think I could do it by drilling one hole in the capsule base-plate of the that mic. .
.