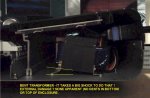
Putting it all back together
Now that the weights are fixed its time to put it all back together again. Wait ! before doing that, take this opportunity to look around and do any other maintenance work that needs to be done. Its not often that the keybed is completely apart so check the felts, the key posts, the towers, aftertouch ribbons etc... You might also want to take the contacts PC board apart and clean those out also - go back to page 1 of this thread, Toddskins has it all laid out for you !
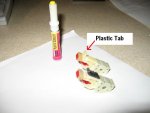
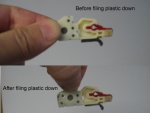
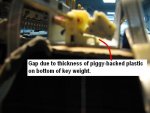
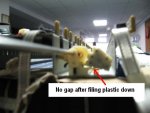
Putting back the rod that holds the keyweights in place can be a bit tricky, you need to work slowly and very carefully. Also, you may need to file or grind (to a slightly conical shape) the inserting end a bit; the rods I had were blunt and had a burr so it would have been very difficult to put them back in smoothly.
Position one weight at a time, rotate while pushing rod back in. When rod gets too short to grasp, lightly tap rod forward. Apply a very light coat of teflon lubricant on the rod to make it slide more easily. *** DO NOT *** apply excessive force - crunched felt, bent rod or broken tower posts could result ! Take your time.
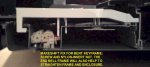
Now that the weights are fixed its time to put it all back together again. Wait ! before doing that, take this opportunity to look around and do any other maintenance work that needs to be done. Its not often that the keybed is completely apart so check the felts, the key posts, the towers, aftertouch ribbons etc... You might also want to take the contacts PC board apart and clean those out also - go back to page 1 of this thread, Toddskins has it all laid out for you !
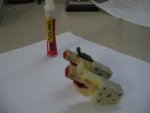
Putting back the rod that holds the keyweights in place can be a bit tricky, you need to work slowly and very carefully. Also, you may need to file or grind (to a slightly conical shape) the inserting end a bit; the rods I had were blunt and had a burr so it would have been very difficult to put them back in smoothly.
Position one weight at a time, rotate while pushing rod back in. When rod gets too short to grasp, lightly tap rod forward. Apply a very light coat of teflon lubricant on the rod to make it slide more easily. *** DO NOT *** apply excessive force - crunched felt, bent rod or broken tower posts could result ! Take your time.
")