You are using an out of date browser. It may not display this or other websites correctly.
You should upgrade or use an alternative browser.
You should upgrade or use an alternative browser.
Tascam M-3500 refurbishment
- Thread starter timkroeger
- Start date
sweetbeats
Reel deep thoughts...
But how did you apply the spray? Did you pull the knob off and spray from the top?
If you did that is actually just about the worst thing you can do IMO.
The pot shaft is sealed with grease. More than likely none of the cleaner gets down into the body of the pot where the element and wiper are, but you risk forcing grease and/or foreign material into the pot body.
The only decent way to really give it a good flushing application of the cleaner is to get at the pot body wich involves pulling the channel card (unless you are lucky and it is one of the channels at the right side of the module like channels 4, 8, 12 etc...), spraying the cleaner into one of the holes in the pot body, sweep-sweep-sweep etc., letting the fluid drain out and giving another flushing spray. Works like a charm. If you can't do this then I suggest you do nothing at all.
If you don't want to open 'er up and clean as described above take a shoelace and wrap it around the knob and then pull the lace back and forth rapidly sweeping the pot a number of times. That might help.
briank
analog for the people!
No I didn't apply it from the top--I removed the module and was actually able to flex the spray tube around without pulling the card.
BTW the symptom is that the gain is intermittently all over the place--during a mix I might get a big drop in level and have to crank the trim way up to get it back to unity...then later it will go back to "normal" and suddenly it's clipping like crazy and I have to crank it back down again. Don't know if that's the pot or something else, it's not scratchy sounding like a typical dirty pot.
BTW the symptom is that the gain is intermittently all over the place--during a mix I might get a big drop in level and have to crank the trim way up to get it back to unity...then later it will go back to "normal" and suddenly it's clipping like crazy and I have to crank it back down again. Don't know if that's the pot or something else, it's not scratchy sounding like a typical dirty pot.
sweetbeats
Reel deep thoughts...
Okay...gotcha.
THAT sounds possibly like a bad cap in the mic amp...I don't have schematics for the M-3x00 series, but you might want to look at the coupling cap...on other Tascam mixers I've worked on its typically the biggest can on the channel card...a larger value non-polar cap like 470uF/16V.
There's another way to deal with that problem too...its a button labeled "MUTE" down by the fader.
Sorry...that's probably not at all funny.
briank
analog for the people!
Hehe "mute" and patching over to a spare channel IS what I've done in the meantime ") I do have manuals for the console so may have a schematic, I'll check next time I'm down at the studio. Again I appreciate the assistance--this place is a boon for Tascam console owners!
I do have manuals for the console so may have a schematic, I'll check next time I'm down at the studio. Again I appreciate the assistance--this place is a boon for Tascam console owners! ")
"mute" and patching over to a spare channel IS what I've done in the meantime I do have manuals for the console so may have a schematic, I'll check next time I'm down at the studio. Again I appreciate the assistance--this place is a boon for Tascam console owners! sweetbeats
Reel deep thoughts...
Yes...for analogophiles in general.
GCalo
Member
Cory is right. Grounding issues usually cause hums not hisssses.
A bad lytic can emit unstable and eratic voltages that can cause hissses.
A bad film in the audio path can emit hissses as well.
So try a few of the given suggestions and see what happens.
Do let us what it was when you resolve the issue.
As an aside, I did encounter a bad P/S capacitor in a less than 1 year old $5.5K Bryston 7.1 surround processor. The cap went bad and took out the digital power supply!
So even newer, very high grade equipment can experience lytic failures
lo.fi.love
Functionally obsessed.
So even newer, very high grade equipment can experience lytic failures
Oh, hi Greg! Didn't know you were on the board!
briank
analog for the people!
First thing I would do is measure the noise level. Do you have a true RMS voltmeter? If so I'd get 32 150ohm resistors (cheap), stuff them in between pins 2 and 3 of every mic input, source each channel to mic, defeat the eq section, route each channel to the main buss (and ONLY the main buss), turn the trim pots to about 3:00, raise the channel faders to unity, raise the main faders to unity, turn on your true RMS meter to AC volts and measure the voltage level at the unbalanced main output and post it here...convert it db's if you like or we can do that here after we have AC volts RMS value. This will be a measure of the mixer's nominal self noise at unity gain for 32 channels through the mic pre's at a reasonable real-world gain level. Maybe the mixer is already at spec...maybe not.
Sweetbeats, I'm a bit dense sometimes
and want to make sure I'm getting this right--what would be the procedure for "stuffing" the resistors between 2 and 3, access the back of each channel XLR in and fix the resistor with a blip of solder to each of the pins? Looks like I can get the resistors for 99cents per 5-pack at Rat Shack and it would be good to know if I'm just asking more from the console than it can give (or less, as it were). I'll probably proceed with the PSU recap either way since it's cheap and a reasonably simple job. When I popped the top off the PSU, I thought I saw a little "brown sludge" on one or two of the caps.
Thanks again and sorry for highjacking this thread--I'll start a new one when I dig into the PSU job.
GCalo
Member
---When I popped the top off the PSU, I thought I saw a little "brown sludge" on one or two of the caps. ---
A type of hot melt glue to hold the taller radial caps in place.
Remove carefully and you'll be OK.
briank
analog for the people!
A type of hot melt glue to hold the taller radial caps in place.
Remove carefully and you'll be OK.
Gotcha, thanks!
sweetbeats
Reel deep thoughts...
A type of hot melt glue to hold the taller radial caps in place.
Remove carefully and you'll be OK.
Yep...Sometimes you can get a hobby knife or similar in there to kind of break the seal on that old adhesive, suck the solder off and usually as you gently rock the cap a little it'll pop off the adhesive. Nothing too scary.
sweetbeats
Reel deep thoughts...
Sweetbeats, I'm a bit dense sometimes
Dense, my foot...look at my signature...no fair cutting in line in front of me.
No need to solder or anything...literally stuff the tails in there...I just bent the tails to make a "U" with the actually resistor at the bottom and then bent the tops of the "U" down so the tails weren't so long and shoved them in there...makes it easy that the mic inputs are XLR-F jacks. Here's a little pictogram of how I bent the resistors:
^-^
The resistor itself is in the middle represented by the dash.
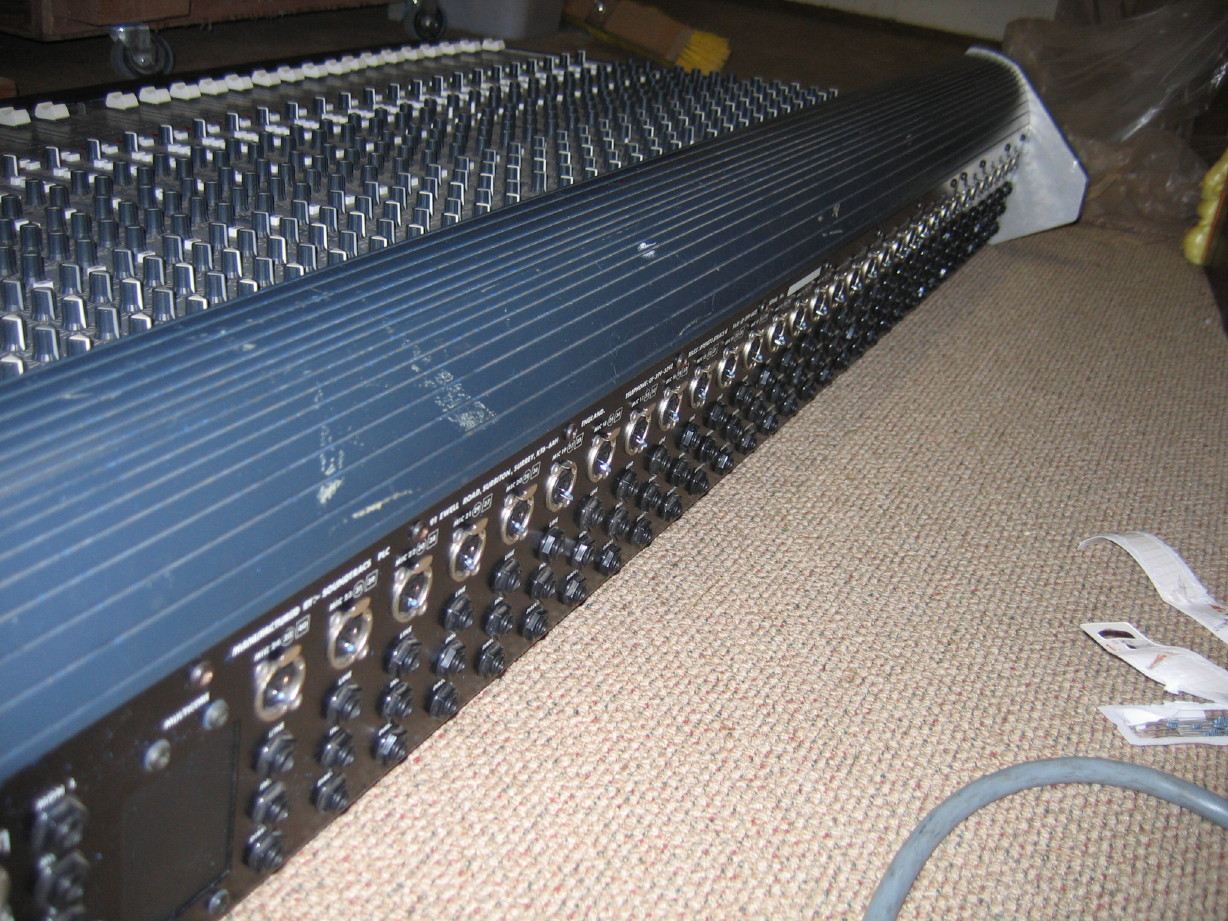
Here's a pic of the back of the console...you can barely see the resistors there in each mic jack but they're the little blue thingies...1/4W 150ohm...$1.99/25pack at Fry's Electronics...
timkroeger
Custom Title User
Hey...on that Fader Lube...I was told by both Caig and TASCAM...NOT to use the Fader Lube!!!
The Alps faders do not use any lubricant (like some do).
Caig recommended their D-100 formula...which is the 100% pure cleaning solvent version of their D-5 (only 5%, the rest is propelent).
I just used a Q-Tip dipped in the D-100, then I wiped the carbon tracks, and also the rails...then one pass with a dry Q-Tip, as you don't want to leave too much of a film on there.
The D-100 will provide enough lubrication on it's own. The Fader Lube might be OK at first, but it might gunk up even quicker.
^^^^^ what he said (...been waiting for an opportunity to write that
)Never ever use Fader Lube on the M-3500's faders. The first group of 8 faders I treated with it are scratching like mad now. It gets better after exercising them some though. I removed the stuff some time ago after Miroslav pointed it out and it was all fine but now the scratchieness has come back. I may treat them with DeOxit D-100 but I have to get a hold of it first here in Germany via ACY's guitar lounge, which seems to be the only shop here to carry that stuff. If the faders ain't misbehaving, don't do anything except some cleaning or maybe use the D-100 on them like Miroslav described. They're very good, unless you mess with them like I did. Ahh well...

timkroeger
Custom Title User
The board is only half done regarding cleaning and such. I'm still working on it accasionally but right now I don't use most of it's potiential anyway since I mix mostly in the box. Too much (non audio  ) work, too little time.
I had a few BB OPA2604 opamps lying around (ok, I bought them for that reason) and I tried them on the channel modules as I said early I'd like to tinker around with that stuff. I was not able to hear an improvement. One or two of the chips were oscillating, too and I increased the bypass caps a little to reduce the negative feedback lowpass to a -3dB point of about 80 to 100 kHz and the oscilltions stopped. But as the chips draw a lot more current than the stock JRC 4580D and I didn't want to be forced to improve the power supply or deal with it in any way, I removed them again.
Board 1:0 Tim
The BB OPA2132PA are nice though as they don't oscillate that easy. Power consumption is in the same ballpark as the stock chips so I'd say they're a drop-in replacement. I swapped most of the master section's 4580s and the ones on one channel strip module, too. I had the sockets already installed, so that was easy. With the improved - almost nonexistent - DC offset of those chips I was able to remove some electrolytics from the board, too. Replaced all the relevant bypass caps with silver mica and listened again.
Hmm.
...
Hmm.
At least I didn't make it sound worse. Still sounds the same even with missing 'lytics. Not that I had not anticipated that outcome from the data sheets and my somewhat poor understanding if audio related circuit design, but it just would have been a nice reward and sometimes you just want to believe It may be my monitors (Yamaha HS80M) or headphones (AKG K240 studio) that prevent me from hearing a difference. Or maybe the sound source (program material from CD via Pioneer PD-8700) but at least I don't seem to be suffering from builder's ear. Maybe I don't have my ears trained enough, but I think the board is just good on its own. It was a nice experiment, I learned a lot about different circuit designs that utilise opamps and maybe I'll hear a difference some day but for now I'm very happy that I have an out of the box nice sounding board
Board 2:0 Tim

Cheers
Tim
) work, too little time.I had a few BB OPA2604 opamps lying around (ok, I bought them for that reason) and I tried them on the channel modules as I said early I'd like to tinker around with that stuff. I was not able to hear an improvement. One or two of the chips were oscillating, too and I increased the bypass caps a little to reduce the negative feedback lowpass to a -3dB point of about 80 to 100 kHz and the oscilltions stopped. But as the chips draw a lot more current than the stock JRC 4580D and I didn't want to be forced to improve the power supply or deal with it in any way, I removed them again.
Board 1:0 Tim
The BB OPA2132PA are nice though as they don't oscillate that easy. Power consumption is in the same ballpark as the stock chips so I'd say they're a drop-in replacement. I swapped most of the master section's 4580s and the ones on one channel strip module, too. I had the sockets already installed, so that was easy. With the improved - almost nonexistent - DC offset of those chips I was able to remove some electrolytics from the board, too. Replaced all the relevant bypass caps with silver mica and listened again.
Hmm.
...
Hmm.
At least I didn't make it sound worse. Still sounds the same even with missing 'lytics. Not that I had not anticipated that outcome from the data sheets and my somewhat poor understanding if audio related circuit design, but it just would have been a nice reward and sometimes you just want to believe
It may be my monitors (Yamaha HS80M) or headphones (AKG K240 studio) that prevent me from hearing a difference. Or maybe the sound source (program material from CD via Pioneer PD-8700) but at least I don't seem to be suffering from builder's ear. Maybe I don't have my ears trained enough, but I think the board is just good on its own. It was a nice experiment, I learned a lot about different circuit designs that utilise opamps and maybe I'll hear a difference some day but for now I'm very happy that I have an out of the box nice sounding board Board 2:0 Tim
Cheers
Tim
sweetbeats
Reel deep thoughts...
Tim,
Quite nice to hear from you!
What's sitting on top of the DX-4D's? Looks like a Tascam ES-51...
Hey, how did you learn when it is okay to remove electrolytic caps from the signal path?
What is the mixer sitting on? And that must be a strong shelf that all the otehr gear is sitting on.
Is the 4580 anything like the 4570? I've read that the 4570 is somewhat equivalent to a low current draw version of the 5532.
timkroeger
Custom Title User
Hey Cory,
yeah I try to keep track of what's happening here and there at HR but this weekend is one of the first where I actually have some more time to post.
On top of the DX-4Ds is sitting an ES-51 that's connected to the ES-50 beneath the console. It came with a deal I couldn't pass on (spare ATR-60/16 with one defect R/P amp card). The seller threw in a 58 in OK condition and good heads, the ES-50/51 combination, RC-65C remote control and an Ampex 499 Grand Master Gold from late '95.
Regarding me homeschooling myself in the art of purging electrolytics (hehe...), I just read a lot of posts, schematics and design papers until I was self delusionally sure enough about when to use decoupling capacitors and when they could be omitted. I just removed those between two opamp stages, not those where the circuit might be "exposed" to external gear via inserts and such to be on the safe side. Anythign that might somehow end up on a jack still has the capacitors attached. Due to the many possibilities to configure the signal path and switch the tape-in and line inputs, that really forced me to pay attention to the schematics and how the different PCB boards are connected throughout the console. Well, I might still have done something wrong as all the terms and discussion of different technology opamps or their input/output design, load and what components might or might not build a 3rd pole together with the output and do this and that is a little bit over my head. If I had a PDF of the schematics, I'd post what components I removed but I'm still searching for a PDF service manual of the M-3500. I only have a bad printed copy of a PDF that came directly from a German Tascam dealer. That was all they could obtain and some of the components description is pretty unreadable.
The mixer is not sitting on something directly. It's connected to custom built flanges. I have three of these flanges so there is space for the patchbay. The shelf is one of the components that holds the flanges together along with the console itself and some more structural integrity reinforcements on the back of the "stand" that are not shown in the figure below. It's pretty sturdy once everything is secured.

Hmm, 4570, 4580... I don't know. I never tinkered with anything that had 4570s inside so I wouldn't know. I find the 4580s to sound good though. As I stated above I wasn't able to hear any difference to the BB OPA2132PA, at least not something that I could easily describe or would justify talking about better or worse sounding. Not even different. It might have a slightly lower noisefloor that I may not be able to hear because of the noise floor of the monitors being higher. Maybe I'll do some measurements in the future if I really don't have anything else to do
Cheers
Tim
yeah I try to keep track of what's happening here and there at HR but this weekend is one of the first where I actually have some more time to post.
On top of the DX-4Ds is sitting an ES-51 that's connected to the ES-50 beneath the console. It came with a deal I couldn't pass on (spare ATR-60/16 with one defect R/P amp card). The seller threw in a 58 in OK condition and good heads, the ES-50/51 combination, RC-65C remote control and an Ampex 499 Grand Master Gold from late '95.
Regarding me homeschooling myself in the art of purging electrolytics (hehe...), I just read a lot of posts, schematics and design papers until I was self delusionally sure enough about when to use decoupling capacitors and when they could be omitted. I just removed those between two opamp stages, not those where the circuit might be "exposed" to external gear via inserts and such to be on the safe side. Anythign that might somehow end up on a jack still has the capacitors attached. Due to the many possibilities to configure the signal path and switch the tape-in and line inputs, that really forced me to pay attention to the schematics and how the different PCB boards are connected throughout the console. Well, I might still have done something wrong as all the terms and discussion of different technology opamps or their input/output design, load and what components might or might not build a 3rd pole together with the output and do this and that is a little bit over my head. If I had a PDF of the schematics, I'd post what components I removed but I'm still searching for a PDF service manual of the M-3500. I only have a bad printed copy of a PDF that came directly from a German Tascam dealer. That was all they could obtain and some of the components description is pretty unreadable.
The mixer is not sitting on something directly. It's connected to custom built flanges. I have three of these flanges so there is space for the patchbay. The shelf is one of the components that holds the flanges together along with the console itself and some more structural integrity reinforcements on the back of the "stand" that are not shown in the figure below. It's pretty sturdy once everything is secured.
Hmm, 4570, 4580... I don't know. I never tinkered with anything that had 4570s inside so I wouldn't know. I find the 4580s to sound good though. As I stated above I wasn't able to hear any difference to the BB OPA2132PA, at least not something that I could easily describe or would justify talking about better or worse sounding. Not even different. It might have a slightly lower noisefloor that I may not be able to hear because of the noise floor of the monitors being higher. Maybe I'll do some measurements in the future if I really don't have anything else to do
Cheers
Tim
Last edited: