tascam 688 - disassembly and (hopefully) repair)

heatmiser

mr. green christmas
This is my attempt to document the disassembly of a tascam 688 midistudio. This is a continuation of a recent thread:

https://homerecording.com/bbs/showthread.php?t=301643

which outlines the issues I was having with pitch/speed. I have a capstan belt on the way from the manufacturer in california and wanted to take it apart both to have a look at the innards and to get prepared for belt replacement.

I used a prior thread from this forum as a guide:

https://homerecording.com/bbs/showthread.php?t=283800&page=2

Post #26 by Ely in particular was invaluable to keep me on track. Keep in mind I have zero experience with this sort of thing, but I have to say, at least with regard to taking it apart...anyone with some patience, an assortment of screwdrivers and an hour or two to spare can do this.

I hope this will be of some help to any fellow 688 owners/fans. :D

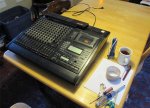
First, the work surface. You will need a good deal of room and a variety of screwdrivers. I drew pictures of the pieces the screws came from and taped each screw to the corresponding drawing. Note, the Finding Nemo flashlight is optional ;).

1.jpg

Next, remove the right side panel (two screws - no problem):
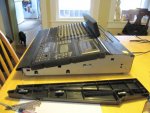
2.jpg

Next, remove the front arm rest at the bottom of the unit. Note - all 5 screws should be loosened not removed. 2 of the screws are recessed and if you simply loosen them, the arm rest should slide out. I made the mistake of removing them (highlighted in the photo below) and had to turn the unit upside down to get them out. I think it will be difficult to reattach them...oh well:
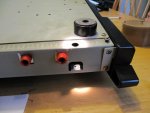
3.jpg

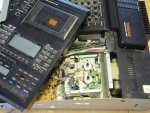
Next, gently pull off the pitch control knob. Then, loosen 2 screws on the back top cover above the tape cover door. Now you can remove the cover to the whole tape control portion of the unit. Note - it is attached by several bunches of wires to several other parts of the unit, so movement is limited. First, I slid it to the left (photo below), then I opened it to the right like the back cover of a book and left it laying on its side up against the right side of the unit (next post):
4.jpg
 
Last edited:
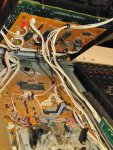
Here is the cover moved off to the right of the unit, exposing various...uh, boards and wires and stuff :o

6.jpg

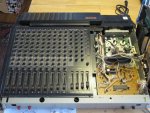
And another, broader view - look at those guts!

7.jpg

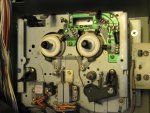
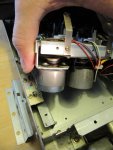
Now, I finally got a good look at the tape drive unit:

5.jpg

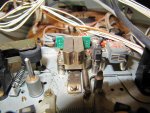
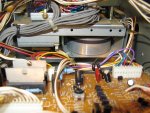
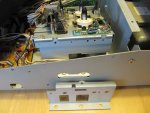
This allowed me a closer look at the heads and the roller...Um...looks ok to me, but what do I know? Note - I did find some carcasses of tiny dead bugs :-)eek:) in here along with the expected dust and grit. A q-tip soaked in water helped, but more cleaning might be in order prior to reassembly:
8.jpg
 
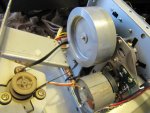
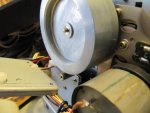
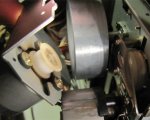
Here was my first look at the capstan belt wrapped around this massive pulley. It looked fine from here, but also looks so tight in there I couldn't imagine how to get at it:

11.jpg

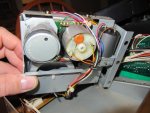
Following Ely's instructions, I removed the tape drive unit from the base mounting bracket, and then I removed the right side bracket (2 screws) from the tape drive unit:

12.jpg

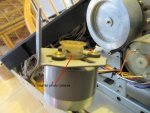
This is where I got confused and had to go outside and have a smoke to calm down :D. The bracket that allows access to the belt has 2 screws on the side. Ely mentions 3 screws, but the 3rd is tucked away underneath the drive unit. I could not move the unit enough to gain access to this screw without disconnecting one ground wire on top of the drive unit. Below you'll see about how far I could move it without disconnecting that wire:

13.jpg

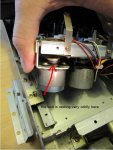
Once the ground wire was disconnected on top, I could lift the unit and almost flip it on its side. Removing the 3rd screw was easy:

14.jpg
 
Last edited:
So, I remove that 3rd screw and the whole undercarriage comes right off. At this point the belt just kind of tumbled off the pulleys...it looks and feels limp with much less spring to it than I would expect. I really think it does need a fresh belt at this point and I hope it will help with my pitch issues.

15.jpg

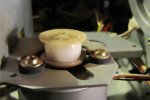
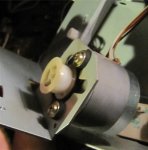
The smaller, plastic pulley had all of this rubber residue on it (see below) - further evidence that the belt has deteriorated and needs replacement (again, hard scrubbing with a wet q-tip cleaned most of this off).

16.jpg

I am a little alarmed as Ely mentions taking careful note of how the belt was threaded on, because he states there is a spacer it needs to go around. I didn't have a chance to examine anything as the belt kind of slid off. I don't see any spacers either:

17.jpg

There is that shiny metal shaft below the big pulley, but I don't think the belt went around that at all...? Both of the pulleys appear to be tightly in place and both spin freely. This thing appears to be very well built and I hope the new belt will arrive soon. If installation is anyway near as easy as removal, I'll be a happy guy.

That is all for now...
 
My fellow Analog Only friends...please join me in a round of applause for heatmiser, and give him some rep points while you are at it!

Heat, I'm looking at the thread on a mobile device so the pictures are too small to see detail yet. I'll review using a full-size screen later, but bravo for diving in and for taking pictures of it all and putting them up. This is really, really great!

I think it is so valuable what you said about preparing the workspace and that is a really great idea to make a sketch of the unit and taping the screws down.

If ever you do get further into disassembly (wires), you can take pictures of you holding a wire and pointing to where it plugs in and such. You will likely find that Teac grouped plugs with different numbers of contacts so they can't be plugged into the wrong spot, and/or color-coded things. The pictures give added assurance when plugging things back in.

Another tip for cleaning up those bugs...get a cheap 1 inch paint brush, get your vacuum cleaner or shop-vac and put the crevice tool on the hose if you have such a thing. Then you can kind of gently loosen or stir debris up while you hold the tip of the crevice tool near where you are brushing...it'll suck the loose stuff up and then you can tae an air duster can after that if you want to get the hard-to-reach stuff out.

I really commend you for braving this and diving in, especially when it is new territory. You are being very smart in your approach and you are going to do just fine. Doesn't it take some of the mystery out of your 688? It is empowering to be able to open it up and DIY. Everybody has their limit. I know I've found mine, and for some the limit is just no DIY at all and I totally respect that, but doing what you CAN do within your means can be a really great experence.

Best wishes...I too hope the belt gets there quick. Teac is really good about getting in-stock items out ASAP. IIRC you are back East so it'll be in transit longer than when I order stuff, but it'll get there soon.

Again, I'll take a closer look at the pics later, but, yeah, if the belt feels not so rubbery and more, um, dry? And if you are seeing residue, I agree that that is supportive evidence that it is time to replace even if that ISN'T the cause of the trouble...hopefully it is but you can be doing nothing but good doing what you are doing.

Also, yes, that is quite a capstan flywheel for a cassette-based system...that is indeed impressive.
 
I am a little alarmed as Ely mentions taking careful note of how the belt was threaded on, because he states there is a spacer it needs to go around. I didn't have a chance to examine anything as the belt kind of slid off. I don't see any spacers either:

<snip>

There is that shiny metal shaft below the big pulley, but I don't think the belt went around that at all...?

First off, as Cory said, further proof that belt's the issue. Second, see that residue on that plastic thing? The belt probably rested there, where that residue is. It's OK to use some soaked q-tips in alcohol (at least 90%) to clean it off (excess squeezed off). Do a once over on the plastic thing and also the flywheel. Needs to be mirror clean. Third. Can you do a clearer photo of the plastic motor shaft wheel thing (where belt attaches to motor)? I just wanna see if there's any grooves in there or where else the belt can go. Another thing... See that 2nd photo. The belt seems to be oddly resting on that plastic pulley, like it folded over to one side. Just a thought to probably belt "travel", from side to side and possibly from one groove to the next, hence speed problems. NOW WE HAVE TO FIGURE OUT WHICH SIDE / GROOVE THE BELT GOES ON.

There's a similar shaft on the 244 / 246. The belt does NOT go around it. It just straight from fly wheel to motor shaft / plastic pulley, with no detours. Someone correct me if I'm wrong.

BTW, excellent work heat.... :) Work slow.
 

Attachments

  • 16.jpg
    16.jpg
    58 KB · Views: 1,092
  • 13.jpg
    13.jpg
    60 KB · Views: 1,125
This is really, really great!

Thanks so much. I know I'm only half way there (at best), but it is pretty satisfying so far.

I just gave the insides the paint brush/shop vac treatment - works well. No more bugs! You were right too about the mystery of the thing. It really helps me to see the mechanical workings. The wiring and boards and stuff is a bit overwhelming, but the more mechanical bits kind of make sense to me and I am impressed but also reassured by the heft of the components.

I now realize what I was referring to as a "pulley" was really a flywheel :o. I probably mis-named a few things along the way, but the photos should help clarify.

The belt really doesn't look damaged or anything...just limp and maybe a little dry. It was VERY loose though and I feel certain after seeing it close up that it wasn't funtioning properly. The underside was marked with patchy shiny areas and left the afore-mentioned residue.

Thanks a ton for the encouragement and the helpful advice :D.
 
First off, as Cory said, further proof that belt's the issue. Second, see that residue on that plastic thing? The belt probably rested there, where that residue is. It's OK to use some soaked q-tips in alcohol (at least 90%) to clean it off (excess squeezed off). Do a once over on the plastic thing and also the flywheel. Needs to be mirror clean.

Agreed on the belt.

Yes, the belt definitely rested on the plastic thing which I am referring to as a pulley...one end of the belt wrapped around that and the other around the flywheel (which I mistakenly also called a pulley above...oops.:)

I was afraid to use alcohol on plastic knowing it was bad for rubber, but I took your advice and cleaned both the plastic pulley and the metal flywheel with 91% alcohol, and although not mirror-like, they look way better. See next post for more photos and answers to your other questions. Thanks! :)
 
Can you do a clearer photo of the plastic motor shaft wheel thing (where belt attaches to motor)? I just wanna see if there's any grooves in there or where else the belt can go. Another thing... See that 2nd photo. The belt seems to be oddly resting on that plastic pulley, like it folded over to one side. Just a thought to probably belt "travel", from side to side and possibly from one groove to the next, hence speed problems. NOW WE HAVE TO FIGURE OUT WHICH SIDE / GROOVE THE BELT GOES ON.

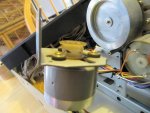
Wow, you have an eye for detail! I have more photos below - post alcohol scrubbing. The clarity isn't great, but certainly a better view than before. There are no grooves to speak of on the surface of the plastic pulley. As you will see, it is convex and smoothly rounded. The second photo in your post amazed me as the belt is obviously riding wrapped around the rim of the pulley. I didn't even notice that! I'm tellin' you it was so loose, it doesn't surprise me now that you point it out.

19.jpg

20.jpg

21.jpg

I'm sorry - not much more clarity, but certainly cleaner now!

I really think despite the mention of a spacer in Ely's post, the belt on mine may simply have wrapped around the top of the metal flywheel and then around this plastic pulley, in fact I know it did, I just can't swear that it didn't also wrap around something else.
 
Excellent photos heat..... It confirms even more that it is the belt. It is supposed to travel flat on the middle of the curved plastic thing and it wasn't. It was off to the side, crumpled up, overly stretched and falling apart. It's likely it traveled back and forth, increasing / decreasing speed. Stuff looks mirror like clean now. Good job. :)
 
Heat...cjacek is right for sure...the belt was so stretched out that sometimes I bet it would ride on the flange of the motor pulley (the plastic part), and sometimes loosely ride where it is supposed to in the channel of the pulley. The convex shape of the pulley channel is for the belt to self-center. The shifty behavior is probably temperature dependent...belt heats up, stretches, rides up on flange, tape speeds up...after the unit is turned off, belt cools and then when you turn it on it loosely snaps into the proper pulley channel until it heats up and stretches again. Does that describe somewhat the symptoms you were experiencing? That belt should be a nice snug (but not tight) fit around the flywheel and the motor pulley.

I'm with cjacek...I betcha that new belt get's you in good shape again.

BTW, your heads look fine from what I can see and that's the nice thing about cassette-based multitrackers anyway...cassette tape runs at slower speeds and rides on the heads with less tension and pressure so cassette heads typically last longer than higher speed open-reel transports. Typically the cassette heads where you'll see wear issues are duplicators.

Clean your pinch roller good with some dilute window cleaner on a piece of t-shirt cloth or something similar so you can really rub it. It definitely looks glazed and if your capstan belt was leaving skid marks (ewww) on the motor pulley and it was stretched out, then the rubber on the pinch roller needs to be suspect. If it is not a problem yet it will be at some point.

If Teac can't get the pinch roller assemblies for the 688, then I'd be saving up for a re-rubber job by Terry.

Nice job cleaning it up, and, again, kudos for the "story" and for braving the effort. Well worth it and a great contribution to the forum.
 
This is truly the best thread ever. I'm gonna follow in your footsteps soon Heat, so many many thanks for taking the time to share this...
 
Clean your pinch roller good with some dilute window cleaner on a piece of t-shirt cloth or something similar so you can really rub it.

If Teac can't get the pinch roller assemblies for the 688, then I'd be saving up for a re-rubber job by Terry.

Yup, great advice. That's the inexpensive way to at least get the roller clean and somewhat improve its traction tho, ultimately, you do need to get new rubber for it, as Cory mentioned. Make sure any sign of liquid and residue is completely wiped off & dry before attempting to run tape.

When you get to the point where you confirm all is running good with the capstan belt, send Rolf an email about the 688 roller. He may have a brand new one and he's a trusted technician and member of this and other boards. It's Rolf@consolidated.net
 
Thanks everyone.

Another good cleaning tip sweetbeats :)...even though a wet q-tip was getting some residue off the roller and I was doing that pretty regularly until the q-tip emerged clean, using a small amount of window cleaner mixed with water got a lot more stuff off there.

I used a small piece of tee shirt and scrubbed pretty hard and now, although there still is a noticeable strip down the center of the roller, most of the sheen is gone. As cjacek notes, this should provide more traction - at least for the time being.

"The shifty behavior is probably temperature dependent...belt heats up, stretches, rides up on flange, tape speeds up...after the unit is turned off, belt cools and then when you turn it on it loosely snaps into the proper pulley channel until it heats up and stretches again. Does that describe somewhat the symptoms you were experiencing? That belt should be a nice snug (but not tight) fit around the flywheel and the motor pulley."

Yes, that is more or less what I experienced. A little more random than that I guess, but temp and humidity did seem to be a factor.

While the belt was somewhat snug I guess, you could see how it rode up on the edge of that pulley and while it was still attached I prodded it gently with a tiny screwdriver and it really felt limp and didn't spring back into shape the way you'd expect rubber to.

I don't want to get my hopes too high, but I'm feeling more and more like some of the major issues will be addressed by this belt replacement. It can't hurt and it is certainly educational!

This machine is never going to be mint or anything...I still have two fried line inputs (xlrs work find on those channels though), some intermittant outages on a few channels on the meter bridge, some scratchy faders and a missing RTZ button. But I have worked around these things and will gladly continue to do so as it is so much fun to use when functional.
 
thank you teac

Just wanted to report that the new capstan belt from teac/tascam was waiting for me today at my doorstep when I returned from work - fast service!!!

Unfortunately, I won't be reassembling it tonight as it was "tall for small" night at pat's pizza, so instead of getting 2 pints I got a free upgrade to two, 23 ozs of lager. That's like 4 beers. I think I'll wait 'till tomorrow :).
 
I'm glad the belt reached you in quick time, tho you def want steady hands when working on your 688. :drunk: :D :spank: :D ;)
 
mission accomplished?

Ok, so tonight I installed the new capstan belt and reassembled the thing. Much easier than disassembly. Really. Just need to be sure the belt is on the flywheel first then wrap it around the plastic pulley. Re-attach the plates that make up the exterior of tape drive, double check that the belt is lined up properly and then re-attach everything else in reverse order.

Now, I played back some tapes made on this machine over the last 3 years and all of them were slow by about one whole step in terms of pitch. It occured to me that either; A) Something is wrong and it is running at a much slower speed than it should, or B) the belt was so loose all these years that it was actually running fast all this time and only now running at the correct speed, hence the lower pitch.

I did a quick informal test and set a timer while I pressed play on a maxell XLII C60. I'm thinking these things are supposed to run at 2X normal speed, so I expected it to take exactly 15 minutes to play one side of a 60 min. tape. It took 16 minutes. So, I guess it is running too slow. :(

I guess I don't care too much exactly what speed it plays at as long as it maintains that speed consistantly, right? The only way I can think of to really test this is to record some multi-track music, so that will be the ultimate test.

Otherwise it seems fine. FF, RW all run at a good clip and I even seem to have fixed the meter bridge somewhere along the way accidentally when I disassembed that and fiddled around with the wires :).
 
heat.... that's right. You can't put in previous tapes recorded with the bad belt (and expect correct pitch). That's why changing belts (and rubber components in general) every 5 to 10 years max is a good idea. Also, it's never gonna be dead on 15min for a 60 min tape. There are variations in tape lengths (due to cassette tape manufacturing) and also the machine itself, any analogue machine. Your best bet is tracking something and observing stability. I think it was a success. Keep us posted. :)
 
Heat, don't sweat it...I have ALWAYS found that 60 minute tapes run about 32 minutes a side and 90 minute tapes about 47.5 minutes...I think you've got it. Try a test recording.

And as for the old tapes? That pitch control is gonna come in handy now mate. :D
 
Back
Top