Tascam 246 pinch roller question

Ok thanks. I want to make sure I understand everything before I proceed, so could you please elaborate on a few things?

Sorry about the late reply FB - was busy last night.

1. When you say you "pushed the roller harder onto the capstan," from where exactly did you push it? I assume you did this with the front cover still removed?

I just took off the inspection cover for the tape heads and pushed the metal roller housing on the edge facing towards the front of the machine- about halfway between the roller and the mounting post, of that makes sense? I also pushed the roller housing down a bit around the post and circlip.

2. When you say "checking the W&F with a proper tape every hour or so," do you mean using the same process described with the WFGUI program?

Yes - same prosess.
I tried the new version of WFGUI you sent me, and unfortunately it's not working for me either. I click on the "WAV" button, but as soon as I select a wave file to load, the program crashes on me. It did it three times in a row. Am I doing something wrong?

You mentioned earlier that you had to convert my file to mono and 44.1k, but it should have been that already. I rendered them as mono, and as far as I know, my Reaper program is set to 44.1k (although I need to verify this).

I used Audacity on a Windows 8 laptop which showed the file to be stereo 48k. I normalised the file to -15dB, removed the DC offset (at the same time) , converted to mono and used mix and render to convert to 44.1k then exported as wav. I checked this all again just now and got WFGUI to run ok. It is strange at the silent bits at the beginning and end but fine for the 10 secs or so the signal. Got same results as yesterday. If you still can't get it to run, post files here and I will check when I can.

3. I want to make sure I've installed the roller correctly. If you look at this picture of my roller (before it was reconditioned -- it looks brand new now), you can see how the little pin sticking through the roller is sticking up out of the top a little bit. It does not stick out through the bottom like this. In fact, it's not even really all the way flush with the bottom of that gold housing. It's just kind of pushed against the inside of the bottom lip. I couldn't push it through easily, and I didn't want to risk bending anything with pliers or anything, so I didn't push it. It seemed stable, so I just went ahead and installed it like that. But do you know whether or not that pin is supposed to be sticking all the way through both holes in that gold housing? And if so, how did you get it to do that?

I pushed mine down further into the bottom hole using a jeweller's tool - looks like a little screwdriver but has a circular end instead of a blade (ie the shaft is cylindrical all along) about the same diameter as the pin. You can get them at dimes stores I'm sure in sets with the little screwdrivers. I pit the roller housing over a block of wood with a hole in it and gently tapped the pin down. The top of the pin is almost flush with the top of the housing.

Thanks for the help!

PS Hope the comments are clear with the quote FB

Final thought - is the roller spinning free in the housing -- you should be able to get it to spin with your finger and for it to keep rolling a bit. I got a lot of W&F with the roller in my first 244 because it was a little tight in the housing - a slight tightness can make a hell of a lot of difference.

Hope this helps and you get it going - keep us posted!
 
No problem Findlay. I appreciate any help I can get anytime I can get it. :)

Well, I feel like a dummy. After doing everything you suggested (running an empty cassette for an hour or so, pressing against the pinch roller, etc.) and getting pretty much the same results, I was just about ready to throw in the towel. Then, when I was removing the head cover to make sure the pinch roller was able to spin freely while in the housing, I noticed the tape speed switch. I never thought to look at it because I always leave it on high. Well, I guess maybe I had tried playing a standard commercial tape in this machine a while back and never switched it back, so it had been on low tape speed this whole time.

Now I know the specs are still supposed to be pretty good even at low speed, but maybe the tech who worked on it a few years ago forgot to even bother with it at low speed (do you have to set it differently for each?). I don't know, but switching it to high speed made a huge difference.

I'm interested to see what it measures at now. It may still be over spec ... I don't know, but it sounds pretty darn good to me. Compared to before, it sounds great. (But it sounded like dogshit before. :) )

And now I know the reason that the files were showing up the way they were for you. I had converted them to mp3 files in order to post them on this site. So the settings in the converter program must have been that way.

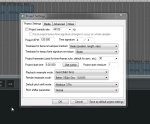
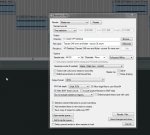
Here’s a link to the new wav files, which should be 44.1k mono (see screenshots in Reaper).
https://www.dropbox.com/sh/5ex8gdrqc13gfh4/AAARe3IaYnjrN6_AM2sxJDhWa?dl=0
 

Attachments

  • Project settings in Reaper.jpg
    Project settings in Reaper.jpg
    96.9 KB · Views: 3
  • Render settings in Reaper.jpg
    Render settings in Reaper.jpg
    304.6 KB · Views: 5
P.S. I am getting WFGUI to work for me now, for some reason. I don't know what changed. But I don't know what settings it should be.

There are choices for 0.1, 0.5, and 1%. Which of those are you using?

Then there's a drop down menu with Unweighted, DIN, Wow, and Flutter choices. Which of those are you using?

I must still not be doing something right, because when I select "Wow" and have 0.5 selected, it's showing crazy things like and RMS of 1.5 % and stuff.
 
Well, I'm curious to hear what it measures at (whenever you get time Findlay), but the good news is that I just made a quick test recording of an acoustic track and three vocals, and it sounded great. All four tracks sounded full, and I didn't hear the slightest bit of pitch wobble. Soooo ... assuming it can hold itself together (crossing my fingers), I'm ready to call it good and start tracking with it finally! :)
 
Hi FB - sorry for the late reply again. Have just measured your new track 1 file and it is coming in at 0.034% RMS, 0.0615% peak DIN. Well under spec! It sounds good - so glad your acoustic recordings sound good and that you are ready to roll! Would be great to heat some of your recordings sometime.
 
Last edited:
Hi FB - sorry for the late reply again. Have just measured your new track 1 file and it is coming in at 0.034% RMS, 0.0615% peak DIN. Well under spec! It sounds good - so glad your acoustic recordings sound good and that you are ready to roll! Would be great to heat some of your recordings sometime.

That's good news, thanks! I'll be sure to post something once I get it done. I appreciate your time and your help. :)
 
Anytime FB. Has been a real delight talking with you. Look forward to hearing those recordings. let's prove how fantastic these machines are!

PS. If you haven't already done it I would recommend a freq. response test for record/replay and bias trimming if necessary before any serious recording. It is amazing the effect this has.
 
Last edited:
Anytime FB. Has been a real delight talking with you. Look forward to hearing those recordings. let's prove how fantastic these machines are!

PS. If you haven't already done it I would recommend a freq. response test for record/replay and bias trimming if necessary before any serious recording. It is amazing the effect this has.

You need a calibration tape for that, right? I don't have one yet, as I figured it was probably overkill before I had gotten the more immediate issues (pitch wobbling) sorted out.
 
I did all 3 of my 244s without a calibration tape - and they sound pretty good to me. Let me know if you ever need help with it.
 
I started by marking all the trim pots before adjusting anything. Then recorded a 400Hz test tone on all tracks at 0dB (dbx on - you have the option to switch off dbx with the 246 I believe - which the manual recommends - but I thought I'd use dbx on as this it how I always record). Played these back and monitored the level on the meters (make sure the tape sync switches used for record are all at the middle position and output set to remix). Most of mine weren't far off but had to adjust a few by a couple of db to get them to 0dB by adjusting the playback output trim. Then I recorded a set of tones - 40, 400, 1000, 10000 and 16000 Hz at 0dB (dbx on) . Played these back and checked level. A few channels were 3db or so down at 10kHz and 6dB of more down at 16kHz do I reduced the bias using the trim to get these back up. You have to monitor that the 400 Hz response doesn't drop by more than a dB or so. Had to repeat a few times but eventually got response within + or - 2dB from 35Hz to 16KHz using TDK SA C90. I have pics from the 244 manual showing where the trimmers are which I can post - they maybe the same on the 246 . Purists will probably tell me off for this method but it is quick, works well and sounds great!
 
I started by marking all the trim pots before adjusting anything. Then recorded a 400Hz test tone on all tracks at 0dB (dbx on - you have the option to switch off dbx with the 246 I believe - which the manual recommends - but I thought I'd use dbx on as this it how I always record). Played these back and monitored the level on the meters (make sure the tape sync switches used for record are all at the middle position and output set to remix). Most of mine weren't far off but had to adjust a few by a couple of db to get them to 0dB by adjusting the playback output trim. Then I recorded a set of tones - 40, 400, 1000, 10000 and 16000 Hz at 0dB (dbx on) . Played these back and checked level. A few channels were 3db or so down at 10kHz and 6dB of more down at 16kHz do I reduced the bias using the trim to get these back up. You have to monitor that the 400 Hz response doesn't drop by more than a dB or so. Had to repeat a few times but eventually got response within + or - 2dB from 35Hz to 16KHz using TDK SA C90. I have pics from the 244 manual showing where the trimmers are which I can post - they maybe the same on the 246 . Purists will probably tell me off for this method but it is quick, works well and sounds great!

Ok thanks for the tip. I have the 246 service manual, so I know where all the pots are.

I'm almost kind of afraid to mess with anything at this point, since it's the first time that it's been in a usable condition since I got it, but I'll consider it! :)
 
Terry's roller should be as good as any them or better because he uses new rubber. The Roller that deforms when you pinch it is defective and should be returned of refunded. This is what happen when you use a part sitting in a bin after 30 years.
I have had to use good roller from other models I have here and they did work well when mounted on the assembly. To go from .024% which is not at all typical and then up to .2% just shows this software has lots of error in it. Use the conventional equipment as some of the problems you see are from using computer cheap software. They should read around .05%wrms.

Yes I was wondering about the software, as I certainly wasn't ever able to get any reliable readings from it. Findlay seems to have figured it out better than I have. Thanks for the tips!
 
I started by marking all the trim pots before adjusting anything. Then recorded a 400Hz test tone on all tracks at 0dB (dbx on - you have the option to switch off dbx with the 246 I believe - which the manual recommends - but I thought I'd use dbx on as this it how I always record). Played these back and monitored the level on the meters (make sure the tape sync switches used for record are all at the middle position and output set to remix). Most of mine weren't far off but had to adjust a few by a couple of db to get them to 0dB by adjusting the playback output trim. Then I recorded a set of tones - 40, 400, 1000, 10000 and 16000 Hz at 0dB (dbx on) . Played these back and checked level. A few channels were 3db or so down at 10kHz and 6dB of more down at 16kHz do I reduced the bias using the trim to get these back up. You have to monitor that the 400 Hz response doesn't drop by more than a dB or so. Had to repeat a few times but eventually got response within + or - 2dB from 35Hz to 16KHz using TDK SA C90. I have pics from the 244 manual showing where the trimmers are which I can post - they maybe the same on the 246 . Purists will probably tell me off for this method but it is quick, works well and sounds great!

Not "telling you off"...it's just a reality that the only way to calibrate your record levels is if you can first calibrate your playback electronics to a known standard. That's where the calibration tape comes in. Your adjustments could be compensating for a record level issue or a playback level issue. Without setting one to a known standard you can't know what you are setting the other one to. I wouldn't touch the play levels without doing it from a cal tape. You might be chasing your tail.
 
Back
Top