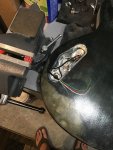
Epi LP special II mod

If not, I saw in your picture, quite the selection of hammers nearby. Isn't that the standard problem solver in the tool world?
:D

Belt sander, sledge hammer, WD40, and duct tape for putting back together what you used the sledge hammer on.
 
If not, I saw in your picture, quite the selection of hammers nearby. Isn't that the standard problem solver in the tool world?
:D
Truth! One for every occasion; and in the drawers beneath my workbench setup there are also a few pneumatic jobbies that take care of anything from framing to trim work as well. Can't ever have too many hammers. One of those, maybe two, were simply purchased to remove a seized alloy rim from the wheel hub in the case of a flat tire on my wife's car. They are now used for "nondestructive testing" on certain things - helped remove a fiberglass shower stall recently. :thumbs up:
 
You forgot superglue and two ton epoxy.
Maybe add in some JB weld and bondo.

Just to do it right. :thumbs up:
 
Hey, Texas - if I get so inclined, maybe I'll have you run the belt sander over one sometime. I forget if you mentioned it, but what grit did you use? I've got a belt sander somewhere. My problem is knowing how much pressure to put on it so that it doesn't take off too much too fast.

IIRC, I started with 80 grit to get off the bulk of the finish then jumped down to a 100 for a light go at it. Orbital sander with 220 grit to finish it all off. (Hand sanded afterwards with 320 just for grins.)

It's not that difficult, just use your eyes really. I went too light in a few areas, as can be seen, but I didn't spend a whole lot of time jacking with it to begin with. Stripper didn't work, 20 minutes later I got it down to what it looked like in the second pic in my OP.
 
You forgot superglue and two ton epoxy.
Maybe add in some JB weld and bondo.

Just to do it right. :thumbs up:
All the adhesives, including JB weld (that stuff is awesome!) is in the top right drawer in my bench. I removed the frets and used epoxy to fill in the fret slots on an old strat I had (cheapo mexi from the early 2000's, not a collectible) and ended up selling it for a profit as a novelty a few years back. :D

I don't have any bondo though... :eek:
 
At any rate, I just put the second of 3-4 coats of tru oil on the neck to seal it up. I'm fairly certain that it's maple and not mahogany, despite what the specs say. I'll post a pic later, after class tonight, of what it looks like "unfinished" so you guys can weigh in... My bet would be maple though. Pickguard should be here thursday but my flight leaves that morning so I won't see it until next week; should start coming together quite nicely then. :thumbs up:
 
Does this look like mahogany? Earlier I thought it could be maple but now, looking at it closer I can't tell.
fullneck.JPG

This is with the second coat of tru oil dried; I'm liking that stuff so far. A few more coats for good measure and then it's just a wait until the rest of the parts come in.
headstock.JPG
 
See, what I'd like to do is have a body that's just oiled.

(I'm sure there's a joke in there somewhere, but I don't want to further cultivate my 'creepy old man' rep. :D)
 
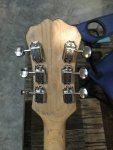
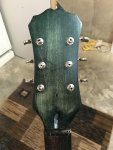
The tuners are officially installed - rushed and sloppy, but in and functional. All practice on this piece... :o
backHS.JPGfrontHS.JPG
3-way on/on/on toggle switch is on order as of today (small town=no local source...boo!!!!!) and once that comes in this project should be ready to rock out on, zombie apocalypse style. It will probably see more hendrix than anything else but...
 
See, what I'd like to do is have a body that's just oiled.

(I'm sure there's a joke in there somewhere, but I don't want to further cultivate my 'creepy old man' rep. :D)
I'm looking forward to that on my actual build. Worked with some oil finish on the neck of this Epi to test it out; going to definitely do a lighter dye job, outside of the black to pop the grain, on the body I'm working on. Tru oil did a nice job on the neck of this mod; semi glossy but super smooth - can't wait to get this done and plug it in!
 
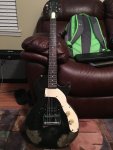
It's finally done? Taking it to get it set up by someone more skilled than myself next weekend. Then it should be finally done. Maybe.

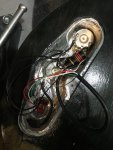
Wired up a 3-way on/on/on switch to try it out and give myself a few different tonal options with a single pickup. This is the only pic I took during that process but it was a lot easier than I thought it was going to be.
finished.jpeg
And the final product once it was all soldered up. I left the lead from the pup long because I wanted to be able to take it out and not be screwed on another setup.
wired up.jpeg
This is what it looks like, in poor lighting and from a phone pic. I screwed the pickguard up pretty good but it's only aesthetic so I wasn't too concerned. Polishing the turd in this project made me drop the perfectionist mentality a little bit.
3wayswitch.jpeg
 
Back
Top