pikingrin
what is this?
Not sure why in the hell I decided to do this but I'm throwing a few bucks at that Epi I got a few months ago before I ship it off. It started out as just wanting to upgrade the electronics and quickly spiraled out of control...not even sure I want to get rid of it anymore at this point. 
It started out looking like this when I took it all apart:
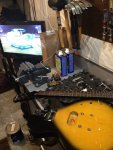
I guess I didn't expect much from the electronics but I was still disappointed in the low quality. Got some emerson 500k pots, a switchcraft output jack and a DiMarzio Air Norton pickup to go in as a replacement. Took the belt sander to the body (stripper did nothing) and it turned out looking like this:
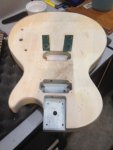
I didn't remove the bridge mounting inserts so they remained the original sunburst; I ended up masking it off and spraying it dark green to try and blend in with the dye I was going to use. Prior to taking the belt sander to it, I also beat it up with a flat head screwdriver a little bit and it ended up digging a few nice chunks out in places. It's gonna be nasty.
I went ahead and played around with the dyes that I got, only to find that I didn't get down to bare wood in a few spots...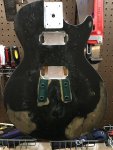
I like the way it turned out though; it's going to possibly be my frankestein git when it's all said and done.
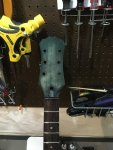
I tried the paint stripper one more time on the neck and, after about a week, gave up on it and took the orbital sander to it on a high speed with a 220 grit pad on it. Got it all down to bare wood without screwing up the shape and dyed the face of the headstock to try and match the body. I thought it came out pretty well...
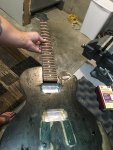
Since this is just a random beater project, and since I screwed the body up to begin with, I've started clear coating the body with spar urethane so I can build up a heavier semi-gloss coating without having to worry about what was underneath. This will not be the case when I start finishing my new build though...
Going to start the neck finishing tomorrow; going with tru oil over the back of the neck and spar urethane on the face of the headstock to try and match the body better. Tuners and pickguard blank material should be here later on this week and then I'm planning on replacing the nut, too.
I've put aluminum tape in the control cavity and some in the pickup cavities, too, and going to do the same to the pickguard once I get it cut and drilled - hopefully that does the trick.
I'll post some more pics once I get a little further along in the next week or so...

It started out looking like this when I took it all apart:

I guess I didn't expect much from the electronics but I was still disappointed in the low quality. Got some emerson 500k pots, a switchcraft output jack and a DiMarzio Air Norton pickup to go in as a replacement. Took the belt sander to the body (stripper did nothing) and it turned out looking like this:

I didn't remove the bridge mounting inserts so they remained the original sunburst; I ended up masking it off and spraying it dark green to try and blend in with the dye I was going to use. Prior to taking the belt sander to it, I also beat it up with a flat head screwdriver a little bit and it ended up digging a few nice chunks out in places. It's gonna be nasty.
I went ahead and played around with the dyes that I got, only to find that I didn't get down to bare wood in a few spots...

I like the way it turned out though; it's going to possibly be my frankestein git when it's all said and done.
I tried the paint stripper one more time on the neck and, after about a week, gave up on it and took the orbital sander to it on a high speed with a 220 grit pad on it. Got it all down to bare wood without screwing up the shape and dyed the face of the headstock to try and match the body. I thought it came out pretty well...


Since this is just a random beater project, and since I screwed the body up to begin with, I've started clear coating the body with spar urethane so I can build up a heavier semi-gloss coating without having to worry about what was underneath. This will not be the case when I start finishing my new build though...
Going to start the neck finishing tomorrow; going with tru oil over the back of the neck and spar urethane on the face of the headstock to try and match the body better. Tuners and pickguard blank material should be here later on this week and then I'm planning on replacing the nut, too.
I've put aluminum tape in the control cavity and some in the pickup cavities, too, and going to do the same to the pickguard once I get it cut and drilled - hopefully that does the trick.
I'll post some more pics once I get a little further along in the next week or so...
Last edited:


